Bust Out That Old Analog Scope For Some Velociraster Fun!

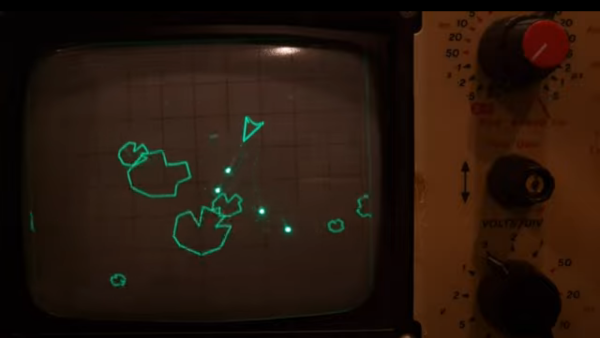
[Oli Wright] is back again with another installation of CRT shenanigans. This time, the target is the humble analog oscilloscope, specifically a Farnell DTV12-14 12 MHz dual-channel unit, which features a handy X-Y mode. The result is the Velociraster, a simple (in hardware terms) Raspberry Pi Pico based display driver.

Using a Pico to drive a pair of AD767 12-bit DACs, the outputs of which drive the two ‘scope input channels directly, this breadboard and pile-of-wires hack can produce some seriously impressive results. On the software side of things, the design is a now a familiar show, with core0 running the application’s high-level processing, and core1 acting in parallel as the rendering engine, determining static DAC codes to be pushed out to the DACs using the DMA and the PIO.

Continue reading “Bust Out That Old Analog Scope For Some Velociraster Fun!”

Engineering The Less Boring Way

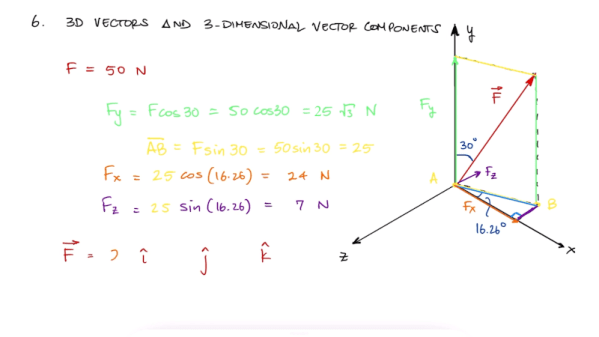
We have to admire a YouTube channel with the name [Less Boring Lectures]. After all, he isn’t promising they won’t be boring, just less boring. Actually though, we found quite a few of the videos pretty interesting and not boring at all. The channel features videos about mechanical engineering and related subjects like statics and math. While your typical electronics project doesn’t always need that kind of knowledge, some of them do and the mental exercise is good for you regardless. A case in point: spend seven minutes and learn about 2D and 3D vectors in two short videos (see below). Or spend 11 minutes and do the whole vector video in one gulp.

These reminded us of Kahn Academy videos, although the topics are pretty hardcore. For example, if you want to know about axial loading, shear strain, or free body diagrams, this is a good place to look.

Continue reading “Engineering The Less Boring Way”

Laser Galvos And An ESP32 Recreate Old-School Asteroids

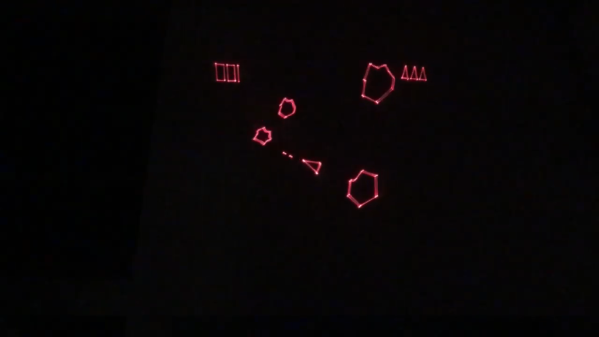
Playing Asteroids now isn’t quite what it used to be when it came out 40 years ago. At the time, the vector-scan display was part of the charm; making do with an emulator running on a traditional raster display just doesn’t quite do it for purists. But if you manage to build your own laser-projector version of the game like [Chris G] did, you’re getting close to capturing some of the original magic of the game.

There’s a lot to unpack about this project, and the video below does a good job explaining it. Where the original game used a beam of electrons flashing inside a CRT to trace out each object in the game, [Chris] substituted an off-the-shelf two-axis galvanometer from eBay and a 5-mW laser LED. This can project a gamefield on a wall up to two meters on a side, far bigger than any version of the machine ever built. The galvos are driven by op-amp drivers and an SPI DAC on a custom PCB. And in comparison to the discrete logic chips and 6502 running the original game, [Chris] opted for an ESP32.

As interesting as the hardware for this is, the real story is in the software. [Chris] does an excellent job running through his design, making the bulk of the video feel like a master class in game programming. His software is from scratch — no emulations here. As such it doesn’t perfectly reproduce the original games — no flying saucers and no spaceship explosion animations (yet) — but when coupled with the laser vector display, it certainly captures the feel of the original.

Being devoted Asteroids fans from back in the day, this one really pushes our buttons. We’ve seen laser-based recreations of the game before, but this one makes us think we can finally afford to recapture the glory of our misspent youth.

Continue reading “Laser Galvos And An ESP32 Recreate Old-School Asteroids”

Oscilloscope Learns How To Speak Japanese, And VGA

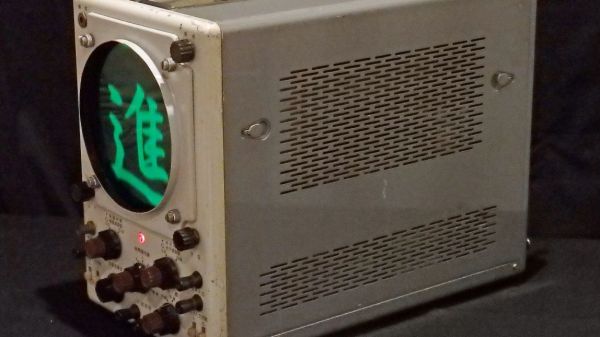
Nostalgia aside, there are a few things an analog scope can still do better than a digital, with oscilloscope art being a prime example. The blue-green glow of phosphors in a real CRT just add something special to such builds, and as a practitioner of this craft, [Aaron] decided to paint a New Year’s affirmation on his oscilloscope screen, in Japanese calligraphy of all things.

When used in X-Y mode, analog oscilloscopes lend themselves nicely to vector-based graphics, which is the approach [Aaron] has taken with previous “Oscilloclock” builds, like the Metropolis Clock. The current work, however, doesn’t use vector graphics, opting instead to turn the scope into the business end of a VGA display. He had previously developed the hardware needed to convert a VGA signal into X- and Y-axis analog outputs, so the bulk of the work was rendering the calligraphy, first in ink and then scanning and processing the results into a file. In keeping with the Japanese theme, [Aaron] chose a rare scope from Nihon Tsushinki Co., Ltd., from 1963. It’s a beautiful piece of equipment and obviously lovingly restored, and with the VGA adapter temporarily connected, the four Japanese characters scroll gracefully up the screen, delivering the uplifting message: “Steady progress, day by day.

[Aaron] sure puts a lot of work into his analog scope builds, which we’ve featured a few times. Check out the clock he made from Grandpa’s old Heathkit scope, or his Tektronic vectorscope clock. And don’t forget about other forms of oscilloscope art — they can make music too, after all.

A 3D – To – 2D Converter To Make Plots From STLs.

We’ve become used to finding models on websites such as Thingiverse and downloading them to print. After all, whose hackerspace doesn’t have a pile of novelty prints? How about printing them on paper? For the plotter enthusiast that can be particularly annoying. Never fear, [Trammell Hudson] is here with an online 3D to 2D converter just for plotters. [Trammell’s] creation makes a vector image suitable for a plotter while eliminating spurious behind-the-scenes lines.

Plotter drawings are the pen-and-paper equivalent of a vector CRT display, in which the graphics are printed as continuous strokes. Rendering a 3D model as a wireframe for a plotter requires the removal of any pen strokes that comes from the 3D space behind the surface in view. Loading various models into the web page seemed to do a pretty good job of this, though the ubiquitous Benchy 3d printer test model lived up to its billing as a torture test in taking several minutes to render.

As anyone who has followed the #PlotterTwitter social media hashtag will know, there is a considerable community of pen plotter enthusiasts who are pushing the boundaries of what their machines can do. [Trammell] has posted his plotter producing some of the work created with this tool, and we can see that it’s likely to work better with lower-poly models.

We’ve featured a lot of plotters over the years as they seem to be a popular project. If you’d like one then they can be made from the most available parts, including those scavenged from scrap DVD drives, or printers.

Camcorder Viewfinder Converted To Diminutive Vector Display

We generally cast a skeptical eye at projects that claim some kind of superlative. If you go on about the “World’s Smallest” widget, the chances are pretty good that someone will point to a yet smaller version of the same thing. But in the case of what’s touted as “The world’s smallest vector monitor”, we’re willing to take that chance.

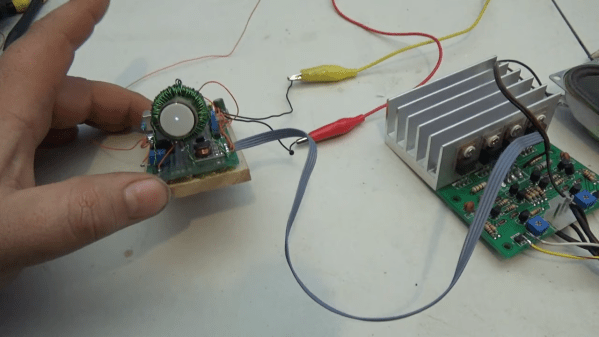
If you’ve seen any of [Arcade Jason]’s projects before, you’ll no doubt have noticed his abiding affection for vector displays. We’re OK with that; after all, many of the best machines from the Golden Age of arcade games such as Asteroids and Tempest were based on vector graphics. None so small as the current work, though, based as it is on the CRT from an old camcorder’s viewfinder. The tube appears to be about 3/4″ (19 mm) in diameter, and while it still had some of its original circuitry, the deflection coils had to be removed. In their place, [Jason] used a ferrite toroid with two windings, one for vertical and one for horizontal. Those were driven directly by a two-channel push-pull audio amplifier to make patterns on the screen. Skip to 15:30 in the video below to see the display playing [Jerobeam Fenderson]’s “Oscilloscope Music”.

As much as we’d love to see a tiny game of Battlezone played on the diminutive display, there’s only so much it can do. Maybe an analog version of this adorable digital oscilloscope would be possible?

Continue reading “Camcorder Viewfinder Converted To Diminutive Vector Display”

Mac Plus Becomes A Vector Display

The vintage Macintosh all-in-one computers were a design icon, as well as being highly useful machines in the 80s and 90s. In the decades since, they’ve been used for everything from web servers to aquariums, but that’s not all. [Arcade Jason] decided to grab an old Macintosh Plus and turn it into a vector display.

The hack starts with the opening of a Macintosh, which naturally requires a long screwdriver with the right tip. Setting the stage for things to come, this is achieved by soldering together a couple of existing tools to get the reach he needs. [Jason] then proceeds to install a brightness control for the main electron gun, as well as deflection drivers and a spot killing circuit. Everything is done with the intention of the hack being reversible, as [Jason] didn’t wish to sacrifice a good Macintosh Plus just for the sake of having some fun.

For those unfamiliar with vector cathode-ray displays and the manner in which they are driven, [Arcade Jason] does a great job explaining the basics. A set of magnetic coils is used to alter the trajectory of an electron fired at the screen. If you aim those electrons in ordered lines from left-to-right, top-to-bottom you’ve created a raster display. If you instead guide the electrons to follow the shapes you want to appear on the screen you’ve created a vector display.

We can’t help but feel this would be a hilarious way to troll at a demoscene meetup. We’ve seen [Jason]’s vector work before, too — like this impressive color Asteroids hack.