4-LED Octal Clock Demands Colorful Math

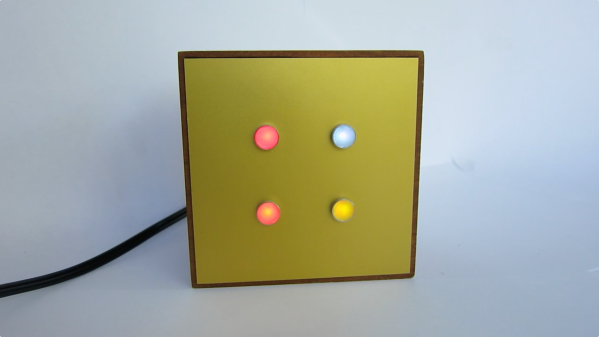
We’ve all seen LED clocks where RGB LEDs are used to display time. It seems like the simpler the interface, the more likely you’d need to do math to figure out the time. This Octal Clock by [Alex Kurrasch] proves the point by using only four LEDs: the top two show hours and minutes, and the bottom two LEDs are multipliers.
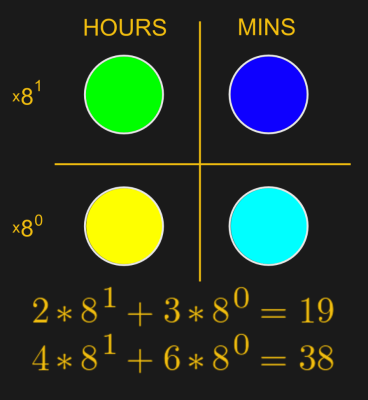
Using octal numbering, [Alex] translates the data using a Venn diagram of color mixing. The mapping uses 1 as red, 2 as green, followed by yellow, blue, magenta, and cyan. It ends with 7 as white (all on) and 0 as black (all off).

As the time changes, a fading algorithm changes the display to match. He offers the time of 7:38pm as an example in the grid shown here. Base-8 math is provided; don’t worry, you’ll get really good at this if you make your own wristwatch version… people will learn to never ask you about the time.

The clock uses a ATMega64 running assembly language firmware with a DS1306E+ RTC chip keeping track of time. The enclosure is cool too; [Alex] milled the case out of mahogany and the front and back plates are anodized aluminum. The unique looking diffusers on the LEDs are actually paraffin, a trick that [Elliot Williams] mentioned in his recent article on diffuser materials.

A One LED Clock

Esoteric clocks are something of a staple among hardware hacker projects. If it can be made to tell the time correctly, even if only twice a day, the chances are someone’s made a clock from it. And if the only person who can read that clock is its creator, so much the better. Universal accessibility is not always a virtue in the world of unusual timepieces.

6145191469481901992

[Setvir] writes to us with details of his One LED Clock. It’s an Arduino Pro Micro with an RTC module and an LED. That’s all, time is communicated to the world through LED flashes. You might expect therefore that it would use Morse Code, but he’s come up with his own timing communication scheme which does have some merit. Long flashes cover a quarter of the clock face, while short flashes cover individual hours or five-minute segments. He goes into detail on the project page and we can see that once you are used to the scheme it has an elegance to it, but it certainly ticks the essential unreadable-to-the-uninitiated box for an esoteric clock.

We like it though for its simplicity and for the flashing scheme, which once explained is both efficient and easy to read. If you would like to have a go yourself he’s published his code, so go forth and cover the world with baffling single-LED timepieces!

We’ve featured a few minimalist LED clocks before, at least one with a minimal face, and another single-LED offering. But that one used a bi-colour LED, so [Setvir] takes the minimalism crown.

Digital Clock + IPhone Dock

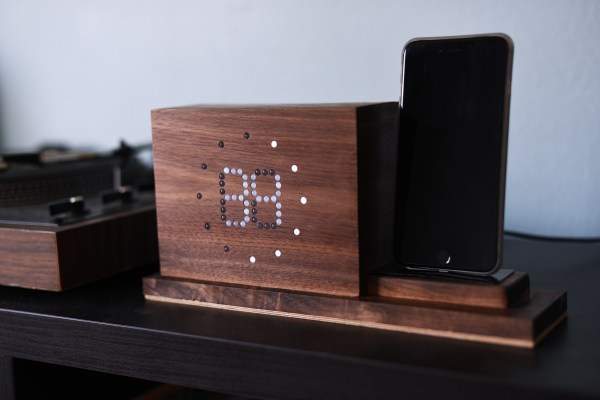
[Pinky_chi] was looking for a project to make for his girlfriend, and settled on a rather fantastic piece of woodworking — a digital clock, with an iPhone dock for her phone.

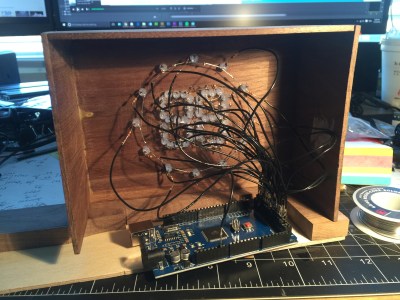
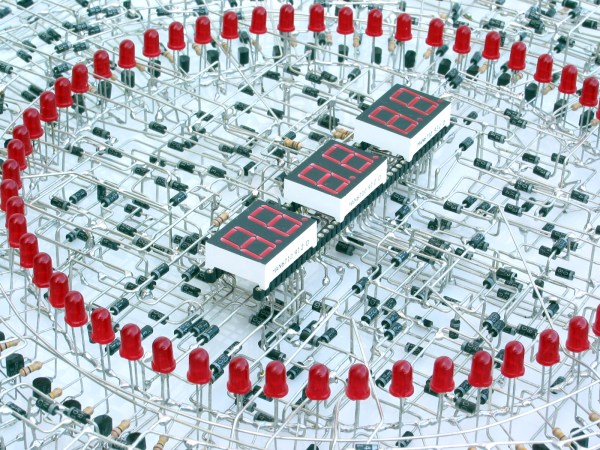
LED ClockHe built the enclosure completely out of walnut, which gives it a very refined and polished look; we’re quite impressed with his woodworking skills. The cool thing about this digital clock is that he used individual LEDs to create both the digital 7-segment displays, and a ring of LEDs around it to denote the hour.
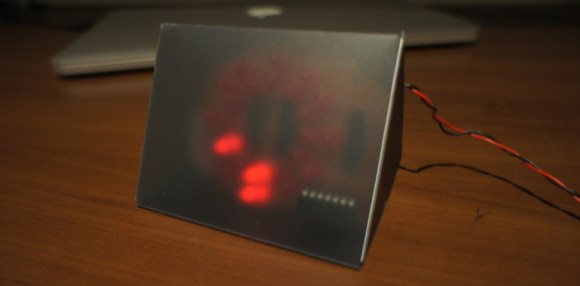
On the back are three buttons. One to change the hour, the minute, and a temperature button. By holding down the temperature button, the display will display the current room temperature — he added this because the RTC device (a DS3231) has a built-in thermometer — so why not?

Choosing a favorite LED clock on Hackaday is like picking a favorite child — we love them all — but this Star Gate themed clock from a few years ago is great — check it out!

[via r/DIY]

Clock's circuit makes up its structure

When Handmade Circuits Become Art

This mind boggling piece of art took hundreds of hours to make over a period of three years. The entire structure is composed of thousands of components, all of which are part of the clocks circuit. They call it, The Clock.

Each component was hand soldered in this ridiculously complex 3D structure. They have a typical artist statement, but you know what — for once it’s actually pretty intuitive.

“The Clock” has digital pulses flowing inside every single wire and every single part. These synchronized pulses, all intelligently controlled and channeled through every circuit, is a binary “dance” of hundreds of bits of information coming and going from one section to another. All working in unison to display the flow of time.

The clock works by taking in mains voltage and counting the frequency of pulses — in North America it’s 60Hz — conveniently a unit divisible for time. However if you were to take this clock elsewhere, perhaps where AC cycles at only 50Hz — the clock’s not going to keep accurate time.

It has no buttons — but you can change the time using a “Time Adjusting Magnet” over certain areas of the clock which feature micro electro-magnetic switches. The whole thing weighs about 14 pounds and consists of 1,916 individual components! Wow.

This has gotta be up there with some of our favorite clock builds we’ve ever seen on Hack a Day, perhaps with it only being second to this home-made Atomic Clock!

[Thanks Arthur!]

ATtiny84 Powered Minimalist LED Clock

LED Clock ATtiny84

We feature a lot of clock builds on HaD, and the reason is that they are cool. Even simple ones are cool. Not everyone can say they built a clock. [Chris] took a ride on the DIY Clock train and came up with this LED-based clock that is controlled by an ATtiny84 chip.

The clock has 24 LEDs total, 1 for each hour and 1 for every 5 minute increment. The 24 LEDs are arranged in 2 concentric rings. To display the hour, both LEDs at the same angle are lit up. To show the minutes, just the inner LED is lit. The main image above shows 6:40.

If you are familiar with the ATtiny84 you know that it only has 12 in/out pins, which is significantly less than the amount of LEDs that need controlling. [Chris] decided to use some 74HC595 shift registers to increase the IO pins on the ATtiny. The entire build is installed on a protoboard with quite a bit of point-to-point wiring. A simple tinted plastic case finishes the project and gives it a modern look.

[Chris] made the code for his clock available in case any readers are interested in making one.

LED Clock ATtiny84

LED Clock Looks Cool AND Tells Time

LED Arduino Clock

Clocks have taken many forms of the years, starting with shadow clocks and sundials in Egypt around 3500 BC. Obviously, these could only tell the time while the sun was out. Water Clocks followed which could track time in the dark. Water Clocks are basically a bowl with a hole in the bottom. This bowl was set in a container filled with water. The water entered the bowl at a consistent rate and graduations on the inside of the bowl showed how much time had passed.

Mechanical clocks followed, as did quartz and the atomic clock. We have now entered a new era in time-telling, the Bamboo LED Clock. [Pascal] brings us this funky fresh chronometer all the way from Germany.

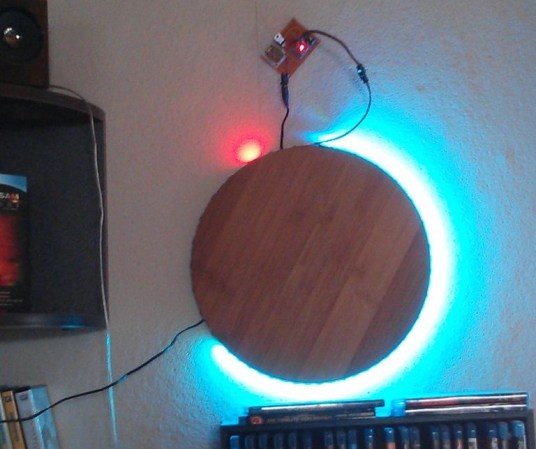
The front face is made from a bamboo pizza plate and gives the clock some modern minimalist pizzazz. A 1-meter long LED strip is attached to the circumference of the plate and contains 60 individually assignable RGB LED’s. An Arduino and Real Time Clock are responsible for the time keeping and coordination of the LED’s.

As you can see in the photo, 2 of the LED’s colors are used. The single red LED indicates the hour. The strip of blue LED’s show the minutes. If you’d like to build one of these [Pascal] has shared the Arduino code on his Instructables page.

A Clock Built From Scraps

IMG_0409

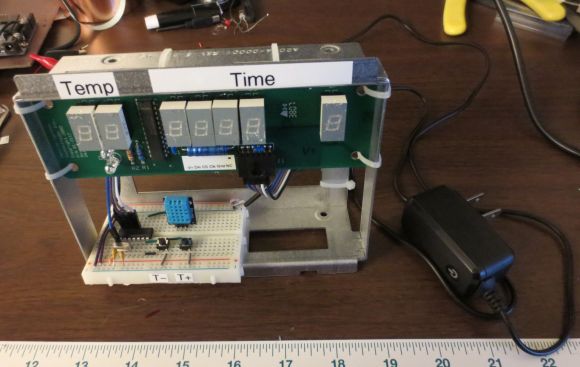
Who doesn’t love a good surplus store? [Tyler Bletsch] just finished up this awesome clock hack by re-purposing a scrapped medical circuit board.

Ax-Man Surplus in Minneapolis has all kinds of goodies and it’s been around a long time (here’s a hack from the ’90s that source from the store). One day while digging through their inventory, [Tyler] found a bunch of scrap circuit boards with 7-segment displays. At $2 a pop, he decided to risk it to tinker with.

He quickly identified the main chip on the board to be a common LED driver (MAX7221) and began reverse engineering the board by tracing the circuit. He actually has a brilliant guide on his website about how to make circuit tracing way easier. From there it was just a matter of loading a MAX7221 library onto a ATtiny44, adding a 16MHz crystal, and since there’s an extra 2 digits available on the display… a temperature sensor too!

It’s a great little hack, and as it turned out, there wasn’t anything wrong with the boards, except for a minor typo in the company’s name. Hooray for reusing scrapped parts!