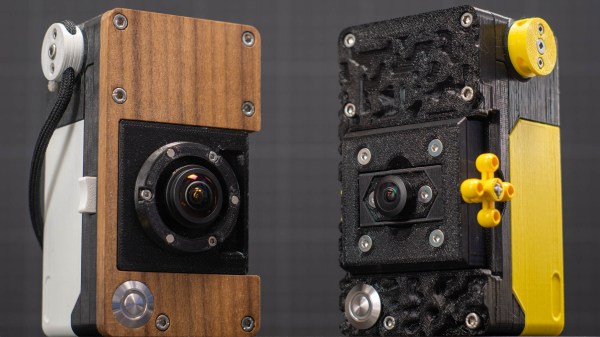
Digital “Toy” Camera, Made For Tilt-Shift And Other Analog-Like Experimenting

Like many others, [volzo] loves playing with photography in a playful and experimental way. Oddball lenses, vintage elements, and building from kits is what that world looks like. But that kind of stuff is really the domain of film cameras, or at least it was until [volzo] created his Digital Toy Camera design. The result? A self-built, lomography-friendly digital camera that allows for all kinds of weird and wonderful attachments and photo shenanigans.
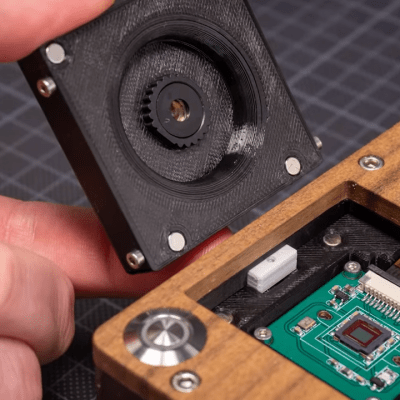
3D-printed mounts and magnetic attachment makes swapping parts a breeze.

To make a DIY digital camera that allowed that kind of play, the first problem [volzo] had to solve was deciding on an image sensor. It turns out that sourcing image sensors as an individual is a pretty cumbersome process, and even if successful, one still needs to write a driver and create things from the ground up. So, the guts of [volzo]’s creations use the Raspberry Pi and camera sensor ecosystem and M12 lenses, a decision that allows him to focus on the rest of the camera.

3D printing, a bit of CNC machining, and some clever design yields a “toy” camera: simple, inexpensive, and enabling one to take a playful and experimental approach to photography. The design files are available on GitHub, and there are some neat elements to the design. Magnetic mounts allow for easy swapping of lens assemblies, and a M12 x 0.75 tap cuts perfect threads into 3D-printed pieces for M12 lenses.

Heat-set inserts also provide robust fastening that can hold up to disassembly and re-assembly (and don’t miss that our own [Joshua Vasquez] has shared how best to design for and use heat-set inserts.)

[volzo] has a fantastic video to accompany his project; give it a watch (embedded below, under the page break) and see if you don’t come away with some inspiration of your own.

Continue reading “Digital “Toy” Camera, Made For Tilt-Shift And Other Analog-Like Experimenting”

Analog Instagram

Several decades ago, the all the punks and artsy types had terrible lenses with terrible camera that leaked light everywhere. Film was crap, and thus was born the fascinating world of Lomography, with effects and light leaks unique to individual cameras. Now, everyone has a smartphone with high-resolution sensors, great lenses, and Instagram to replicate the warm look of filters, light leaks, and other ‘artististic’ photographic techniques. The new version of this photography is purely in the digital domain, and wouldn’t it be great if there was a way to make your digital selfies analog once again? The SnapJet team has your back.

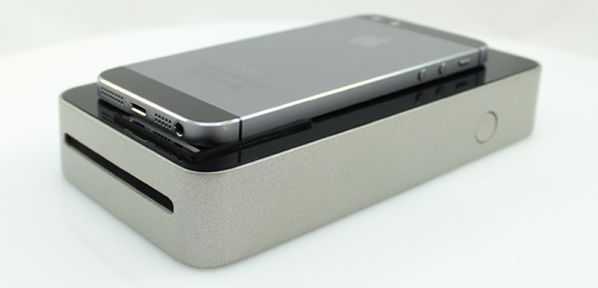
Instead of adding filters and other digital modifications to smartphone snaps, the SnapJet prints pictures onto Polaroid film. Yes, you can still buy this film, and yes, it’s exactly how you remember it. By putting a smartphone down on the SnapJet, you’ll only need to press a button, wait for the film to be exposed, dispensed, and developed. What comes out of the SnapJet is an analog reproduction of whatever is displayed on your phone’s screen, with all the digital filters you can imagine and the option to modify the photos in the analog domain; eac Polaroid can be turned into a transparency, with backlit LEDs being an obvious application:

gif

Continue reading “Analog Instagram”

Is Your Camera Lying?

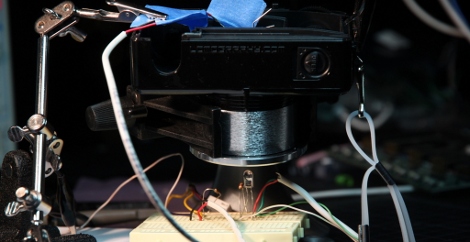
It is easy to rely on the ratings marked on different tools, whether it is a power supply, scale, or speedometer. However calibration is essential for any part that is relied upon either professionally or for a hobby. [Jeremy] wanted to see if his Lomography camera shutter really was only open for 1/100ths of a second when set to that. In order to test his rig, he set up an LED on one side of the shutter, and a high speed phototransistor to gauge the time spent open, using an oscilloscope to measure the time the reference point was pulled low. In his case, when the camera was set to 1/100, the shutter was actually open for closer to 1/150th of a second (the mean was 1/148ths of a second, with a standard deviation of 417 uSecs). This difference can make a large difference in picture brightness.

Be sure to check his blog for more pictures of the setup, as well as some useful part references and circuit diagrams.