Building An Automotive Load Dump Tester

For those who have not dealt with the automotive side of electronics before, it comes as somewhat of a shock when you find out just how much extra you have to think about and how tough the testing and acceptance standards are. One particular test requirement is known as the “load dump” test. [Tim Williams] needed to build a device (first article of three) to apply such test conditions and wanted to do it as an exercise using scrap and spares. Following is a proper demonstration of follow-through from an analytical look at the testing specs to some interesting hand construction.
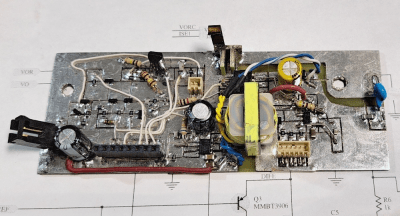
Manhattan-style layout

The load dump test simulates the effect of a spinning automotive alternator in a sudden no-load scenario, such as a loose battery terminal. The sudden reduction in load (since the battery no longer takes charging current) coupled with the inductance of the alternator windings causes a sudden huge voltage spike. The automotive standard ISO 7637-2:2011 dictates how this pulse should be designed and what load the testing device must drive.

The first article covers the required pulse shape and two possible driving techniques. It then dives deep into a case study of the Linear Tech DC1950A load dump tester, which is a tricky circuit to understand, so [Tim] breaks it down into a spice model based around a virtual transistor driving an RC network to emulate the pulse shape and power characteristics and help pin down the specs of the parts needed. The second article deals with analysing and designing a hysteric controller based around a simple current regulator, which controls the current through a power inductor. Roughly speaking, this circuit operates a bit like a buck converter with a catch diode circulating current in a tank LC circuit. A sense resistor in the output path is used to feedback a voltage, which is then used to control the driving pulses to the power MOSFET stage. [Tim] does a good job modeling and explaining some of the details that need to be considered with such a circuit.

Continue reading “Building An Automotive Load Dump Tester”

Hackaday Links Column Banner

Hackaday Links: September 2, 2018

It’s (was, is?) the end of August, and that means the entire dreadlocked population of San Francisco is out in the middle of the Nevada Desert for a week. Yes, it’s Burning Man, and as always we have a host of builds that make you ask, ‘how did they do that, and how did they get that here’.

For the last few years, the greatest logistical feat of art cars is the 747. Yes, it’s the fuselage of a 747, turned into an art car. The top deck is a convertible. The biggest question surrounding this 747 is how do you transport this thing? You can’t fly it in (well, you could, once), it’s not going to fit on a train, and it’s extraordinarily long. Now we have an answer: they did it on a truck. The 747 was stationed in the Mojave, and from there it’s a relatively quick shot up Nevada to Black Rock City. Several power lines had to be raised, and you’re still looking at an enormous logistical endeavour.

I’m saying it now. Sphere, the 1998 movie with Dustin Hoffman. There’s a 25 meter diameter mirror ball that looks like the sphere in Sphere. It’s inflatable, so that takes care of the obvious questions, but we’re still asking how this thing looks in person, how massive wind storms are going to affect what is basically a gigantic sale sail, and what the reflections of the sun will actually do. I suppose being convex, you’re not going to get the accidental architectural parabolic mirror effect that melts cars, but one can always hope.

Want a neat story on the features of Burning Man that doesn’t get a lot of press? IEEE Spectrum did a feature on Black Rock City airport. For one week a year, it is the third busiest airport in Nevada, behind McCarren and Reno. It’s also a towered, yet uncontrolled airport. This makes no logical sense, but it’s something that can happen with FAA regs.

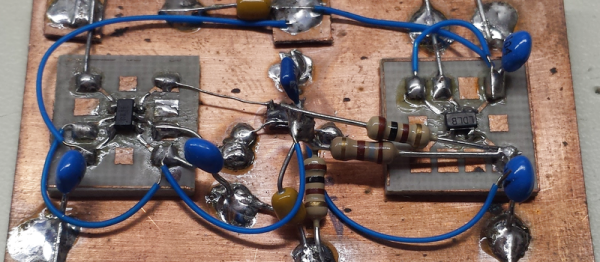
[alicestewwwart] has left us with a quandary. She’s creating highly artistic circuits out of ICs, discrete parts, and wire. These circuits are functional, but we don’t know what to call them. They’re not quite deadbug, because SMD parts don’t have legs, and ‘deadbug’ gets its name from upside down DIPs that looks like dead centipedes. It’s not Manhattan style, although this might be closer to Manhattan than deadbug. So what is it? Leave your answer in the comments.

Scribble Your Way To Quick Printed Circuit Boards

There are a variety of techniques employed by electronic constructors seeking the convenience of a printed circuit board without the inconvenience of making a printed circuit board. Dead bug style construction in which the components float on a spiders-web of soldered leads above a ground plane is one, Manhattan style construction in which pads made from small cut squares of bare copper-clad PCB are glued on top of a groundplane is another.

[Freestate QRP] has another take on this type of electronics, with what he calls “Scribble style” construction. He cuts away copper from bare board to create pads and rudimentary tracks, and for him the magic ingredient comes from his choice of an engineer’s scribe to do the job. This is where the “scribble” comes from, creating a pad is as simple as drawing it with the scribe.

Of course, this technique is not entirely new, constructors have been doing this type of work for years with Dremel tools, hand engraving tools, and similar. If you’ve ever tried to do it with a knife or scalpel you will know that it’s hardly an easy task with those hand tools so the prospect of another one doing a better job is rather interesting. He’s ready and able to demonstrate it in action, showing us a couple of RF circuits using the technique.

Have you tried this technique, or one like it? How did you get on, tell us in the comments. Meanwhile, you might like to read our own [Dan Maloney]’s look at dead bug and Manhattan construction.

Wilderness Radio Build

[AA7EE] is no stranger to building radios. His latest is a from-scratch build of a 20 meter QRP transceiver based on the popular SST design. Although the SST has been available as a kit, [AA7EE] incorporated some design changes from others and some of his own, too. He even added an onboard keyer to simplify operation. You can see videos of the radio below.

The build uses Manhattan-style PCB pads. Although the construction is very attractive, the real value of the post is the detailed explanation of not only how, but why everything is the way it is. This isn’t a simple project, and being able to see it completed step-by-step is very educational. About the only decision not adequately explained was the change of red and yellow knobs to black! You can see both versions in the videos below.

The Manhattan construction is tidy, but the radio also has an attractive case. The size is just big enough to stack a pair of paddles on top.

There may be some more enhancements for the little radio coming. We’ve covered [AA7EE’s] RF exploits before, including a physically attractive radios and details about the same construction method used in this radio.

Continue reading “Wilderness Radio Build”

Ugly Manhattan Adapters

“Ugly” or “Manhattan” style circuit building is popular among ham radio folks. Basically, you solder the circuit point-to-point, using a solid copper plate as a backplane. “Manhattan” gets its name from the little pads and parts of different heights strewn all around the board — it looks like the Manhattan skyline. It’s a great one-off construction method and actually has reasonably good properties for radio/analog circuitry. It’s easy to pull off with leaded components, but gets trick with smaller surface-mount parts.

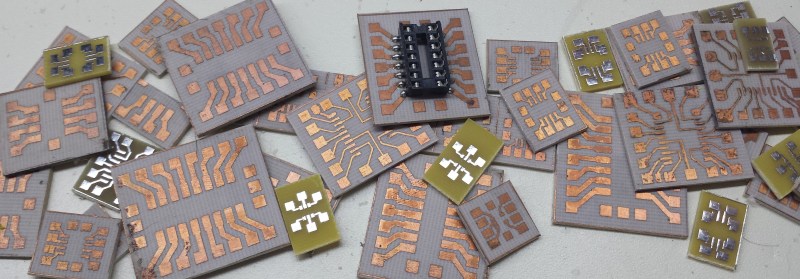
Unless you build some adapters. [Ted Yapo] has made his library of small Manhattan adapters available for us all to use. There’s also no reason to stop with SMT parts — even normal DIP parts can be easily adapted to Manhattan construction, as this teasing photo of a bunch of [Ted]’s adapters shows. And if he doesn’t have the layout you need, the source files should give you a good starting point.

If you want to get started with Manhattan (or other “ugly”) construction, we’ve got a guide for you. And in case you take the “ugly” moniker too seriously, check out this incredibly beautiful ugly build.