Custom Nixie Tube PSU Is A Lesson In Good PCB Design

Nixie HVPSU

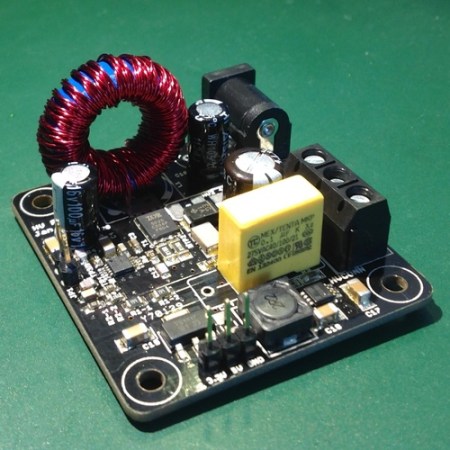
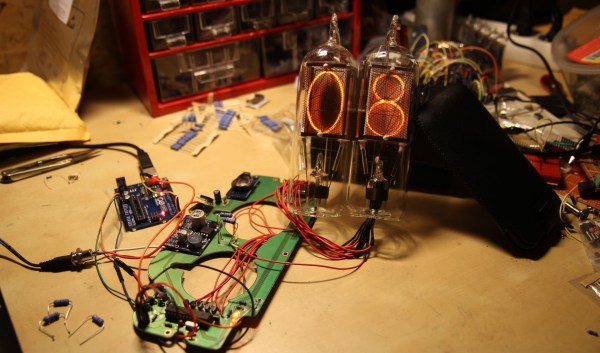
[Jan Rychter] was sick and tired of not being able to find the right power supply for his Nixie tube projects, so he decided to design his own. [Jan] started out designing around the MAX1771 (PDF) DC-DC controller, but quickly discovered he was having stability problems. Even after seven board revisions, he was still experiencing uncontrolled behavior. He ended up abandoning the MAX1171 and switching to the Texas Instruments TPS40210. After three more board designs, he finally has something that works for him. [Jan] admits that his design is likely not perfect (could have fooled us!), but he wanted to release it to the world as Open-Source Hardware to give back to the community.

The end result of [Jan’s] hard work is a 5cm x 5cm board that generates four separate output voltages from a single 12V source. These include both a 3.3V and 5V output for digital logic as well as a 220V out put for Nixie tubes and a 440V maximum output for dekatrons. The circuit also features several safety features including over-current protection, thermal shutdown, and slow-start. Be sure to check out [Jan’s] webpage to view out the schematics and technical information for this awesome circuit.

Need some Nixie tubes to go with that circuit? We know some resources for you to check out. Or you could always just build your own. How can you use this board in your next project?

EL Wire Nixie Tube Is In Your Reach

FUQ84C3HS0D05D9.MEDIUM

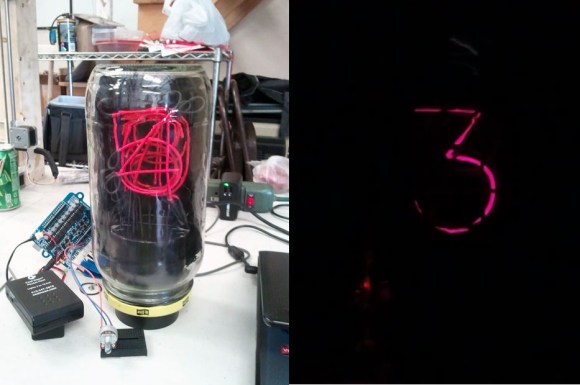
Nixie tubes are awesome, but sometimes a little out of reach for some makers, whether it is a matter of obtaining them, or figuring out how to drive them. The hackerspace over at H3 Laboratories decided to try making a fun alternative — EL wire nixie tubes.

[Marty] leads us through the build in a very detailed Instructable, which makes use of CoolNeon EL wire. He’s using an Arduino Uno with a CoolNeon shield to control it. The trickiest part of this build is forming the numbers to minimize the overlap — to figure this out he modeled it in Blender. He created a test jig and formed the numbers using coat hanger wire first before playing around with the EL wire.

EL wire can be soldered together — it’s just a bit of a fine art, which is explained in another detailed Instructable. To black out parts of the number and the trailing wires, [Marty] made use of black plastic dip. The numbers are mounted on a Styrofoam cylinder which fits into the bottom of a large masonry jar. It’s a great build and a fun project to get into Nixies … without actually getting into Nixies.

Stick around for a video of it in operation.

Continue reading “EL Wire Nixie Tube Is In Your Reach”

Nixie-ify Me Necklace

big-nixie

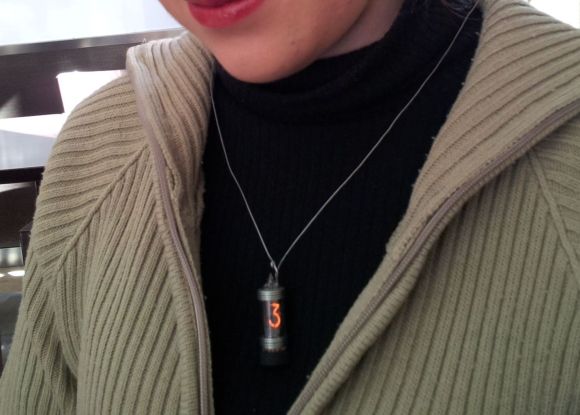
[Armilar] wanted to cheer up his friend who was going through a rough spot at the time — she really likes Dieselpunk, so he decided to improvise a Dieselpunk themed photo shoot for her. We’re assuming they had other costumes and props, but [Armilar] had this idea to make a nixie tube pendant for a while, he’d just have to expedite the build process to have it ready!

What he managed to whip up the day of the shoot looks amazing considering the time involved, if not just a little bit ill-advised. There may or may not be 200VAC running around his friend’s neck.

He’s using an electroluminescent driver rated for 5VDC to 100VAC, over-powered to 12VDC, resulting in about 200VAC, which is just enough to make the nixie glow a nice warm orange. In an effort to minimize the size of the pendant, he had to keep the battery and driver hanging off the back of the necklace.

Continue reading “Nixie-ify Me Necklace”

Retro Modern Nixie Clock

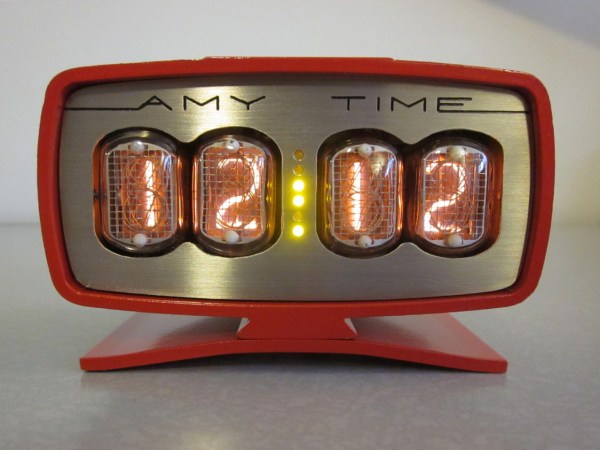
[Reboots] is a humble hacker who enjoys nixie tubes. So when he saw an old General Electric battery charger for sale at a hamfest, he thought: “that case would make a nice clock…”

He was first exposed to nixie tube clocks a few years ago when his brother gave him a DIY nixie clock kit from [Peter Jensen’s] website TubeClock.com — it was an easy build, and worked very well. It also introduced him to a unique driver for nixie tubes, an HV5622 high-voltage shift register made by Supertex inc. Compared to the traditional (and rare) 74141 nixie driver chips or discrete transistor drivers, the HV5622 is much smaller, requires less microcontroller I/O’s, and is not as picky when it comes to powering it.

The nixie tubes he chose for the project came from a lot sale on eBay, Russian surplus IN-12 tubes. He even managed to find an english datasheet for them!

Continue reading “Retro Modern Nixie Clock”

Homemade Nixie Tubes

Do you love Nixie Tubes? Upset that they aren’t really manufactured anymore, and the cost of old ones is rising? Why not make your own? That’s exactly what [Dalibor] of the Czech Republic is up to, including blowing the glass tubes himself!

He’s chosen the Z568 nixie tubes to copy, as they are his favorite style of nixie. To create the display he has etched the digits and housing out of 0.3mm stainless steel sheet — which potentially means if he gets the hang of making the tubes, he could actually produce them to sell! To perform the glass blowing, he scored a Heathway glassblowing lathe off eBay — but unfortunately he hasn’t documented much of anything on making the glass tubes, which is too bad because we think that would be equally fascinating as the nixie displays themselves. On his first attempt with a properly sealed tube, the nixie worked and he even recorded striking voltage values very similar to industry tubes — not bad for something made in a backyard shed!

He has since then continued refining this art and is entering a glass-art contest called “When Prague Meets Shanghai” with a beautiful entry dubbed the ShanghaiTime Nixie Clock.

If this post seems vaguely familiar, it’s because this isn’t the first time we’ve posted an article about homemade nixie tubes, but we think [Dalibor’s] is by far the most elegant! Stick around after the break to see one of his first test videos — You might even think he’s cheating, the tubes look so professional!

Continue reading “Homemade Nixie Tubes”

A Simple Nixie Clock With Logic Gates

Here is a very nice project that [Znaxque] finished a few months ago: a simple nixie clock made with logic gates only. In this build, the mains 50Hz is used as a time base instead of a 32KHz crystal that most readers here may use. In the very long term, this clock may actually be more precise than a crystal-based one as power companies in Europe adjust the mains frequency. However, at a given moment the difference between this clock and a reference may be as big as 60 seconds.

The design was sketched on a simple piece of paper and later made using salvaged ICs. [Znaxque] only bought the six IN-14 nixies for $45 and the veroboard shown in the picture above. The BCD to Decimal decoders are 74141s and three buttons are present on the board to set minutes, hours, as well as resetting all the counters.

Spare Parts Pulled Together Into A Nixie Clock

We’d like to dig around in [Small Scale Research’s] parts bin. Apparently there’s good stuff in there because he managed to build this Nixie tube clock using mostly leftovers.

The chip driving the device is an ATtiny1634. We weren’t familiar with it so here’s a datasheet (pdf) if you’re curios as well. The microcontroller communicates with an old GPS module in order to keep perfect time. There is an external antenna for it which connects through the hole next to the red switch seen above. The high voltage driver is a repurposed backlight inverter which is fed 12V power from an old laptop supply.

The album linked above shows the build quite well and even includes full schematics. There are some fireworks when he encountered an issue with a pretty large cap shorting to a resistor leg. If this isn’t enough juicy detail for you there are a few more nuggets shared in the Reddit comments.