Mephisto III Internet Radio

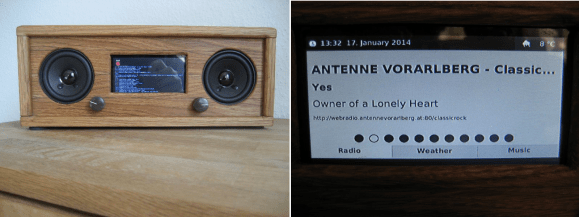
Avid Hackaday reader [Matthias] told us he takes a lot of inspiration from our site. That’s quite a compliment, because his work is both inspiring and beautiful. [Matthias] wanted to build a UI using JavaFX, so he made a really nice-looking Raspberry Pi-based Internet radio. We featured his previous radio build a few months ago when he modified an old Bakelite unit.

The Mephisto III is enclosed in a handsome oak cabinet built by [Matthias]’ father. Like his previous build, this one uses the Google Music interface to play MP3s and streams radio from the web. He also added weather and a clock, which is a nice touch. In addition to the Raspi and a USB WLAN stick, [Matthias] is using two relays. One relay powers the amplifier and the other enables the display. [Matthias] is impressed with the JavaFX API, but found that the performance of the Raspberry Pi is insufficient for smooth multithreading. He considered switching to a BeagleBone Black, but it has no component out.

If you want to be able to listen to vinyl, too, check out this killer media center. If you have lost your taste for Pi, build yourself a web radio from a tiny router.

[Thanks Matthias]

$20 GPS/GLONASS/Beidou Receiver

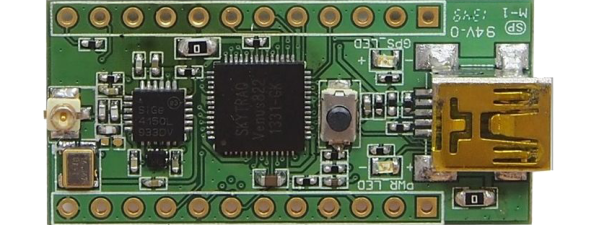
Sticking a GPS module in a project has been a common occurrence for a while now, whether it be for a reverse geocache or for a drone telemetry system. These GPS modules are expensive, though, and they only listen in on GPS satellites – not the Russian GLONASS satellites or the Chinese Beidou satellites. NavSpark has the capability to listen to all these positioning systems, all while being an Arduino-compatible board that costs about $20.

Inside the NavSpark is a 32-bit microcontroller core (no, not ARM. LEON) with 1 MB of Flash 212kB of RAM, and a whole lot of horsepower. Tacked onto this core is a GPS unit that’s capable of listening in on GPS, GPS and GLONASS, or GPS and Beidou signals.

On paper, it’s an extremely impressive board for any application that needs any sort of global positioning and a powerful microcontroller. There’s also the option of using two of these boards and active antennas to capture carrier phase information, bringing the accuracy of this setup down to a few centimeters. Very cool, indeed.

Thanks [Steve] for sending this in.

Magic Morse Arduino Trainer

cover_IMG408

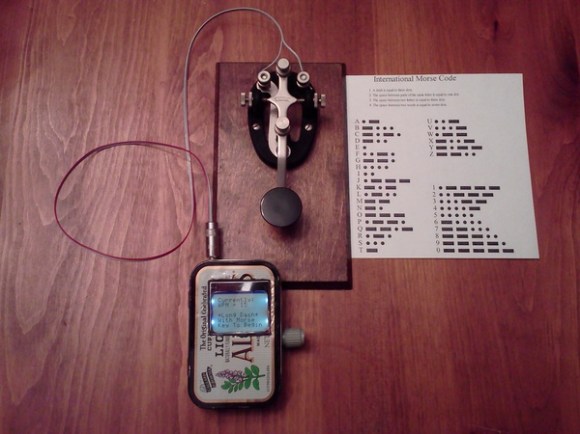
Magic Morse is a mathematical algorithm that [Ray Burnette] wrote a few years ago to make it easy to send and receive Morse code. When he first wrote it, he designed it for a PIC, but since then he has re-written it to use as a training program for the Arduino platform.

It can run on the Uno, Nano, Pro Micro, or even home-brew Arduino boards. He’s demonstrating the program with a Nokia 5110 LCD, but has also included code for the typical 2×16 LCD displays. The Magic Morse algorithm is copyrighted, but he has released the Arduino code as open source in an effort to get people using Morse code once again — it is pretty awesome.

So how does it work? The algorithm assigns weights to the “dits” and “dahs” as received — when there is a longer pause, the algorithm creates a pointer which calls the character out of an array stored in the EEPROM. He’s included an example of this in Excel on his page.

Now you have no excuses about learning Morse code! Oh and if you don’t have a fancy telegraph key (the switch), [Ray’s] also published a handy method of making your own Morse code key out of popsicle sticks and magnets.

$1 Coin Cell Charger

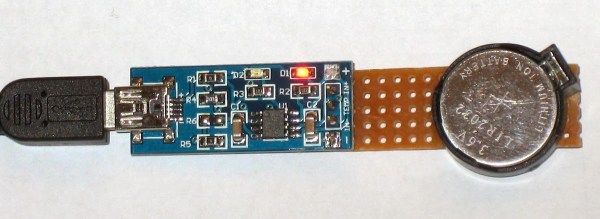
Sure, coin cells usually last a long time — but do you really want to buy new ones and throw the old ones out? The LiR2032 coin cell is a rechargeable lithium battery, for which you can build a charger at around $1.

The 5 minute hack starts with a TP4056 lithium charging circuit, which is a great DIY board designed to charge high-capacity cells at about 1A. Luckily, it is pretty easy to modify the board to charge lower capacity batteries. It’s just a matter of replacing resistor R4, and a little bit of soldering! Continue reading “$1 Coin Cell Charger”

The Pioneering Lifestyle In Low Earth Orbit

The first element of the International Space Station (ISS) launched over fifteen years ago, on November 20, 1998. For more than thirteen years at least two human beings have been continually living off the surface of our planet. Assembly of the Space Station is now complete. It is being utilized by its crews and scientists from around the world to execute its primary mission – scientific investigations that can only be accomplished in the microgravity environment of Low Earth Orbit (LEO). As with any structure, items age, wear out, or break and need to be repaired. What could be rather “simple” repairs on Earth can become much more complex in zero gravity. In some cases, “necessity becomes the mother of invention.”

Continue reading “The Pioneering Lifestyle In Low Earth Orbit”

Nixie-ify Me Necklace

big-nixie

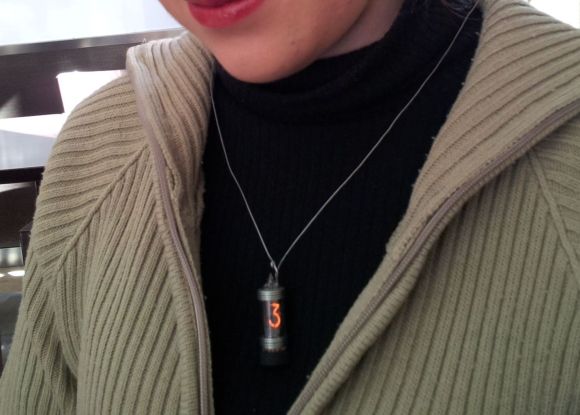
[Armilar] wanted to cheer up his friend who was going through a rough spot at the time — she really likes Dieselpunk, so he decided to improvise a Dieselpunk themed photo shoot for her. We’re assuming they had other costumes and props, but [Armilar] had this idea to make a nixie tube pendant for a while, he’d just have to expedite the build process to have it ready!

What he managed to whip up the day of the shoot looks amazing considering the time involved, if not just a little bit ill-advised. There may or may not be 200VAC running around his friend’s neck.

He’s using an electroluminescent driver rated for 5VDC to 100VAC, over-powered to 12VDC, resulting in about 200VAC, which is just enough to make the nixie glow a nice warm orange. In an effort to minimize the size of the pendant, he had to keep the battery and driver hanging off the back of the necklace.

Continue reading “Nixie-ify Me Necklace”

PIDDYBOT – A Self Balancing Teaching Tool

We’re sure that most Hackaday readers are already familiar with the inverted pendulum system, which basically consists of a pendulum having its center of mass above its pivot point. Most applications (like the one we are going to describe) limit the pendulum to 1 degree of freedom by affixing the pole (or circuit board here) to an axis of rotation. The overall system is therefore inherently unstable and must be actively balanced in order to remain upright.

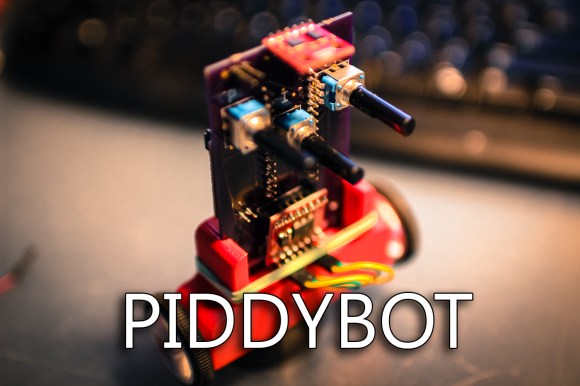
[Sean] created the piddybot, a tiny balancing robot aimed to teach the basics of PID control by trying to get the robot to stand still. More interestingly, the Proportional / Integral / Derivative values can directly be adjusted using the three on-board potentiometers. This will allow users to get the feel of each parameter’s impact on the robot behavior. The piddybot is based around the Arduino nano, a custom PCB, 2x 26:1 geared motors, one 1A dual motor driver board, a six degrees of freedom Inertial Measurement Unit, 2 batteries and finally a 3D printed body. You can check out a video of the robot in action after the break.

This project stems from a non-PID self balancer which [Sean] hacked together in September.

Continue reading “PIDDYBOT – A Self Balancing Teaching Tool”