Thinkpad 13 Gets NVMe Support With Three Jumpers

Hardware restrictions can be unreasonable, and at times, it can be downright puzzling just how arbitrary they are. Such is the case with the Lenovo ThinkPad 13 — it’s got a M.2 M-key socket, yet somehow only supports SATA SSDs in it, despite the CPU being new enough to support both SATA and NVMe effortlessly. [treble] got one of those laptops from a recycler, and decided to figure out just what this laptop’s deal is.

Armed with schematics, she and her friend looked at the M.2 implementation. The slot’s schematic sure looked ready to support either kind of drive, a surprising find. Here’s the catch — Lenovo only populated components for SATA drive support. All you need to switch from SATA to NVMe support is three magnet wire jumpers, or zero-ohm 0402 resistors, and voila; you can now use the significantly cheaper kind of M.2 drives in your ThinkPad.

All is documented, and [treble] even mentions that you could increase the link speed by adding more PCIe lane capacitors that Lenovo, again, left unsoldered. UEFI already has the modules needed to boot from NVMe, too – it’s an outright upgrade for your laptop with just a soldering iron’s touch required, and a reminder that proprietary tech will screw you over for entirely arbitrary reasons. Now, it’s not just laptops you can upgrade with a few resistors — same goes for certain electric cars.

Pi with the PiFEX shield on the right, the SSD under test on the left with testpoints held by a jumper clip, jumper wires connecting the two together

JTAG Hacking An SSD With A Pi: A Primer

[Matthew “wrongbaud” Alt] is well known around these parts for his hardware hacking and reverse-engineering lessons, and today he’s bringing us a JTAG hacking primer that demoes some cool new hardware — the PiFEX (Pi Interface Explorer). Ever wondered about those testpoint arrays on mSATA and M.2 SSDs? This write-up lays bare the secrets of such an SSD, using a Pi 4, PiFEX, OpenOCD and a good few open-source tools for JTAG probing that you can easily use yourself.

The PiFEX hat gives you level-shifted bidirectional GPIO connectors for UART, SPI, I2C, JTAG, SWD and potentially way more, an OLED screen to show any debugging information you might need, and even a logic analyzer header so that you can check up on your reverse-engineering progress.

Continue reading “JTAG Hacking An SSD With A Pi: A Primer”

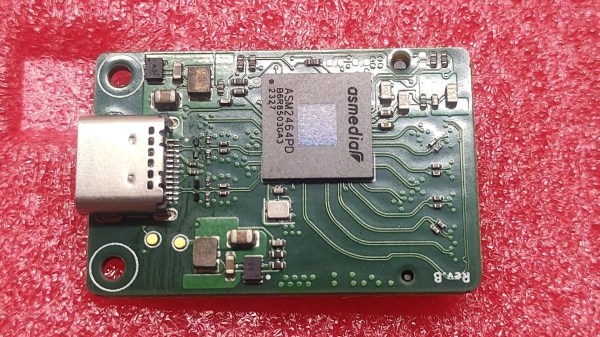
The assembled PCB on red foam, with both a USB-C connector and the ASM2464PD chip visible

Finally Taming Thunderbolt With Third-Party Chips

Thunderbolt has always been a functionally proprietary technology, held secret by Intel until “opening” the standard in a way that evidently wasn’t enough for anyone to meaningfully join in. At least, until last year, when we saw announcements about ASMedia developing two chips for Thunderbolt use. Now, we are starting to see glimmers of open source, letting us tinker with PCIe at prices lower than $100 per endpoint.

In particular, this board from [Picomicro] uses the ASM2464PD — a chipset that supports TB3/4/USB4, and gives you a 4x PCIe link. Harnessing the 40 Gbps power to wire up an NVMe SSD, this board shows us it’s very much possible to design a fully functional ASM2464PD board without the blessing of Intel. With minimal footprint that barely extends beyond the 2230 SSD it’s designed for, curved trace layout, and a CNC-milled case, this board sets a high standard for a DIY Thunderbolt implementation.

The main problem is that this project is not open-source – all we get is pretty pictures and a bit of technical info. Thankfully, we’ve also seen [WifiCable] take up the mantle of making this chip actually hobbyist-available – she’s created a symbol, fit a footprint, and made an example board in KiCad retracing [Picomicro]’s steps in a friendly fashion. The board is currently incomplete because it needs someone to buy an ASM2464PD enclosure on Aliexpress and reverse-engineer the missing circuitry, but if open-source Thunderbolt devices are on your wish list, this is as close as you get today – maybe you’ll be able to make an eGPU adapter, even. In the meantime, if you don’t want to develop hardware but want to take advantage of Thunderbolt, you can build 10 Gbps point-to-point networks.

Booting The Raspberry Pi 5 With An NVMe SSD

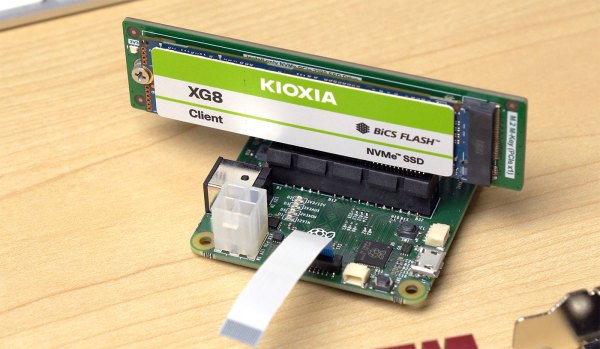
The Raspberry Pi has come a long way since its humble origins, adding faster processors and better interfaces with each new generation. Now, the Raspberry Pi 5 has a lovely new PCIe port right on board, and [Jeff Geerling] has gone right ahead and slammed in an NVMe SSD as a boot drive.

[Jeff] explains that to use an NVMe to boot, you first have to modify /boot/config.txt to enable PCIe and modify the Raspberry Pi’s boot order. Once the bootloader is appropriately configured, you can boot straight off an SSD with Raspberry Pi OS installed. To get the operating system on to an NVMe drive, he recommends cloning an existing boot volume from a microSD install.

One of the primary reasons you might want to do this is speed. NVMe drives are generally a significant cut above even the best microSD cards, both in speed and reliability. [Jeff] also notes that you canĀ use an NVMe SSD through a PCIe switch on the Pi 5 if you so desire, but you can’t currently boot with this configuration.

It’s a great feature to have on the Pi 5, and it follows on from the earlier implementation on the Raspberry Pi Compute Module 4. Video after the break.

Continue reading “Booting The Raspberry Pi 5 With An NVMe SSD”