Xerox Phaser Drum Unit Hacked, Lives To Print Another Day

Faced with a printer that would stop printing for no apparent reason, Finnish pirate and hacker [Janne] decided he had had enough. After doing a bit of research, he disassembled the drum assembly and replaced some components. The end result? Supposedly ‘broken’ printers started working again.

Continue reading “Xerox Phaser Drum Unit Hacked, Lives To Print Another Day”

Breathing New Life Into A Broken IPod

ipad_nano_button_fix

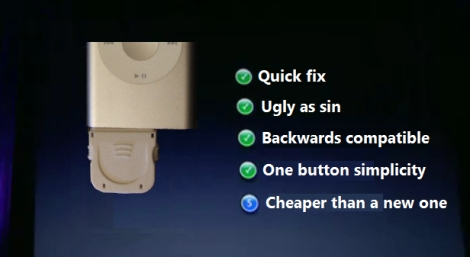
[Craig] had a busted 2nd Gen iPod Nano that was well out of warranty. The play/pause button no longer worked, leaving him unable to play or pause music, nor power off the device. He didn’t want to scrap the iPod, so he figured out a way to add an external play/pause button instead.

He ordered an iPod dock connector from SparkFun and found that it had just enough space inside for the electronic components he would be adding. He consulted some online references for pinout information, then got busy cramming an ATiny13 and a pushbutton into the dock connector.

To minimize the drain on the iPod’s battery, he puts the ATiny into sleep mode when it is not being used. When the button is pressed, it wakes up the microcontroller and sends the proper signal to the iPod. Based on his estimations, it would take nearly 250 years for the ATiny to drain the iPod’s battery completely, so he’s pretty comfortable leaving the dongle attached at all times.

If you have an iPod with similar issues, he has made his source code available so you can save yours from the trash heap as well.

Reviving A Broken HSDPA Modem With A Bit Of Clever Investigation

hsdpa_modem

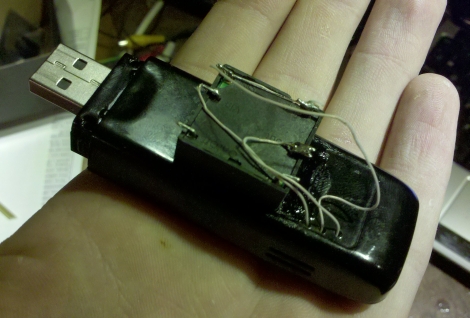
Hack-a-Day forum member [Necromant] was recently working on a router when he made a terrible mistake. He connected the wrong power brick to the router, causing a 2.5v over-voltage. The router itself was just fine, as it contained a good stepdown converter, but the HSDPA modem connected to the router’s USB port was not so lucky. It seems that the USB host is powered directly from the router’s power supply without any conversion – this meant his modem got a nice 7.5v zap when he used the wrong plug.

He assumed the modem was dead, so he figured there was no harm in disassembling it. He examined the modem’s circuit board and found that when plugged in, the onboard stepdown converter supplied 0 volts to the rest of the PCB. He couldn’t find any documentation for the converter online, so he employed a little bit of trial and error clever investigation to determine what sort of voltage the stepdown provided before being cooked.

After a bit of testing with his home-built low dropout regulator, he determined that the damaged stepdown provided 3.3v to the rest of the modem (that’s a 4.2v over-voltage for those of you who are keeping track). He added a linear voltage regulator to the board in place of the old stepdown, which worked for about 15 seconds before overheating.

In the end, he decided to add a pretty hefty 3.3v stepdown converter to the modem, throwing aesthetics to the curb. The result is one ugly, but quite functional HSDPA modem.

oscope_teardown

Rigol Oscilloscope Teardown And Repair

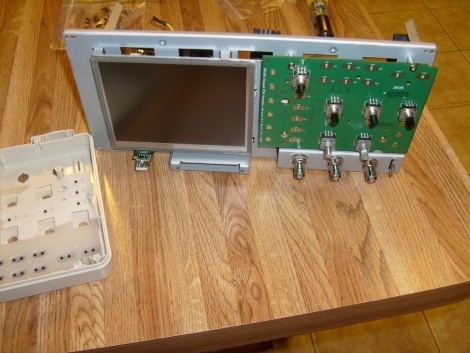
[Hotsolder] encountered a bad encoder in his Rigol Oscilloscope, so he opened it up in order to replace the damaged part. According to him, it was quite an adventure, so he documented the disassembly and component swap for the benefit of anyone else out there that might have to do the same.

The teardown is in the form of a slideshow, which is available on his site. The images are all pretty well annotated, so you should be able to follow along quite easily if you happen to be tearing one apart yourself. There’s not a ton of exotic things to see inside the scope, it pretty much contains what you would expect to see if you cracked one open.

The encoder replacement went off without a hitch, and he even took pictures of the defective one to discuss how it works.

It’s definitely a quick and interesting read if you are simply curious about oscilloscopes, or if you happen to need to dismantle yours.

[Thanks, oakkar7]

Simple Fixes Breathe New Life Into Aging Game Consoles

dreamcast_repair

While the Sega Dreamcast has long been out of production, there is an avid fanbase that loves the console dearly. As with many CD/DVD-based consoles, the Dreamcast can sometimes run into issues reading discs, at which point all games are unplayable.

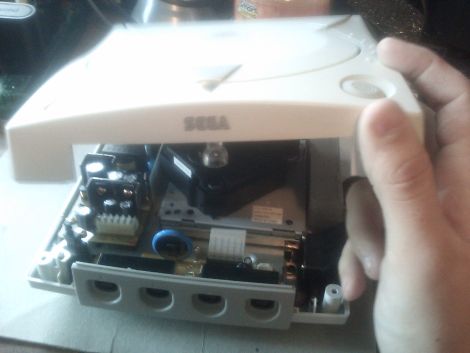
Instructables user [Andrew] got his hands on a pair of the consoles and found that one could not read CDs, while the other suffered from a fried controller interface board, the result of a controller wiring mix-up on his part. Determined to get the consoles up and running again, he disassembled them and got to work, sharing his fixes with us.

The CD drive fix is a pretty standard one. He first needed to locate the potentiometer that regulates the laser. Once he did, a slight counter-clockwise turn is all it required in order to increase the laser’s voltage. Once he did this, he popped in a game to see if it worked. No longer greeted with a disc read error when he powered on his Dreamcast, he reassembled the console and began work on the other one.

To fix his controller issues, [Andrew] had to remove the entire controller board from the console. He eventually located a resistor that had been damaged by his wiring mishap, and replaced it. The console was tested and seeing that the controllers worked again, he put everything back together.

While this pair of fixes is not incredibly complex, it’s nice to see people sharing their tips for bringing these consoles back to life.

LED Backlight Conversion Using Recycled CCFL Inverter Parts

inverter_repair

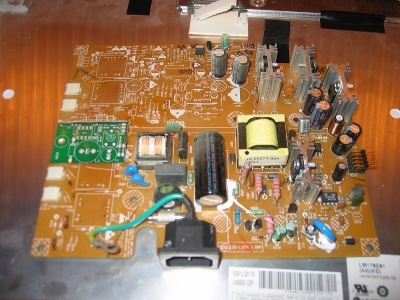
[Ammon] repairs busted LCD monitors as a side hobby, so replacing burned out CCFLs and inverter circuits is something he can do in his sleep. One Dell monitor he received had him so perplexed, that he simply gave up on trying to repair the inverter circuit. He still wanted to get it working, so he had some narrow PCBs made and started working on his LED replacement backlight.

He built a driver board for the LEDs, populated with left over components that he stripped from the LCD panel’s inverter circuit. He needed space to insert his driver board, so he simply cut out a chunk of the inverter board and slipped his replacement driver board in its place. As you can see in the picture above, his board (in green) takes up far less space than the original inverter circuit it replaces.

He provides a schematic for his circuit as well as a PCB layout file, so it should be fairly easy to replicate his work. He has not posted schematics or layout information for his LED strips, but we’re betting he will if someone asks nicely.

Check out this pair of posts if you are interested in reading more about replacing your burned out CCFL with LEDs.

Repair Parts From Unlikely Sources

baby_swing_motor_replacement

[Jay] sent us some details of a quick fix for a baby swing he owns, along with the unlikely place where he found replacement parts. We showed you a pair of his creations earlier this week, which you might recall. As luck would have it, the motor on the baby swing he modified burned out shortly after we featured his hack. Don’t worry – he didn’t break the swing when he hacked it, nor is there a Hack-a-Day curse. It’s purely coincidence, we swear!

The swing is about 7 years old so the burned out motor wasn’t that huge a surprise. After doing some research, it was looking like he would likely need to shell out $70-$100 for a replacement motor. He luckily stumbled upon a forum thread that said a motor from a cheap air freshener was a perfect match, so he gave it a shot.  Sure enough, it was the same motor, but with more torque. All it took was $5 to get the swing up and running good as new.

It just goes to show that you never know useful common items can be until you take them apart to see what’s inside.