How To Design Custom LCDs For Your Own Projects

These days, you can buy full graphical LCD or OLED displays for just a few dollars. However, if you’re so inclined, you can actually get your own segmented LCDs made to suit your own projects. [Icoso Labs] explains how it’s done, with plenty of handy tips along the way.

There are three primary things you need to do to design a segmented LCD. First, you need to design it visually, laying out all the individual elements you want on the display. Then you need to determine how you want to split them up into segments. Some elements you’ll just want to be a single monolithic on-or-off shape, while other areas you might want to create things like seven-segment numerals for displaying numbers and so on. With that done, you also need to specify various engineering details—such as whether you want a transmissive, reflective, or transflective display, and thicknesses, colors, and other important things. Armed with all that, you can take your design to a manufacturer and get them to make a bunch for you. Often, there’s a moderately high tooling cost to start a run, but you can then turn out more examples of your design for just a few bucks apiece.

It’s a neat guide to designing something few of us have ever considered sourcing for ourselves. We’ve featured other insights into the world of segmented LCDs before, too. Video after the break.

Continue reading “How To Design Custom LCDs For Your Own Projects”

Hacking A New Display Into A Fluke 8050A Multimeter

Old lab equipment was often built to last, and can give decades of service when treated properly. It’s often so loved that when one part fails, it’s considered well worth repairing rather than replacing with something newer. [Michael] did just that, putting in the work to give his Fluke 8050A multimeter a shiny new display.

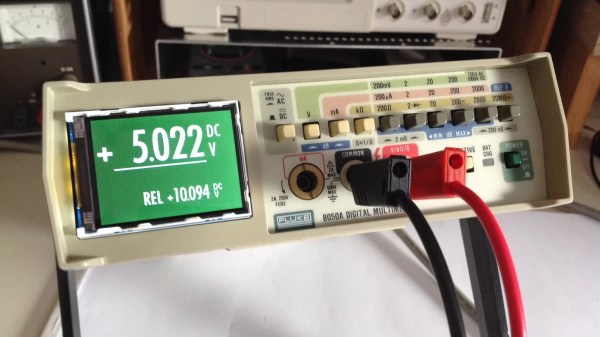
The Fluke 8050A is a versatile device, capable of measuring voltage, current, and resistance in addition to decibels at various impedences and conductance, too. The original display doesn’t show some of the finer details so well, so [Michael] elected to improve on that when he installed a new 2.2″ graphical LCD to replace the basic 7-segment LCD that originally came with the hardware.

To achieve the install, the original LCD display module was removed from the chassis. A piggyback device that sits under the Fluke’s microcontroller was then used to break out signals for the new graphical LCD without requiring modification to the meter’s PCB itself. An Atmega32u4 microcontroller then takes in these signals, and then drives the graphical LCD accordingly.

It’s a great hack that makes the old multimeter easier to use, and the new white-on-green display is far kinder on the eyes, too. We’ve seen other multimeters get screen transplants before, too. Of course, if you’re new to the world of segmented LCDs and want to learn more about how they work, [Joey Castillo]’s talk from last year’s Remoticon will get you up to speed!

Vintage Multimeter Gets An LCD Transplant

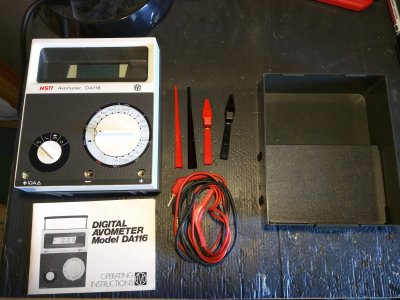
Hackers are often of the sentimental type, falling in love with the look and feel of quality old hardware. Of course, sometimes that older hardware needs a little TLC to keep it running in the modern world. [Lex] had a beautiful vintage multimeter that sadly had a broken screen, and set about a nifty repair to restore it to working condition. 

It’s a handsome thing.

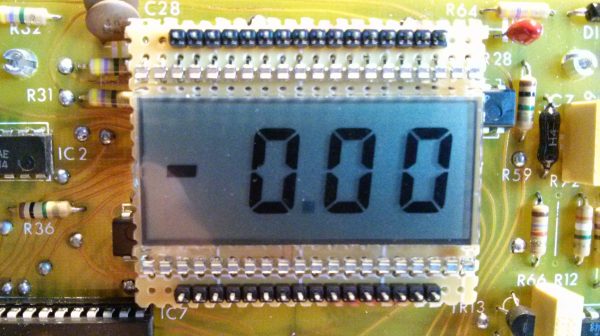
The HSN Avometer DA116 is a handsome thing, controlled with two dials and featuring a clean two-tone aesthetic. Even the font on the PCB’s silkscreen is gloriously pretty (can anyone ID that?). However, the original LCD was non-functional. A direct replacement part was sadly unavailable. Instead, to rectify this, [Lex] first hunted down another segmented LCD screen that had the same segment layout.

However, the new screen had a completely different pinout to the original part. Thus, after taking some notes and figuring out what all the pins did, [Lex] whipped up an adapter board to carry the new screen. With some protoboard, some pin headers, and a bunch of point-to-point wiring, the new screen worked just fine, and [Lex] had a functioning vintage meter once again!

The story actually came to us on Twitter, where we invited discussion about the best bodge wiring jobs out there. Feel free to contribute your own stories to the conversation! If you’re in the market for more LCD hacking, be sure to check out the excellent talk [Joey Castillo] gave at the 2021 Remoticon.

Remoticon 2021 // Joey Castillo Teaches Old LCDs New Tricks

Segmented liquid crystal displays are considered quite an old and archaic display technology these days. They’re perhaps most familiar to us from their use in calculators and watches, where they still find regular application. [Joey Castillo] decided that he could get more out of these displays with a little tinkering, and rocked up to Remoticon 2021 to share his findings.

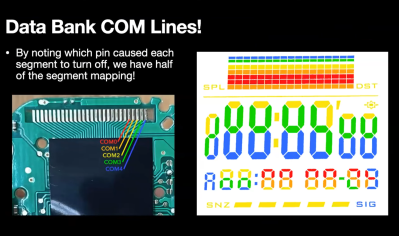
[Joey’s] talk is a great way to learn the skills needed to reverse engineer a typical segment LCD.
[Joey] got his start hacking on these displays via his Sensor Watch project –  a board swap for the venerable Casio F-91W wristwatch, with the project now available on CrowdSupply. It kits out the 33-year-old watch design with a modern, low-power ARM Cortex M0+ microcontroller running at 32 MHz that completely revolutionizes what the watch can do. Most importantly, however, it repurposes the watches original segmented monochrome LCD.

Segment LCDs are usually small monochrome devices made out of glass, that have the benefit of using very little power in their operation. They come with a fixed layout, which cannot be changed – so they’re often designed specifically for a given purpose. A calculator will have segments laid out to display numbers, often in the usual 7-segment fashion, while a watch may add dedicated segments for displaying things like “AM,” “PM,” or “ALARM.” Continue reading “Remoticon 2021 // Joey Castillo Teaches Old LCDs New Tricks”