UV Resin Perfects 3D Print, But Not How You Think

At this point, everyone knows that the print quality you’ll get from even an entry level UV resin printer far exceeds what’s possible for filament-based fused deposition modeling (FDM) machines. But there’s a trade-off: for the money, you get way more build volume by going with FDM. So until the logistics of large-format resin printers gets worked out, folks looking to make things like replica prop helmets have no choice but to put considerable time into post-processing their prints to remove the obvious layer lines.

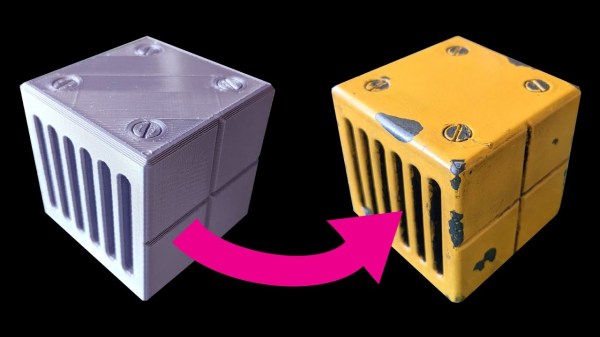
But thanks to this somewhat ironic trick demonstrated by [PropsNstuff], you can actually use UV resin to improve the finish quality of your FDM prints. The idea is to put a layer of resin over the layer lines and other imperfections of the 3D print, cure it with a handheld UV flashlight, and then sand it smooth. Essentially it’s like using resin in place of a body filler like Bondo, with the advantage here being that the resin cures in seconds.

The thick resin fills in tough spots quickly.

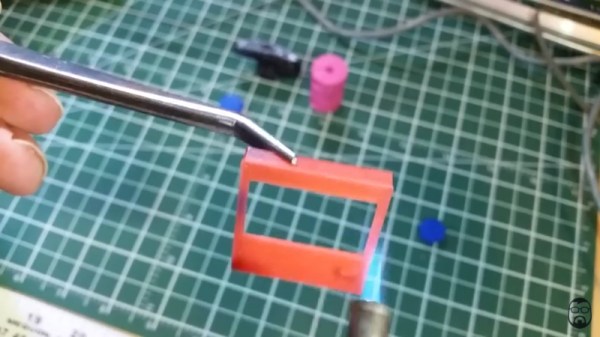
Now to be clear, this isn’t a new idea. Our very own [Donald Papp] investigated the process back in 2018, and [Thomas Sanladerer] covered the idea in a video of his own the following year. But the difference here is that [PropsNstuff] doesn’t just coat the whole print with resin, he takes a more methodical approach. Working in small sections, he targets areas that really need the high-build properties offered by this technique.

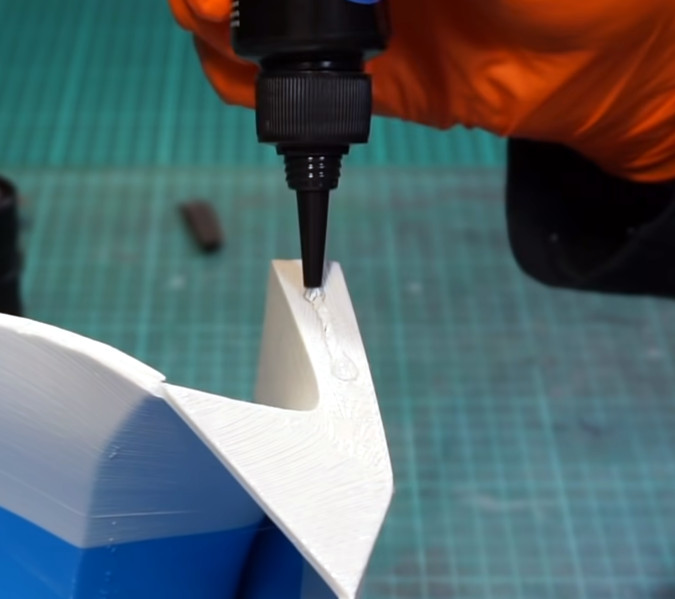
With the tough spots addressed, he then moves on to coating larger areas with resin. But this time, he mixes leftover resin from his SLA printer with talcum powder to make a mix that can be brushed on without running everywhere. It takes a few thin coats, but with this mix, he’s able to build up large swaths of the print without losing any surface detail.

Is it still a hassle? Absolutely. But the final result does look spectacular, so until we figure out how to build the replicators from Star Trek, it looks like we’ll have to make up for our technological shortcomings with the application of a little elbow grease.

Continue reading “UV Resin Perfects 3D Print, But Not How You Think”

Give 3D Printed Plastic A Well-Worn Metal Look

Affordable 3D printers let us turn ideas into physical reality without a big expensive workshop, but with their power came some disadvantages. The nature of FDM printers impart layer lines and nozzle ridges in the parts they produce. They can be minimized with optimized print settings, but never eliminated. [Emily Velasco] loves the power of 3D printing but not how the parts look. So she put in the effort to make 3D-printed plastic look like distressed metal and showed us how she did it. (Video also embedded after the break.)

This video is a follow-up to her Pet Eye project in response to feedback on Twitter. She had mentioned that the  salvaged metal box for Pet Eye wasn’t quite big enough to hold everything, so she had to extend its internal volume with a 3D print box on the back. It fit in so well that the offhand comment surprised many people who wanted to know more about how it was done. So she designed a demonstration cube covered with mechanical characteristics, and gave us this walkthrough of its transformation.

Continue reading “Give 3D Printed Plastic A Well-Worn Metal Look”

Smooth PLA Through The Fire And Flames

3D printing makes it easy to produce complex geometries, but the fused deposition methods generally create parts with poor surface finish, largely due to the layers being highly visible in the finished part. There are a wide variety of ways to deal with this, often involving sanding parts after production, or the use of fillers and paints. [XerotoLabs] has another solution. (YouTube, video below the break.)

To smooth the parts, a butane torch is pressed into service. The flame temperature is kept fairly low, and the torch is used almost like a brush to evenly apply heat to the surface of the part. As the PLA reaches its melting temperature, surface tension helps to smooth the part out. This is very similar to flame polishing which is commonly used in the fabrication of acrylic plastics.

It is a technique that requires some finesse – too much heat or focus on a single area, and you’re liable to end up with a molten plastic blob instead of a nice shiny finished part. Precautions must also be taken to avoid burning yourself or your workshop to the ground. But it’s a useful tool to have in your kit when you’re producing PLA parts that you want to look their best.

We’ve seen other techniques for smoothing PLA, too – the solvent method is particularly interesting. Continue reading “Smooth PLA Through The Fire And Flames”