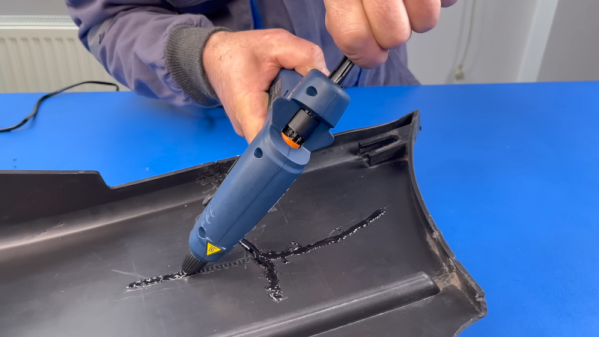
Plastic welding isn’t a new idea. But a recent video from [The Maker] shows an interesting twist. Given a broken piece of plastic, he secures it together with tape, machines out a channel around the cracks, and then melts zip ties into the channels. Honestly, although he mentions plastic welding and soldering, we aren’t sure this isn’t just simple gluing, but it did give us some ideas. Watch the video below and you’ll probably get the same ideas.
The ingenuity here isn’t necessarily using hot plastic to glue together two pieces — that’s just a hot glue gun, after all. Rather, it occurred to us that the key here was machining out the places where significant amounts of the hot plastic could bond the two pieces together. He cut the channels with a rotary tool, buffed them, and used a hot knife to give them some internal texture. But with a 3D printer, you could build these channels into parts that were made to interlock.
At this point, everyone knows that the print quality you’ll get from even an entry level UV resin printer far exceeds what’s possible for filament-based fused deposition modeling (FDM) machines. But there’s a trade-off: for the money, you get way more build volume by going with FDM. So until the logistics of large-format resin printers gets worked out, folks looking to make things like replica prop helmets have no choice but to put considerable time into post-processing their prints to remove the obvious layer lines.
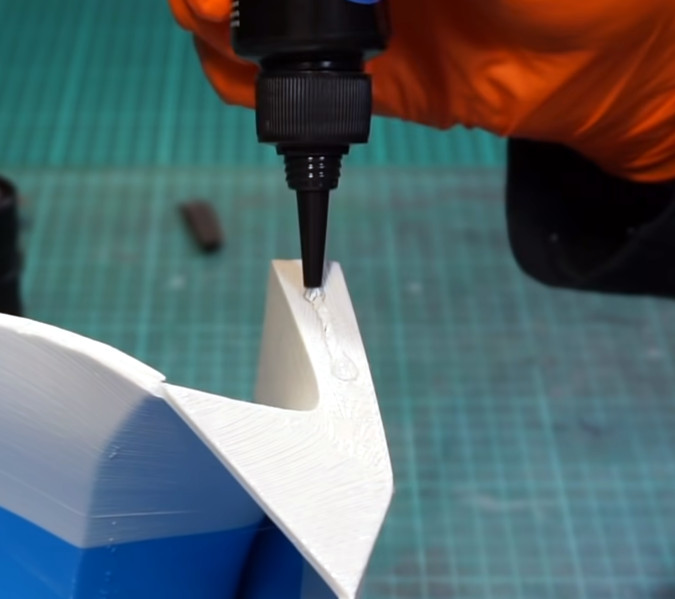
But thanks to this somewhat ironic trick demonstrated by [PropsNstuff], you can actually use UV resin to improve the finish quality of your FDM prints. The idea is to put a layer of resin over the layer lines and other imperfections of the 3D print, cure it with a handheld UV flashlight, and then sand it smooth. Essentially it’s like using resin in place of a body filler like Bondo, with the advantage here being that the resin cures in seconds.
With the tough spots addressed, he then moves on to coating larger areas with resin. But this time, he mixes leftover resin from his SLA printer with talcum powder to make a mix that can be brushed on without running everywhere. It takes a few thin coats, but with this mix, he’s able to build up large swaths of the print without losing any surface detail.
Is it still a hassle? Absolutely. But the final result does look spectacular, so until we figure out how to build the replicators from Star Trek, it looks like we’ll have to make up for our technological shortcomings with the application of a little elbow grease.
When putting together a home workshop, available floor space is often the deciding factor when it comes time to pick tools and equipment. This ultimately leads to some very difficult decisions, and we’d wager there isn’t a hacker or maker reading this that hasn’t had to pass on a new piece of gear because they didn’t have anywhere to put it.
For example, the average home gamer isn’t going to have a paint booth and spraying equipment, so they have to settle for a rattle can in the backyard. Traditionally this has limited the kinds of products you can realistically apply, but as [Eric Strebel] shows off in his latest video, it seems like spray can technology is starting to catch up.
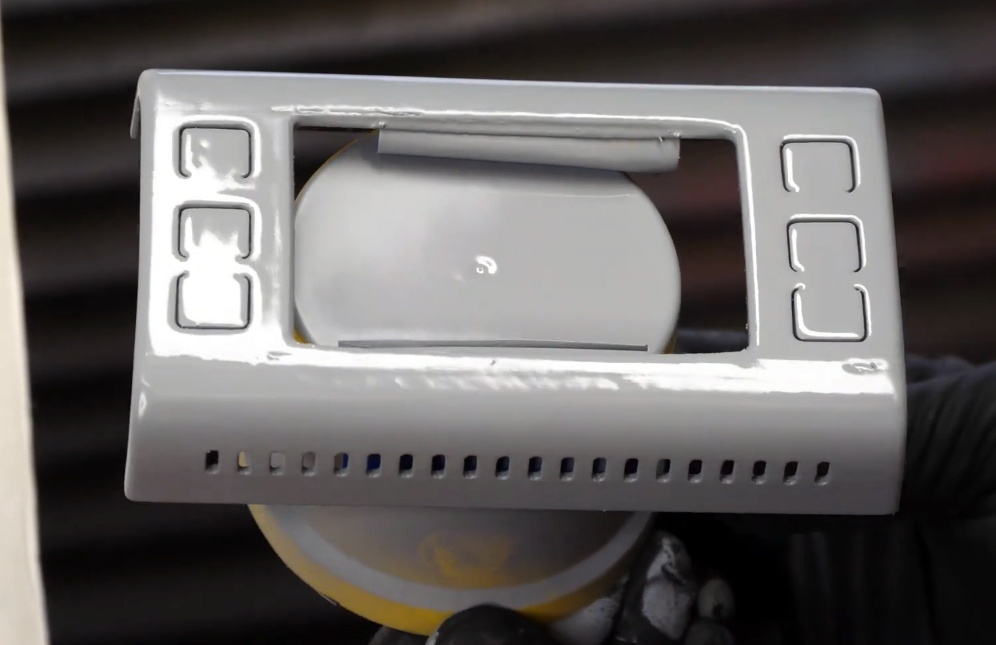
The finish after two coats of primer.
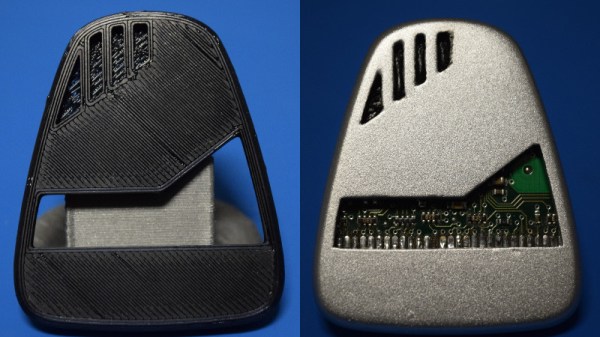
Specifically, he’s been working with a canned two-part primer that doesn’t require any complicated mixing or special equipment to apply. After hitting a plunger on the bottom, a small compartment containing the activator is ruptured and the reaction begins. From that point, you’ve only got 24 hours to use the contents of the can before it cures. But since you only need to wait about 10 minutes between coats, that should give you plenty of time to complete the project.
In the video, [Eric] demonstrates how quickly this high-build primer can smooth out the layer lines on a 3D print. While you’ll still need to sand and potentially break out the spot filler to achieve that perfect finish, it’s clear that the primer works much better than anything we’re used to seeing come out of a can. Even after just two coats, the results are truly remarkable.
If there’s a downside, it’s that a can of this primer will run you about $25 USD. That’s about five times the cost of the Rust-Oleum Filler Primer that usually gets recommended in DIY circles, but the results really do seem to speak for themselves. We wouldn’t necessarily use this on every project, but if you’ve got something that needs an especially fine finish, you’ve at least got an option that doesn’t involve borrowing somebody’s compressor and spray gun.
If you need help shaking your paint before spraying – definitely give this 3D printed paint shaker a look!
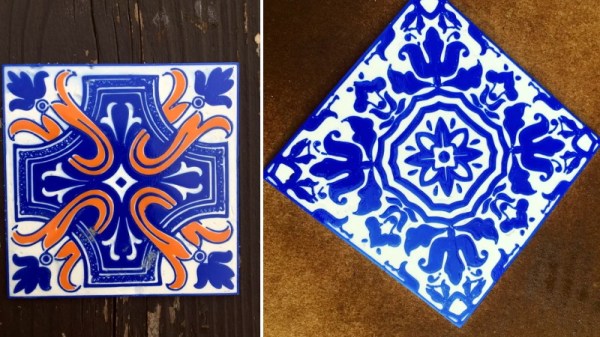
Where does your mind go when you think of 3D printed parts? Running off hard to find replacement components? Maybe spinning up a bespoke electronics enclosure? Occasionally the little boat that you can compare to the little boats of others online? All reasonable enough answers. But thanks to the work of [Matthew Wentworth], you might have a new mental image to associate with the smell of melting PLA: decorative Portuguese Azulejo tiles.
As difficult as it might be to believe, the tiles you’re seeing here weren’t made on some exotic ceramic printer, but a standard Prusa i3 MK3. Well, at least they started on the 3D printer. As you might have guessed, there’s a bit more involved than that.
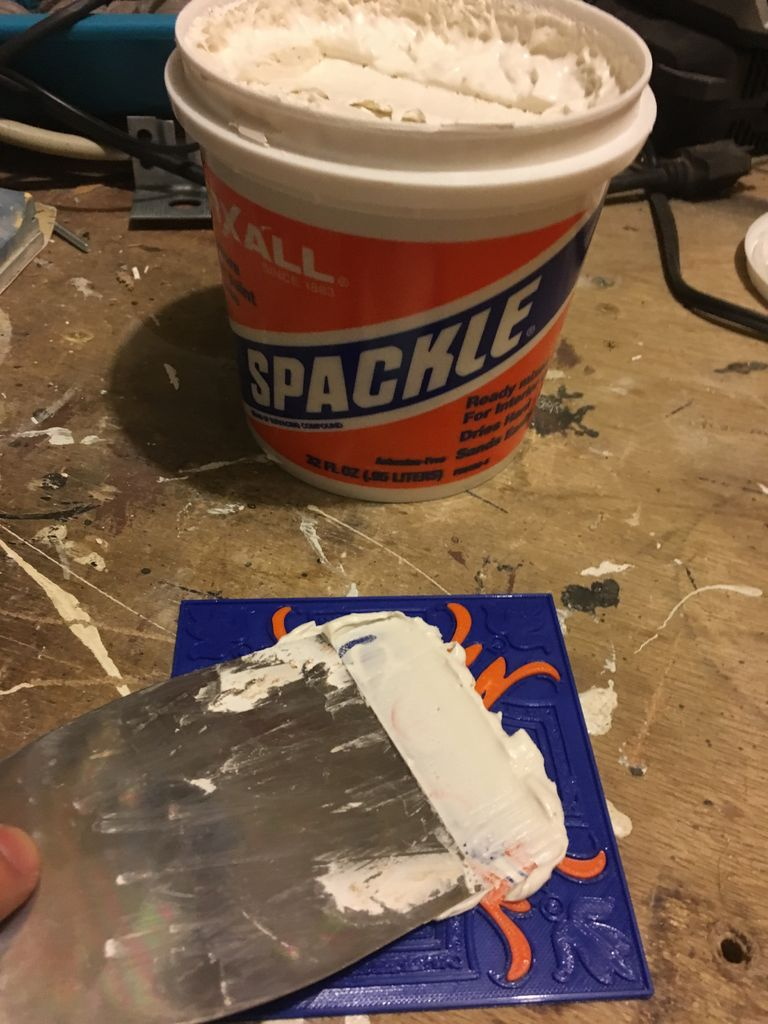
That said, the idea is actually quite simple. The printed “tile” is just the base plate, plus the raised elements that will eventually be seen on the surface. Everything else is just a void, which naturally saves a lot on printing time and material. Once the print is done, premixed spackling paste is pushed into all of the open areas and the top is made as smooth as possible with a putty knife. The filled tile is then left to dry for 24 hours or so.
Once it’s dried, you take the tile outside and sand the top down with a palm sander (or by hand, if you have the patience). This not only smooths out the spackle, but eventually will expose and then smooth the top parts of the print. Once everything is nice and silky, it gets sprayed with a semi-gloss clear coat to both protect it and give it that authentic looking shine.
[Matthew] actually created his designs based on images of real Azulejo tiles he found online, but really any sort of image that has raised elements like this could be made to work. If anyone out there decorates their home with 3D printed Jolly Wrencher tiles, you know where to send the pictures. Interestingly, these aren’t the first tiles we’ve seen made out of plastic, but we’ve got to admit these ones would look quite a bit more appealing on your kitchen walls.
The world of glues is wide and varied, and it pays to use the right glue for the job. When [Eric] needed to stick a wide and flat 3D printed mount onto the back of a PCB that had been weatherproofed with an uneven epoxy coating, he needed a gap-filling adhesive that would bond to both surfaces. It seemed like a job for the hot glue gun, but the surface was a bit larger than [Eric] was comfortable using with hot glue for. The larger the surface to be glued, the harder it is to do the whole thing before hot glue cools too much to bond properly.
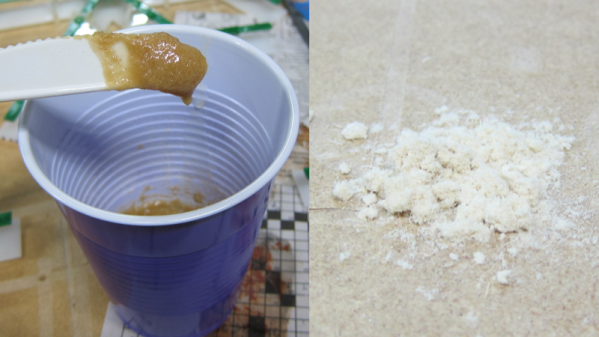
What [Eric] really wanted to use was a high quality two-part epoxy that he already had on hand, but the stuff was too runny to work properly for this application. His solution was to thicken it with a thixotropic filler, which yields a mixture that is akin to peanut butter: sticky, easily spread to where it’s needed, but otherwise stays in place without dripping or sagging and doesn’t affect bonding.
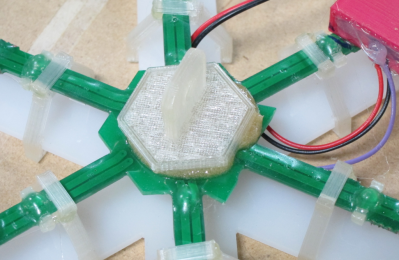
3D printed pad stuck to back of PCB with thickened epoxy.
Common thixotropic fillers include ground silica or plastic fibers, but [Eric]’s choice was wood flour. Wood flour is really just very fine sawdust, and easily obtained from the bag on his orbital sander. Simply mix up a batch of thin two-part epoxy and stir in some wood flour until the sticky mixture holds its shape. Apply as needed, and allow it to cure.
Thanks to this, [Eric] was able to securely glue a 3D printed pad to the back of his animated LED snowflakes to help mount them in tricky spots. Whether for small projects or huge installations, LEDs, PCBs, and snowflakes are a good combination.
Unless you’re particularly fond of hockey pucks, you probably aren’t really keen on the aesthetics of the NSA’s Amazon’s diminutive listening device, the Echo Dot. It’s not exactly ugly, but if anyone at Amazon spent more than ten minutes considering the visual design of the thing when it was being developed, we’d be shocked.
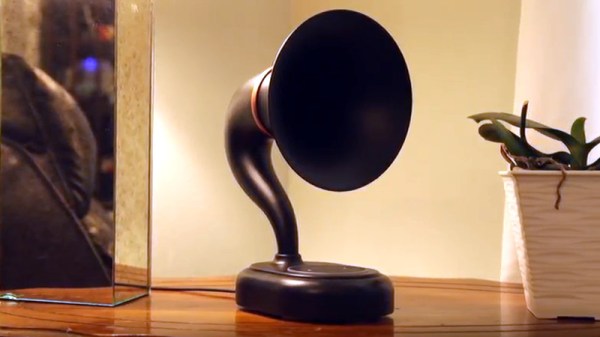
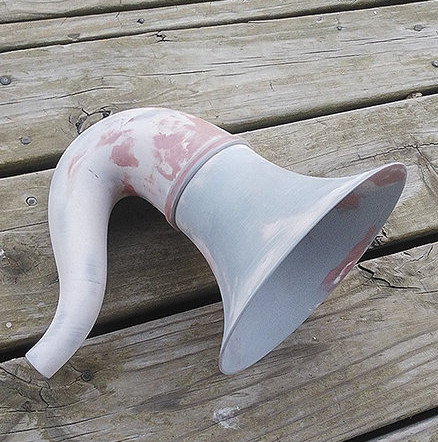
Luckily for us, there are hackers and makers who not only have the artistic chops to come up with visually appealing designs, but are kind enough to share them with those of us who are a few crayons short of a full box in that department. Such is the case with the jaw-dropping Gramazon by [Bård Fleistad], a 3D printed acoustic amplifier for the Echo Dot that converts the ho-hum looking device into a classic 1920’s style “horn” speaker.
[Bård] has wanted a horn speaker for awhile, but the prices on a real one in decent condition are getting pretty high. If he couldn’t have the real deal he figured the next best thing would be to 3D print his own version, but he’d still need electronics to put into it. Since the Echo is readily available and works as a Bluetooth speaker (not to mention plays audio from various online sources), it made sense to use it as the heart of his faux-horn.
The design he came up with is very slick, but the finish work on the printed parts is really what puts this project over the edge. [Bård] used Bondo and multiple primer coats to smooth the outside of the horn, and XTC-3D for the hard-to-reach internal curves. Plus sanding. Lots, and lots, of sanding.
With 3D printers now dropping to record low prices, more and more people are getting on the additive manufacturing bandwagon. As a long time believer in consumer-level desktop 3D printing, this is a very exciting time for me; the creativity coming out of places like Thingiverse or the 3D printing communities on Reddit is absolutely incredible. But the realist in me knows that despite what slick promotional material from the manufacturers may lead you to believe, these aren’t Star Trek-level replicators. What comes out of these machines is often riddled with imperfections (from small to soul crushing), and can require considerable cleanup work before they start to look like finished pieces.
If all you hope to get out of your 3D printer are some decent toy boats and some low-poly Pokemon, then have no fear. Even the most finicky of cheap printers can pump those out all day. But if you’re looking to build display pieces, cosplay props, or even prototypes that are worth showing to investors, you’ve got some work cut out for you.
With time, patience, and a few commercial products, you can accomplish the ultimate goal: turning a 3D printed object into something that doesn’t look like it was 3D printed. For the purposes of this demonstration I’ll be creating a replica of the mobile emitter used by the “Emergency Medical Hologram” in Star Trek: Voyager. I can neither confirm nor deny I selected this example due to the fact that I’m currently re-watching Voyager on Netflix. Let’s make it look good.