Breadboarding A 4-bit ALU

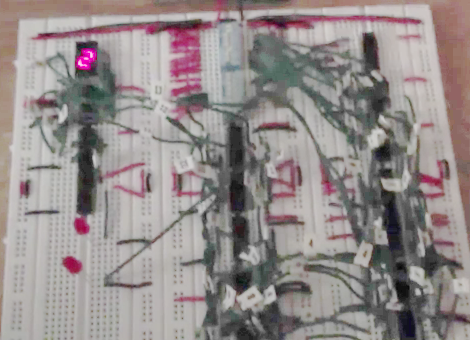
[TGTTGIT] recently took the plunge and decided to build his own computer using logic chips. He just completed a 4-bit ALU which can compute 18 functions. It took a long time to get the wiring right, but in true geek fashion his build was accompanied by an alternating Chapelle’s Show and Star Trek: TNG marathon playing in the background.

This project is the stepping stone for a larger 16-bit version. The experience of wiring up just this much of it has convinced him that an FPGA is the only way to go for the future of the build. But since he had already ordered the chips it was decided that the only thing to do was to see this much through. He used the truth table from The Elements of Computing Systems for the design and posted several times about the project before arriving at this stopping point so you may be interested in clicking through the other post on his blog. There’s also a lot of other TTL computer projects around here worth checking into.

Continue reading “Breadboarding A 4-bit ALU”

Mess Of Wires Is Actually A One Instruction Computer

If you’re going to build your own computer, it probably wouldn’t do you well to exactly emulate the computer you’re looking at right now. The modern x86 and x64 chips that power your desktop or laptop contain hundreds of individual instructions, and the supposed RISC CPUs found in ARM-powered devices contain nearly as many. No, if you’re going to build your own computer you should make it easy on yourself, just as [Jack Eisenmann] did  when he built the DUO Compact, a one-instruction set computer made on a breadboard.

Instead of dozens or hundreds of individual instructions, a one instruction computer has – like its name implies – only one way of manipulating bits. For the DUO Compact, [Jack] chose a NOR and fork conditionally instruction. Each line of assembly written for the DUO Compact has four memory instructions: a source address, destination address, skip address 1, and skip address 2. [Jack] explains exactly how this operation can allow him to compute everything:

Three steps occur when executing the instruction:

  1. Load the byte at the first and second address. NOR these bytes together.
  2. Store the result of step 1 in the second address.
  3. If the result of step 1 was zero, then skip to the instruction at the fourth address; otherwise, skip to the instruction at the third address.

As if designing a one instruction computer built using only basic logic and memory chips wasn’t impressive enough, [Jack] went as far as writing an emulator for his system, a compiler, an operating system, and even a few programs such as a square root calculator and a text-based adventure game.

By any measure, [Jack] has finished an amazing build, but we’re blown away by the sheer amount of documentation he’s made available. He’s even gone so far as to write a tutorial for building your own DUO Compact.

You can check out a few videos of the DUO Compact after the break. Of course, if you’re looking for a project to tackle, you’re more than welcome to design a PCB from the DUO Compact schematic. We’d certainly buy one.

Continue reading “Mess Of Wires Is Actually A One Instruction Computer”

Building A 4-bit TTL Computer

When [GG] was 12 years old, he was introduced to BugBooks, the wonderful ‘introduction to digital design’ books from the early 1970s. It has always been a dream of [GG] to build the TTL computer featured in the BugBooks, and now that he has the necessary time and money available to him, the Apollo181 has become a reality.

[GG]’s computer is built around a 74181 ALU, an exceptionally old-school chip that provides the core of a computer in a neat 24-pin chip. With a 256-byte RAM and a few additional logic chips, [GG]’s computer is an exceptional piece of engineering able to perform 625,000 instructions per second when clocked at 2.5 MHz.

This isn’t [GG]’s first homebrew computer build; last year we saw his incredible Z80 minicomputer. Now we can’t wait to see what’s on tap for next year. After the break, you can check out [GG] loading in operands and operators into his computer and letting the Apollo181 churn away on its program.

Continue reading “Building A 4-bit TTL Computer”

Build An 8-bit TTL Computer

Very rarely do we see an Instructable so complete, and so informative, that it’s a paragon of tutorials that all Instructables should aspire to. [8 Bit Spaghetti]’s How to Build an 8-bit computer is one of those tutorials.

[8 Bit Spaghetti]’s build began on his blog. He originally planned to build a 4-bit computer but decided a computer that could only count to 15 would be too limiting. The build continued by programming an NVRAM as the ROM on a breadboard and finally testing his bundle of wires.

What really makes [8 Bit Spaghetti]’s special is the Instructable – he covers just about all the background information like the definition of a Turing machine, a brief introduction to electronics and logic chips, and binary numbers. Even though he’s doing some fairly complicated work, [8 Bit Spaghetti]’s tutorial makes everything very clear.

The computer isn’t quite done yet – there’s still a few nixie tubes to add – but we couldn’t imagine a better project for the budding electronic hacker.

Cheap And Easy Logic Signal Generator

While function generators or analog signal generators are ubiquitous in their utility, we haven’t seen much of logic function generators on Hack a Day. Luckily, [Dilshan] sent in a really neat 8-channel signal injector that is amazingly simple to build and comes with a great front end for editing patterns from your computer.

The hardware portion of the build is kept to a minimum with a PIC18F chip, USB socket, and header pins as the only major components. This board serves as the hardware output for the Kidogo software. This software provides a very nice interface to generate 5 volt logic signals on eight separate channels that will immensely help exploring your digital world.

With a great interface and very easy to build hardware, we can easily see the Kidogo hardware finding its way onto workbenches around the world. We’re tempted to build our own version using an AVR, but we would hate to ruin such a simple but useful tool.

Building A Computer Around A TTL CPU

[Bill’s] worked on his homebrew computer for almost a decade. He didn’t start with a Z80 processor like a lot of the projects we’ve seen, but instead build the CPU itself from 74-series TTL chips and a ridiculous amount of wire wrapping to connect it all.

The video after the break shows off the functionality. We love the front panel, which is packed with information but manages to remain organized and offers many convenient features. Our favorite is the ability to pause execution and scroll through the registers by spinning the dial. The clock signal has a variable speed which is selected by an internal DIP switch package that can be changed during a pause. It runs MINIX and has a library of programs, but perhaps most surprising is its ability to serve webpages.

Lately we’ve been interested in drilling down through program language abstractions to understand what is going on inside the silicon. This has given us new respect for those building processors from scratch. Think of it this way, if you actually need to build each instruction out of gates, you’ll be able to understand how those instructions work at the most fundamental level.

Continue reading “Building A Computer Around A TTL CPU”

Homebrew TTL Logic Computer

Although [Jack] just graduated High School and doesn’t have much experience with electronics, that didn’t stop him from building the DUO Adept, a homebrew computer built entirely out of TTL logic chips.

The DUO Adept has 64k of memory, 6K of which is dedicated to the video ram that outputs a 240×208 black and white image onto a TV. Bootstrapping the computer to it’s current state was quite a challenge, as an entire OS was put into th system one bit at a time though DIP switches. After the OS was written to the computer, [Jack] was able to connect a keyboard and started programming. [Jack] programmed a hex editor and a few games of his own design. If all that wasn’t impressive enough, [Jack] also programmed an assembly compiler and emulator for his homebrew system.

We’ve seen a a few homebrew computersbefore, but not many of them are laid out on 17 breadboards like the DUO Adept. With skills like these, we can’t wait to see what [Jack] comes up with next. Check out the video after the break for a walk-through of the build.

Continue reading “Homebrew TTL Logic Computer”