DIY GameTank Game Console Gets Upgraded Cartridge

Over the summer, you might recall seeing a homebrew 6502 game console called the GameTank grace these pages. The product of [Clyde Shaffer], the system was impressively complete, very well documented, and even had a budding library of games.

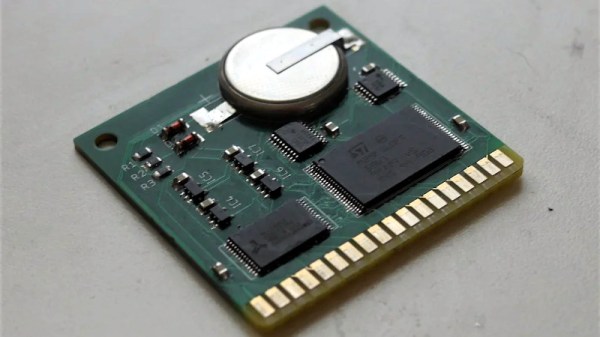
Recently, [Clyde] took to the r/electronics subreddit to show off the latest improvement to the GameTank: a revised removable cartridge. The biggest change this time around is the addition of 32 KB of battery-backed SRAM that gives games (or any other software that might be on the cartridge) some persistent storage to work with. Continue reading “DIY GameTank Game Console Gets Upgraded Cartridge”

A homebrew computer built inside plexiglass cases with lots of LEDs

The Coleman Z80 Is A Modern Take On A 1970s Computer

[Joshua Coleman] likes to design his own computers. Sometimes, that means drawing up bus architectures,  memory maps and I/O port pinouts. Other times, he can focus his efforts more on the general aesthetics, as well as on building a great set of peripherals, as he shows in his latest ColemanZ80 project. Thanks to the RC2014 architecture defining most of the essential features of a classic Z80 computing platform, [Joshua] was able to design a modern retrocomputer that’s not only genuinely useful, but also looks as if it came off a production line yesterday.

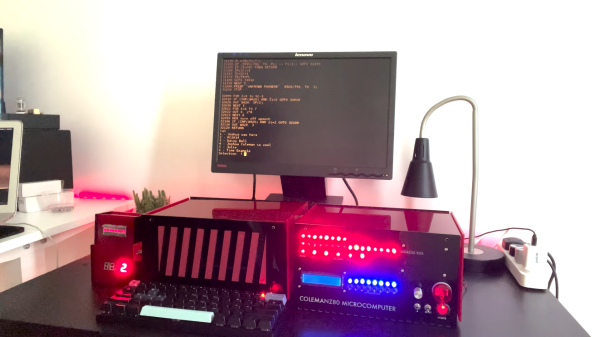
The external design is a sight to behold: bright red laser-cut acrylic pieces form a neat, semi-transparent case with ventilation slots on the sides and lots of blinkenlights on the front. Inspired by 1970s classics like the Altair 8800, the front panel gives the user a direct view of the machine’s internal state and allows simple command inputs through a series of tumbler switches. The CPU, RAM and other basic devices are housed in one case, with all the expansion modules in a second one, linked to the mainboard through a 40-wire flatcable.

A hand-built Z80 computer's mainboard
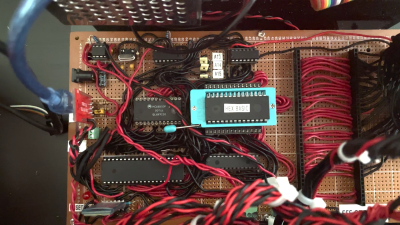
Lots of classic chips, but also loads of hand-routed wires grace the ColemanZ80’s mainboard.

Although the mainboard closely follows the RC2014 design, [Joshua] went through a lot of effort to tune the system to his specific needs. The expansion boards he built include an NS16550 UART to replace the default 68B50, a battery-backed real-time clock, a YM2149-based sound card and even a speech synthesizer module built around the classic SP0256 chip, of Speak & Spell fame. An even more unusual feature is the presence of an AM9511, one of the earliest math coprocessors ever made, to speed up floating-point calculations. All of these modules were built entirely by hand on prototype boards: we can barely imagine how much time this must have taken.

Output devices include a VGA adapter courtesy of a Raspberry Pi Pico as well as a regular 4-digit 7-segment LED display and a set of classic HP “bubble” LEDs. [Joshua] runs several demos in his video (embedded below), ranging from computing the Mandelbrot set to playing chiptunes on the YM2149. There’s plenty of scope for further expansion, too: [Joshua] plans to build more peripherals including a floppy drive interface and a module to operate a robotic car.

This is not the first Coleman Z80 computer: the previous version ran on an architecture [Joshua] designed all by himself. We’ve seen several other impressive RC2014 derivatives, like a tiny micro version and this Altair-inspired case.

Continue reading “The Coleman Z80 Is A Modern Take On A 1970s Computer”

WheatSystem Is A Homebrew 8-Bit OS

[Esperantanaso] has long been involved in producing homebrew 8-bit computers. His various builds could all achieve different things, but he grew frustrated that applications written for one could not be easily run on another. He recently took a big leap forward in this area, though, cooking up his own 8-bit operating system called WheatSystem.

The work initially began with BreadSystem, which relied on applications existing in bytecode. This would then be run by the BreadSystem OS which would handle the requisite conversion to the machine code of the system it ran on. However, the work quickly got out of hand when it came to implementing advanced features like the file system and floating-point handling. BreadSystem was looking likely to be too heavy to run on lightweight 8-bit systems.

That led to the development of WheatSystem, which kept the bytecode runtime environment, unified heap, and a memory permission system from BreadSystem. Fancier features like granular memory permissioning, automatic garbage collection, and file system directories were dropped.

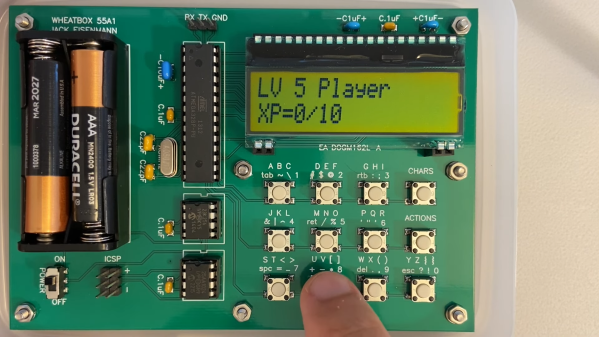
WheatSystem quickly became a basic and functional OS. To demonstrate it, [Esperantanaso] created WheatBox 55A1, a small homebrew computer based on the ATmega328. It readily runs simple applications like a prime number generator or a basic RPG.

Creating one’s own OS is no mean feat, even at the 8-bit level. We’ve seen it done before, and it never fails to impress.

Continue reading “WheatSystem Is A Homebrew 8-Bit OS”

A Z80 CPU board built on a piece of prototype board with an edge connector

Designed From Scratch And Fully Handmade: The Modular Coleman Z80 Computer

While the phrase “I built my own computer” might sound impressive to the uninitiated, anyone with an interest in modern computer hardware knows that there’s really not much to it: buy a case, a motherboard with a CPU, some RAM and peripherals, and you’re pretty much there. What’s way more impressive is designing a complete computer system from the ground up, as [Joshua Coleman] just did when he built the Coleman Z80.

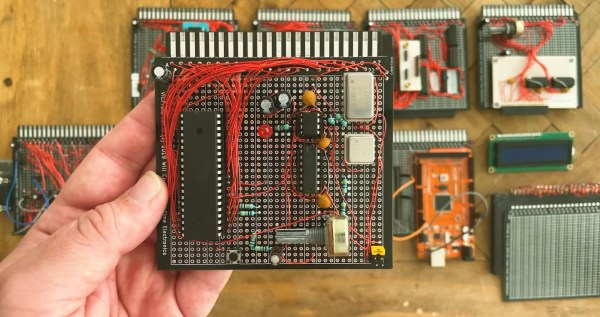
And when we say “from the ground up”, we mean it: everything down to the system bus was hand-drawn by [Joshua] himself. It does share something with modern PCs though: a strictly modular design. There’s a Z80 CPU board, a ROM and RAM board, and even two modules that you could describe as a video card and a sound card. All of these are built on prototyping boards with a 40-pin edge connector and hooked up to a single backplane carrying the main system bus.

Designed as an experimentation platform, the Coleman Z80 has many features that enable testing and debugging, such as an adjustable clock generator and a few beautiful vintage LED displays that show the status of the main bus. Input and output are mainly through a serial link and a 16×2 LCD, but [Joshua] is already planning a keyboard interface and composite video output to give it that proper 1980s home computer vibe. The software is currently limited to a ROM monitor that enables basic I/O commands, but with 256 KB of RAM there’s plenty of potential for writing useful software.

Just as impressive as the design itself is the fact that this was [Joshua]’s first electronic design project; we’ve certainly seen worse first projects! Over the years we’ve featured several cool homebrew Z80 computers, such as a super-minimalistic board, a modular system based on the powerful eZ80, and this cute little one that fits inside an Altoids tin.

Continue reading “Designed From Scratch And Fully Handmade: The Modular Coleman Z80 Computer”

A Well Documented BreadBoard Computer Shows Dedication

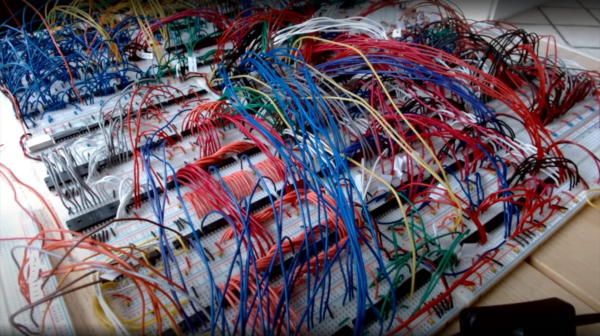
These pages have not been exactly devoid of home-built computers, with those constructed on solderless breadboard less frequent, but still not rarities. But what is more of a rarity is this ground-up 8-bit 74xx logic-based computer (video, embedded below) with full source, an emulator, assembler and test suite. [JDH] spent a solid couple of weeks working late into the night to build this, and the results show for themselves.

The new JDH-8 is now a figment of reality.

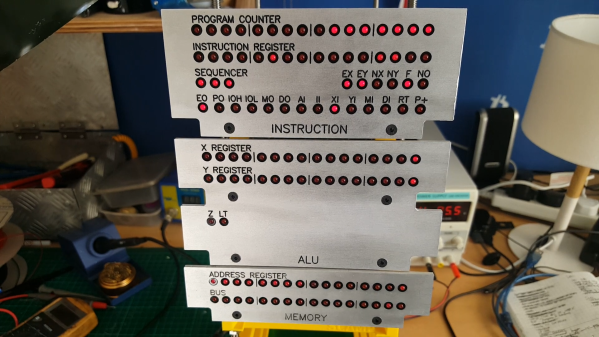
The architecture is a traditional 8-bit load/store microcoded processor with the microcode stored in easily programmable AT28C64 EEPROMs for ease of tweaking.  The address bus is 16-bits, which is quite ample for this, and puts it in line with (admittedly more sophisticated) 8-bit micros of old such as the 6502. There is also a hardware stack, and a discrete-logic ALU as well! Finally, since that wasn’t enough work already, he added in his own discrete logic video controller.

Wise people simulate before prototyping something like this

There are sixteen instructions covering memory access, ALU operations and I/O operations. One of the great things about this project is that [JDH] readily admits the mistakes made along the way, and how the architecture didn’t need to be this complex. One example is that hardware stack wasn’t really necessary as it could just have been implemented in software. Also, due to the implementation, memory accesses were so fast compared with the achievable cycle time, that there really was no point to using load/store architecture at all! Still, [JDH] had fun building and programming it!

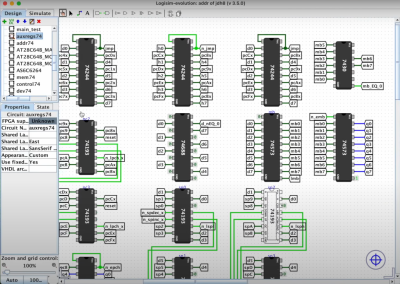
It was interesting to see the use of LogiSim-Evolution to debug first a high level model of the architecture and then the translation into TTL chips. This scribe wasn’t aware of that tool (the shame!) but is going to try this out real soon.

All code for the software side of things can be found on the project GitHub. Perhaps the hardware design will appear there as well, be at the time of writing we couldn’t seem to find it.

Can’t get enough breadboard computers? (We can’t) check this out from last year. Stuck for a suitable enclosure for your latest bread breadboard computer? How about a bread bin.

Continue reading “A Well Documented BreadBoard Computer Shows Dedication”

SCAMP runs SCAMP/os

Homebrew 16 Bit Computer Reinvents All The Wheels

Building your own computer has many possible paths. One can fabricate their own Z80 or MOS 6502 computers and then run a period correct OS. Or a person could start from scratch as [James Stanley] did. [James] has invented a completely unique computer and CPU he calls SCAMP. SCAMP runs a custom OS called SCAMP/os which you can check out in the video below the break.

[James] describes the CPU and computer as purposefully primitive. Built out of discrete 74xx series logic chips, it runs at a fast-enough-for-homebrew 1 MHz. Plus, it has a lot of blinking lights that can’t help but remind us of the original Imsai 8080. But instead of a panel of switches for programming, the SCAMP/os boots to a shell, which is presented through a serial terminal. Programs are written in a bespoke language with its own compiler. The OS is described as a having a Unix-like feel with CP/M-like functionality. That’s quite a combination!

What we love most about the build, other than its clean looks and blinkenlights, is the amount of work that [James] has put into documenting the build both on his blog and on Github, where the source code and design is available. There’s also an open invitation for contributors to help advance the project. We’re sure he’ll get there, one bit at a time.

While [James] is using a Compact Flash card for storage currently we can’t help but wonder if a Cassette Tape storage system might be a worthwhile future upgrade.

Continue reading “Homebrew 16 Bit Computer Reinvents All The Wheels”

Arduino Brings USB Mouse To Homebrew Computer

When building your own homebrew computer, everything is a challenge. Ultimately, that’s kind of the point. If you didn’t want to really get your hands dirty with the nuts and bolts of the thing, you wouldn’t have built it in the first place. For example, take the lengths to which [rehsd] was willing to go in order to support standard USB mice on their 6502 machine.

Code for mapping mouse movement to digital output.

The idea early on was to leverage existing Arduino libraries to connect with a standard USB mouse, specifically, the hardware would take the form of an Arduino Mega 2560 with a USB Host Shield. There was plenty of code and examples that showed how you could read the mouse position and clicks from the Arduino, but [rehsd] still had to figure out a way to get that information into the 6502.

In the end, [rehsd] connected one of the digital pins from the Arduino to an interrupt pin on the computer’s W65C22 versatile interface adapter (VIA). Then eleven more digital pins were connected to the computer, each one representing a state for the mouse and buttons, such as MOUSE_CLICK_RIGHT and MOUSE_LEFT_DOWN.

Admittedly, [rehsd] says the mouse action is far from perfect. But as you can see in the video after the break, it’s at least functional. While the code could likely be tightened up, there’s obviously some improvements to be made in terms of the electrical interface. The use of shift registers could reduce the number of wires between the Arduino and VIA, which would be a start. It’s also possible a chip like the CH375 could be used, taking the microcontroller out of the equation entirely.

From classic breadboard builds to some impressively practical portable machines, we’ve seen our fair share of 6502 computers over the years. Despite the incredible variation to be found in these homebrew systems, one thing is always the same: they’re built by some of the most passionate folks out there.

Continue reading “Arduino Brings USB Mouse To Homebrew Computer”