Arguably one of the most difficult aspects of 3D printing is trying to make the finished product look like it wasn’t 3D printed. It can take a lot of time and work to cover up the telltale layer lines (or striations, if you want to get fancy), especially if your 3D printer isn’t perfectly calibrated. While there aren’t many shortcuts to achieve a glass-like finish on 3D printed parts, if your end goal is to make something that looks like stone, [Wekster] has a tip for you.
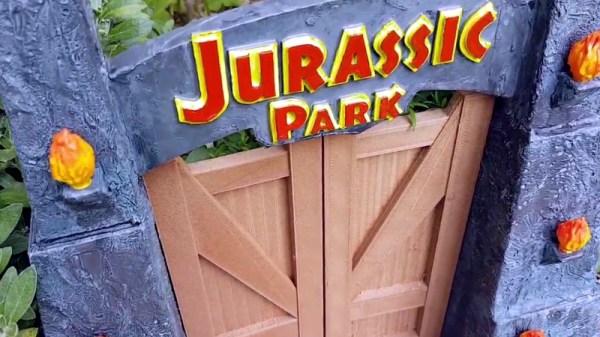
 He demonstrates the technique by building a gorgeous recreation of the main gate from Jurassic Park. The process gives the relatively smooth plastic the gnarled look of rough-hewn stone with very little in the way of manual work. While it’s true there’s no overabundance of projects this stone-look finish will work for, it’s definitely something we’ll be filing away mentally.
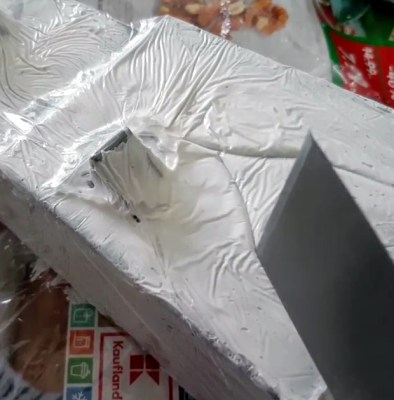
So what’s the secret? [Wekster] first coats the 3D printed parts with common wood filler, the sort of stuff available at any hardware store. He then wraps them in clear plastic wrap, allowing the wrap to bunch up rather than trying to pull it taught. For extra detail, he digs into the plastic wrap here and there to create what will appear to be gaps and cracks on the finished piece. The wood filler is then left to dry; a process which normally only takes a few minutes, but now will take considerably longer as the plastic wrap will be keeping the air from it.
Once its hardened and unwrapped, [Wekster] sprays it with a base coat of color, and follows up with a few washings with watered down black and gray paints. This technique is well known to anyone who’s done miniature or model painting; serving to highlight the surface texture and give the finish more depth. With this method, anything that resembles a layer line in the print is long gone, and the surface looks so complex and detailed that at first glance few would believe it’s plastic.
[Wekster] also used wood filler during the finishing process for his Fallout 4 “Thirst Zapper” replica. In the past we’ve shown how you can smooth out 3D printed parts with epoxy and taken a very scientific look at using UV resin as a conformal coating, but maybe it’s time we give wood filler a shot.
Continue reading “Texture Trick For 3D Prints From The Stone Age”


