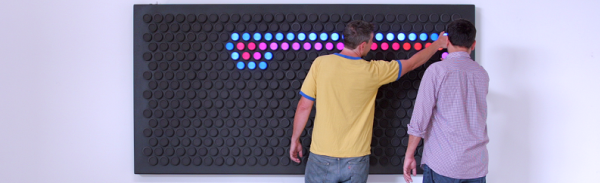
Hero-Design wants you to make art at work with this mesmerizing contraption and as far as we’re concerned they hit the nail right on the head with the inclusion of LEDs, we’re whores for LEDs. The team over at Hero have come up with an interactive wall of 464 pixels that can be individually controlled to display any of the available colors simply by turning the circular pixel in either direction.
The design is quite elegant with a luxurious color scheme of black on black on black. Until you touch a knob or play an animation, that is. The large wall unit comes with a custom designed animation of your choice along with three other animations (and hopefully instructions to create your own animation from scratch). They have taken some precautions that we’re pleased to see: each pixel has redundant LEDs in the case that one goes out and if the worst happens and the redundant goes up in smoke not to worry, each pixel is easily replaceable due to its modular design.
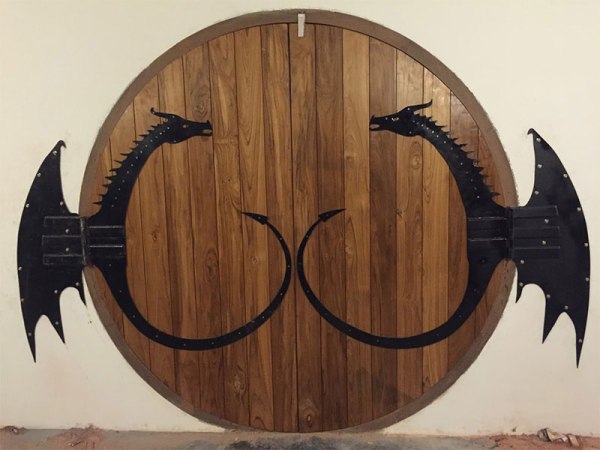
[Abhimanyu Kumar] is renovating a hotel in Nainital, near the India-Nepal border, and like any self-respecting Lord of the Rings fan, he wanted to give the restaurant a Hobbit theme. He built circular windows and to top it off a gorgeous round door complete with dragon hinges.
I asked him how well the doors work, as the 50kg (over 110lbs) weight of each of the doors must put a lot of strain on the hinges. [Abhimanyu] told me, “The door opens quite smoothly.While building the hinges even I was concerned about needing support as all other commercially available hinges we tried broke down or got bent.”
However, once the dragon hinge was installed it worked better that we expected and the door stays about 0.5″ over the ground at all times. The dragon hinges (made from 1/4-inch iron) integrate the hinge pins to the wings of the dragon, making it look like they are taking off when the doors open.
He has posted plenty of pictures of the build and the final product looks incredible. The tail of the dragon is quite long and provides a lot of support for the entire door. Each hinge itself weighs about 30kg, so it should be strong enough to hold up a door for a long time without any sagging. Kudos to him for some serious engineering!
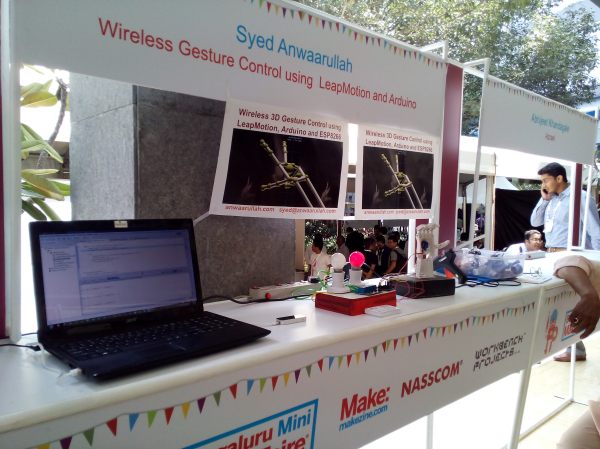
The Leap Motion controller is a rather impressive little sensor bar that is capable of generating a massive 3D point cloud and recognizing hands and fingers to allow for gesture control based computing. It’s been out for a few years now but we haven’t seen many hackers playing with it. [Anwaarullah] has messed around with it before, but when it came time to submit something for India’s first Maker Faire, he decided to try doing an actual project with it.
Checking out the latest Leap Motion SDK, [Anwaarullah] realized many improvements had been made and he’d have to rewrite some of his original code to reflect the changes. This time around he’s opted to use the ESP8266 WiFi module instead of a Bluetooth one. He printed off a Raptor hand (from the wonderful folks at e-NABLE) and hooked it up with some RC servos to give him a nice robotic hand to control.
Earlier this week, the US Department of Transportation announced registration would be required for unmanned aerial systems. Yes, drones will be regulated, and right now representatives from the Academy of Model Aircraft, the Air Line Pilots Association, the Consumer Electronics Association and others are deciding which quadcopters, planes, and other aircraft should be exempt from registration.
Should registration happen at point-of-sale, or after the box is opened?
Should registration be dependant on serial numbers? If so, how will kits be registered?
Should certain drones/UAS be excluded from registration? Should weight, speed, maximum altitude, or flight times be taken into account?
Should registration require a fee?
Are there any additional ways of encouraging accountability of drone/UAS use?
Comments will be taken until November 6, with the task force assembled by the US DOT providing its regulations by November 20. The hope for all involved parties is that this system of regulation will be in place for the holiday season. One million UAS are expected to be sold by Christmas.
An October 6th Press Release from the FAA states that SkyPan International, a Chicago based aerial photography company conducted 65 unauthorized operations over a 2+ year period resulting in a $1.9M penalty. This is by far the most severe penalty the FAA has proposed, the previous leader being $18,700 against Xizmo Media which was issued in September.
SkyPan International isn’t your suburban neighbor’s spoiled brat kid who flies his new octocopter through the neighborhood with his HD camera running in hopes to catch…well, you get the idea. SkyPan has been in the aerial photography game for 27 years and was awarded a Section 333 Exemption from the blanket ban of commercial UAS (unmanned aircraft systems) operation from the FAA in 2015. They also proactively contacted the FAA in 2005, 2008, and 2010 to discuss and suggest technical regulatory parameters. The seemingly civil history between the two entities leaves things in a confusing state, which seems to be par for the course when it comes to UAS.
Everyone has their favorite process for PCB fabrication, as long as you’re a happy hacker I don’t think it really matters. But in this post I thought it might be interesting to describe my personal process, and some of the options available.
Making your own at home
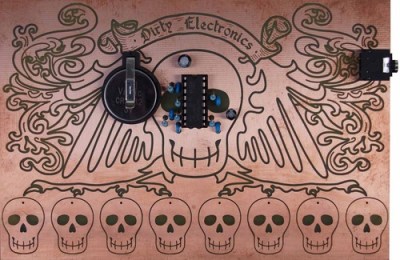
The Dirty Electronics Skull Etching Synth a great looking maskless board.
Etching is the classic PCB fabrication option for the home hacker. It’s been many, many years since I etched a PCBs but it can produce interesting results. Some people don’t like it, and I’d personally tend to avoid it as a messy and finicky process. But, if you only need 1 or 2 layer boards with large features (through-hole components are best of course) it can be a viable option. In some cases, I think etched boards look awesome and are a great fit. One example is the skull etching shown to the right. The oxidation and discoloration of the boards adds to the design aesthetic in this case.
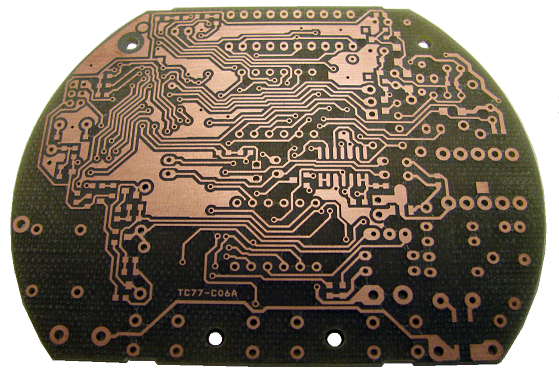
A simple design milled on an Accurate CNC
For those with a bigger budget a professional milling machine might be a viable choice. I’ve used an Accurate CNC in the past (LPKF and others make mills too), but this is an expensive option (no online pricing, but if $10,000 USD is a lot for you don’t bother). The accurate mill is pretty awesome, it can be fitted with a vacuum bed, automatic tool changer and vision system for alignment. The mill can produce high quality two layer boards with all the holes and vias drilled out. The final step of filling the vias is however manual, but compared to etched boards the results are pretty professional (the mill itself uses milled PCBs!). They claim a 0.1mm (4 mil) track size, I’ve never tried tracks this small but surface mount components were not a problem.
While a fun toy, it’s worth considering if you really need a PCB mill. The only case where they’re really valuable is if you want to be able to iterate over a design with less than a days turn around. This can be useful in RF or low noise designs where you might want to experiment with different layouts, but for other projects the price of a good mill can pay for quick turn around (1 or 2 days from order submission to delivery) on a lot of boards.
Commercial Fabrication
Years ago commercial fabrication used to be a very expensive and finicky process. For the most part you’d need to order a full panel putting the service outside of most hobbyists reach. Generating gerbers and drill files to the fabs specification could also be a process fraught with complication.
These days services that aggregate designs onto a single panel and break them out for distribution are common. For my work I mostly stick with OSHPark and SeeedStudio whose services complement each other well. I’ve also used Itead and found them compatible with Seeed (with the added benefit that they supply free boards for open projects).
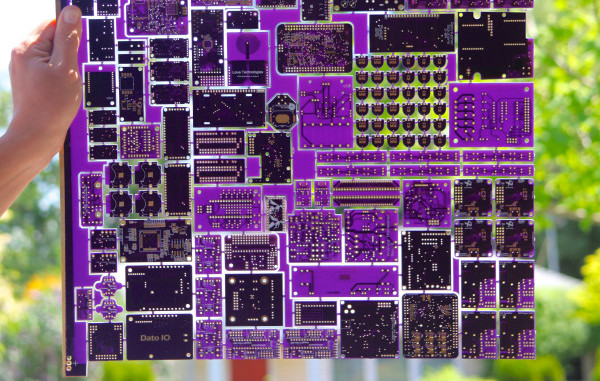
Using OSHPark gives me the warm fuzzies. A child of the hacker community, born out of DorkbotPDX, all OSHPark’s boards are fabbed in the US (check out the great amphour interview for more details). Their services are limited to either 2 or 4 layer boards (always in purple, and always coated with gold (ENIG)), in 6×6 (6 mil traces with 6 mil spacing) or 5×5. I rarely attempt BGA boards so the 2 layer service works out great for me. OSHPark’s minimum order is 3 boards, which is perfect for prototyping. The gold plating also provides a nice finish, which both protects the board from oxidation and provides a nice surface to solder to. The main reason I use OSHPark however is that they’re cheap for small boards and have a relatively fast turn around (I recently purchased 3 tiny 20x15mm boards for $2.40 including shipping which was unbeatable). From OSHPark in the US to the UK my boards take about 2 weeks to arrive. They’ve also automatically upgrade boards to their super-swift service for free when there’s spare capacity. Their service is pretty slick, and provides a rendering of the gerbers prior to ordering as a final check which comes in very handy.
Seeed on the other hand are much cheaper for larger size boards and volume orders. They also provide more color and finishing options. The cheapest option at Seeed is green PCBs with HASL finish (hot air solder leveling). From Seeed, my boards usually take about a month to arrive (there are a few delivery options, but in my experience this is about as fast as it gets and faster shipping services often make using Seeed less attractive).
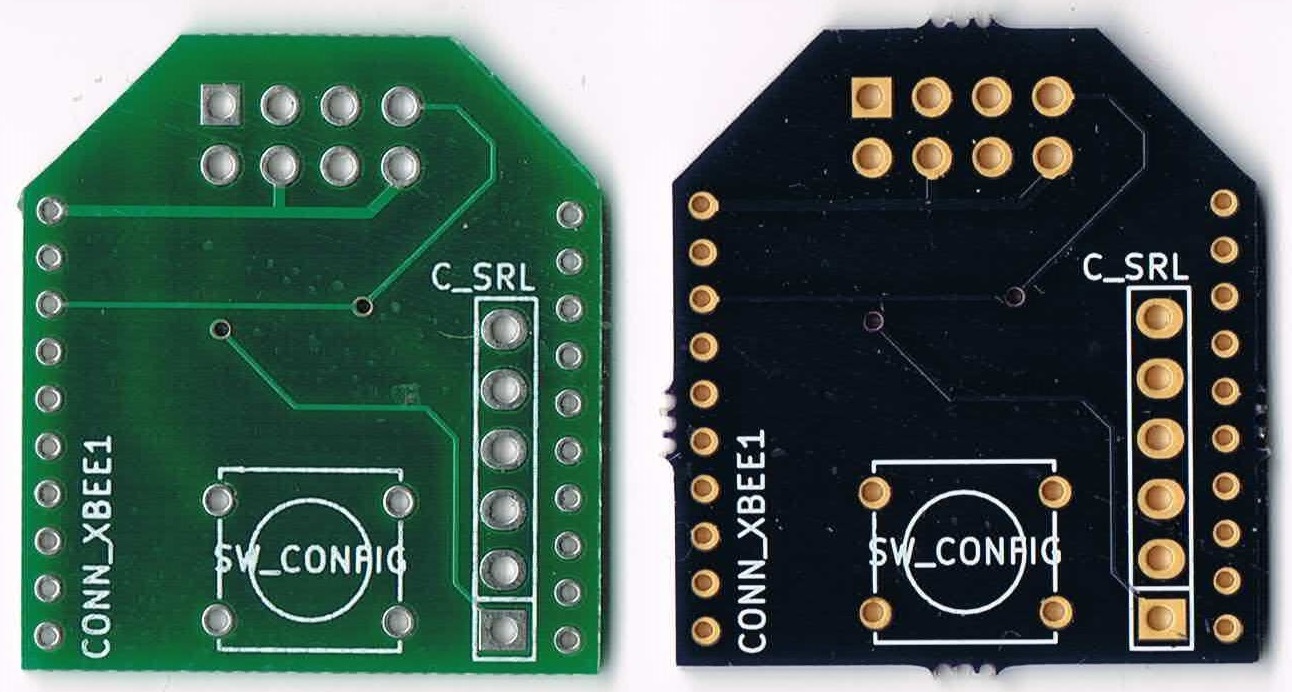
The image to the right shows a couple of very simple boards I had manufactured at both OSHPark and Seeed. I’ve never had a fabrication issues with boards from either service (though I prefer the ENIG finish).
Partly due to the limitations imposed by using commercial fabs I pipeline my projects. I send projects out to fab early in the design process and then switch to another design. When the board comes back I bring it up, bodge as required, and iterate over the layout. This works well with a two-week turn around, so I mostly use OSHPark while prototyping.
My boards also tend to be quite small (Arduino shield size or a little bigger). With small boards like this OSHPark is usually on-par or cheaper than ordering from Seeed (whose minimum quantity is 10 boards). With boards of about 100x100mm or larger I consider Seeed as they become significantly cheaper.
As a hobbyist I also rarely need huge numbers of boards, but for workshops when I need 10 or 20 boards I order from Seeed based on the final iteration of my prototypes. This is not only much cheaper than OSHPark, but I can get boards in a variety of colors to make workshops more interesting too.
This post has described some of the available options and my personal process. I hope it’s been interesting, but I’d love to hear about your favorite fabrication techniques, services and experiences both good and bad too. Please comment below!
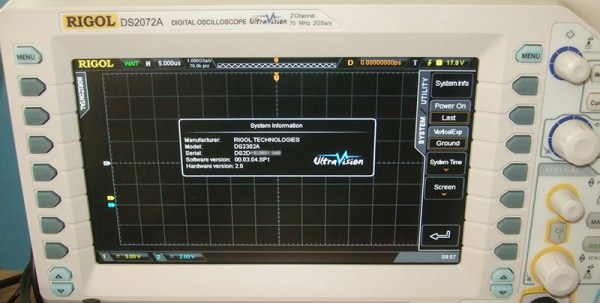
[mosaicmerc] over on hackaday.io has upgraded his Rigol DS2072A oscilloscope to a DS2302A, turning an $800 oscilloscope into one that sells for $2500, with all the bandwidth, storage depth, and options of the more expensive model.
Rigol o-scopes have a long and storied history of unlocking, hacking, and upgrading. The original hack that put Rigol on the map was the DS1052E upgrade that turned a 50MHz scope into a 100MHz scope. The latest low-end Rigol scope, the 1054Z can be unlocked in software to become an 1104Z with 100MHz of bandwidth, SPI, I2C, and RS232 decoders, twice the storage depth, and more triggers. It appears Rigol’s engineers are designing their products to capitalize on the hacker’s proclivity to buy their tools to get the ‘free’ upgrade. This, of course, sounds just slightly insane, but no one seems to mind.
The process of upgrading the Rigol DS2072A scope is documented over on the EEVBlog, and requires only a USB cable and a computer with the Labview Runtime Engine installed. It’s literally as simple as pressing a few buttons; a far cry from the previous keygen method that was also engineered over on the EEVBlog.