
You don’t need any fancy tools. A CNC machine is nice. A 3D printer can help. Laser cutters are just great. However, when it comes to actually making something, none of this is exactly necessary. With a basic set of hand tools and a few simple power tools, most of which can be picked up for a pittance, many things of surprising complexity, precision, and quality can be made.
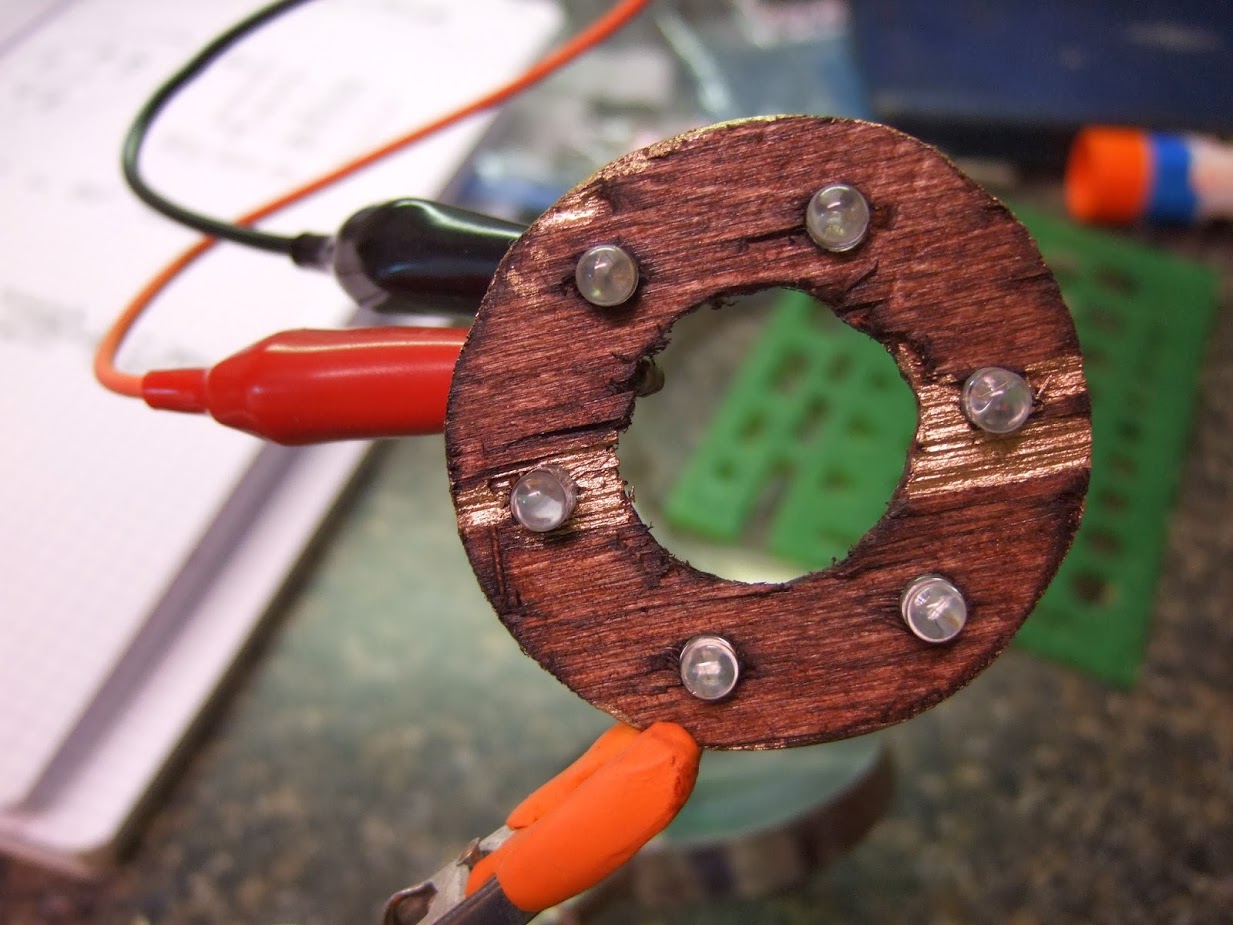
A while back I was working on a ring light for my 3D printer. I already had a collection of LEDs, as all hackers are weak for a five-dollar assortment box. So I got on my CAD software of choice and modeled out a ring that I was going to laser cut out of plywood. It would have holes for each of the LEDs. To get a file ready for laser cutting ook around ten minutes. I started to get ready to leave the house and do the ten minute drive to the hackerspace, the ten minutes firing up and using the laser cutter (assuming it wasn’t occupied) and the drive back. It suddenly occurred to me that I was being very silly. I pulled out a sheet of plywood. Drew three circles on it with a compass and subdivided the circle. Under ten minutes of work with basic layout tools, a power drill, and a coping saw and I had the part. This was versus the 40 minutes it would have taken me to fire up the laser cutter.
A lot of the tools we use today were made to win against economies of scale. However, we’re often not doing any of that. We’re building one or two. Often the sheer set-up cost isn’t worth it. Likewise, the skill from being able to do it without the machine will come in handy. There’s an art to using a file properly and getting the expected result. So it’s good to take the time now to practice and develop the manual skills, you never know when you’ll be out trying to do an emergency fit on a part and no one in the area has a single milling machine just sitting around.
So what tools would a hacker need to get the closest to a machine shop without having one or spending too much money? For most needs a person can build a surprising amount of things with nothing more than the following tools.
Basic Metrology: Now if you really want to do precision work you may need more expensive tools, but often we are just spoiled by precision. We can design our parts with a little more wiggle room and just spend the time adjusting them.
- Calipers – Since they are so cheap now, there is no reason not to own a simple digital or dial caliper. For most work this will be able to measure most things well enough for all practical purposes. Honestly if you’re building something that needs a full metrology suite you’re probably making it hard on yourself. This even goes for production work.
- Rule – Not a ruler. A steel rule. This will have a ground flat edge and precise graduations. You can use this for layout.
Chris over at Clickspring is always using the glued paper trick to do some very accurate work. - Square – A carpenter’s combination square can be used for a lot of layout. It’s not as fantastically precise as a real machinists square, but I’ve yet to ever actually need the precision of a real machinist’s square for every day hacking.
- Compass & Protractor – To be able to layout circles and angles is key. Buy a robust one rather than a nice one. The kind for school children is pretty good.
- Scribe and Punch- Pencil and Permanent Marker- In lieu of layout fluid a permanent marker is enough to bring out scribed lines on metal. A pencil is great for the rest of the materials. Lastly a punch is essential for drilling holes.
- Glue stick – With CAD software as amazing and free as it is there’s no reason not to just print out a template and glue it to your part. Contact cement or a simple glue stick is all you need

Working: Next comes working the material itself. Hand working typically happens in two steps. Bulk removal and fine removal. To do the first you need good layout and a bit of experience. To do the second you need even better layout, a godlike amount of patience, a strong back (or a workbench at the right height) and a way to hold the part firmly.
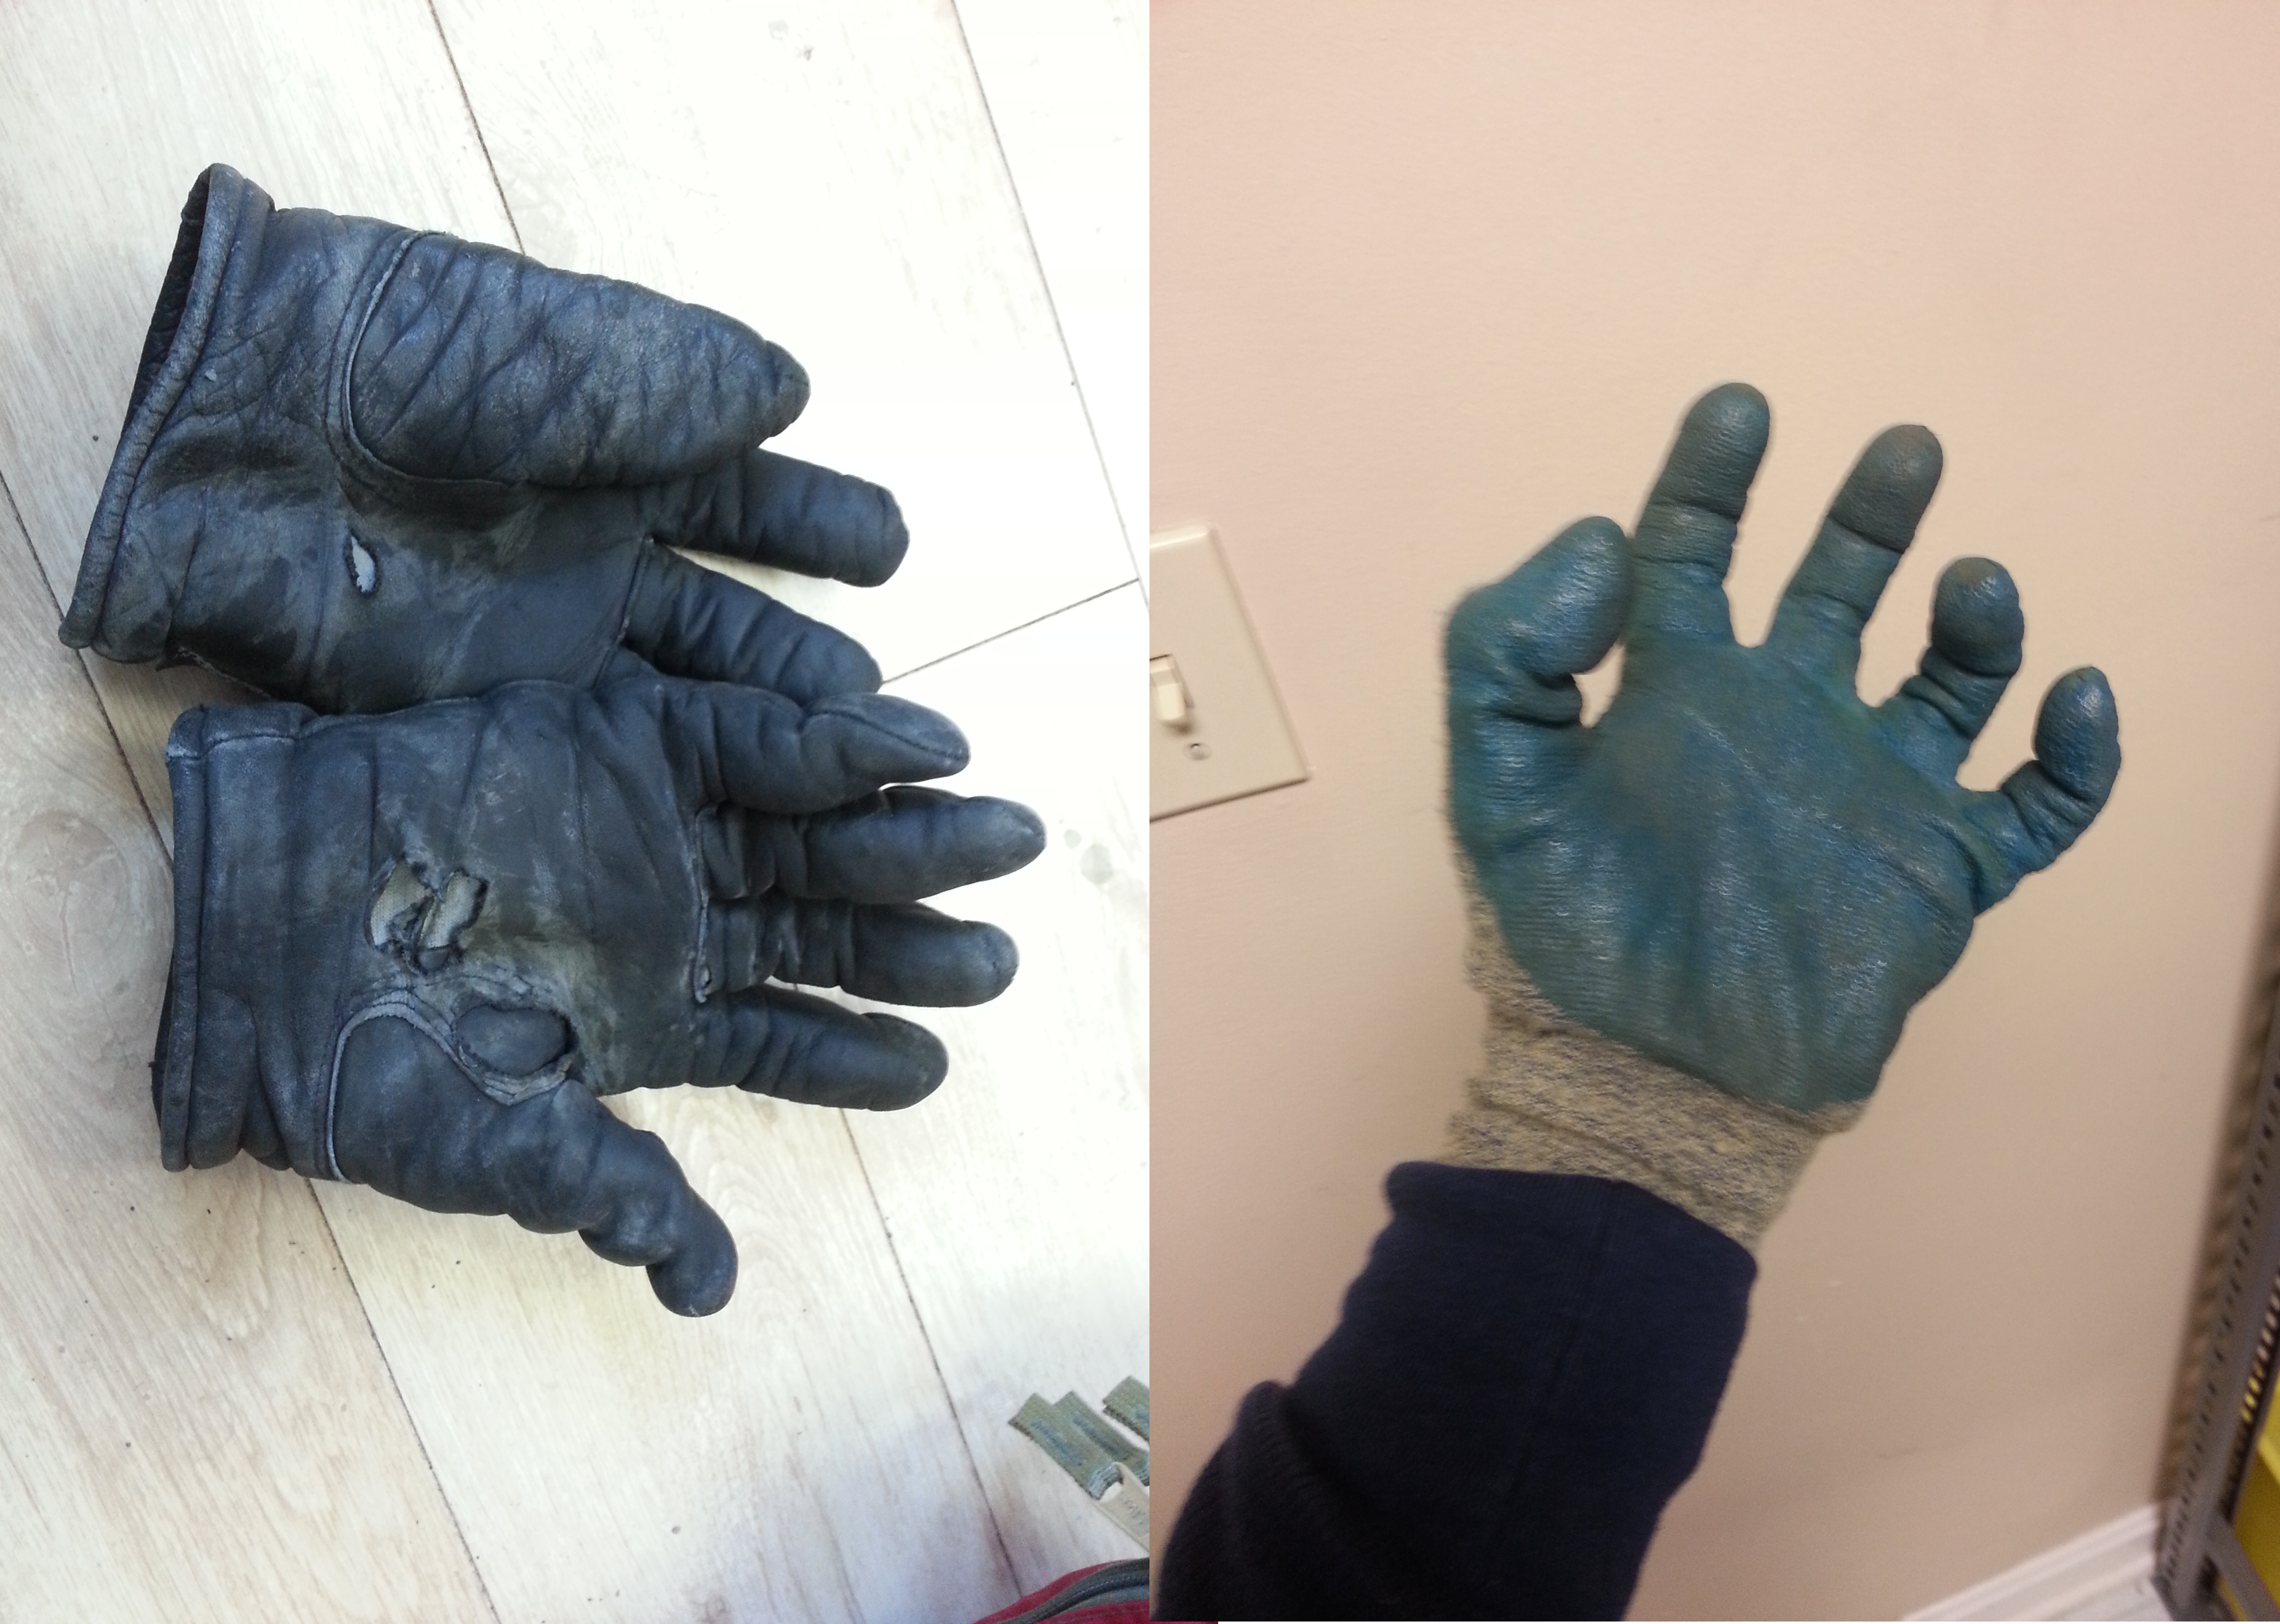
- Stubby Knife (and cut proof gloves) – A knife that lets you get your fingers close to the work, such as an exacto blade or a utility knife. That being said I’m lucky to still have digits with full working ranges. It doesn’t matter how careful you are, it is statistically impossible to not eventually cut yourself with a knife. It then comes down to how damaging that cut will be. Most will hit the flesh of the hand and be relatively harmless, just painful. However, if you hit a tendon say goodbye to full range of motion forever and hello to surgery and picking up an instrument (source: Grew up with an occupational therapist as a parent, that’ll scare the gloves on ya). To that end I highly recommend a good set of kevlar cut-proof gloves. My absolute favorite is the Ansell Blue Nitrile Coated Kevlar HyFlex glove. They’re pricey but they last forever (I would go through five sets of leather gloves in the time it took me to start to see wear on the HyFlex) and give practically normal range of motion and feel for the work.
- Big File – A coarse bastard file is a must have. If you can only afford one get one with a flat side and a round side. It will be a little difficult not to cut into right angles, but a bit of masking tape or a section of plastic can help with this. Also, the traditional brands like Nicholson can no longer be trusted, do some research before paying more than five bucks for a regular file these days. Only a few brands deliver a long-lasting file. Lastly, watch a few videos on the proper use of a file. If you do it right they’ll cut fast and last a long time.
- Round File – A round file is useful for a staggering amount of things, but mostly for fitting holes and shaping radii.
- Little Files – I recommend spending a bit on a nice quality set. One small round, small triangle, and small-D shaped file is a good start. I’d also recommend a small flat file with a safe side for sharpening corners.
- Japanese Pull Saw – Wood is a great prototyping material and there is no better saw for general woodworking than a Japanese pull saw. If you want to get deeper into the craft then there is a reason for the other saws, but general joints, shaping, etc can be done quickly and precisely with the saw.
- Hacksaw – A hacksaw can cut through any material as long as you buy the right blade and are willing to sweat. A good hacksaw frame can put a lot of tension on a blade without a lot of added bulk. If it has both a lever action and a thumb screw it is likely to be able to do this. A good hacksaw blade is almost never sold with the frame.

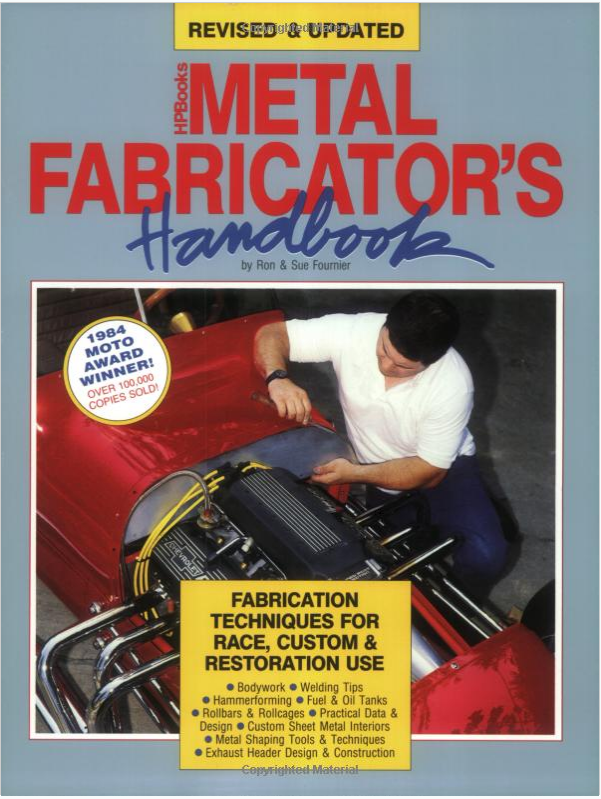
The metal fabricator’s handbook will blow your mind if you’ve ever wondered how people made armor or hot-rods. It’s hard, but technically simple. - Coping Saw – Think of a coping saw as a manual laser cutter. There are some nice ones out there, but the blade is the important thing to buy. Weirdly they are getting harder to find these days. I think less people are using them but no shop should be without a coping saw.
- Plier Set – A set of pliers. Needle Nose, End Cutters, Side Cutters, and Lineman’s is a good place to start.
- Tongs – I define a tong as any plier that you’re going to heat up. Keep this one separate from your regular pliers. It’s also good for holding something while you beat on it with a hammer. You’ll probably break it eventually.
- Clamp or Vise – No shop should be without some way of holding a piece firmly. This is one of your most important tools. Really high quality ones usually show up at garage sales or Craigslist; sold by ignorant family members. Look for one that has nice thick jaws and a flat area on the back.
- Hammer and Scrap Wood – You’d be amazed at the shapes a person can draw out of regular sheet stock with a hammer and scrap wood. This is a must have for the shop. A regular claw hammer and a ball peen are an absolute necessity.
Modern Day Luxuries: There’s no need to stay completely manual though. With Horrible Freight right around the corner or slightly better alternatives for a premium at the home improvement shop there’s no need to to have a few modern luxuries.
- Dremel – A cheap rotary tool will make quick work of a lot of shaping tasks. Definitely saves time and there are some things that can’t be done economically without one. Also good for feeding an endless stream of cutting disks into to cut sheet stock without deforming it. Saves time on polishing too if you want to get fancy. Have to be careful not to waste too much time setting-up and forcing this tool to do the work. It’s often considerably underpowered compared to some sweat and hand files.
- Power Drill and Bits – There is absolutely no reason not to have a decent power drill these days. Get a corded one if you can’t swing the money for a nicer model cordless. This will drill holes, sand, and occasionally act as a shitty lathe. Especially handy if you just want to bring something round into a tolerance for some sort of fit. Get a decent set of drill bits unless you hate yourself. I bought a 30 dollar set with decent coatings and have been replacing the individual bits with their higher quality counterparts as I burn through them. I’m currently on my third 1/8th inch bit.

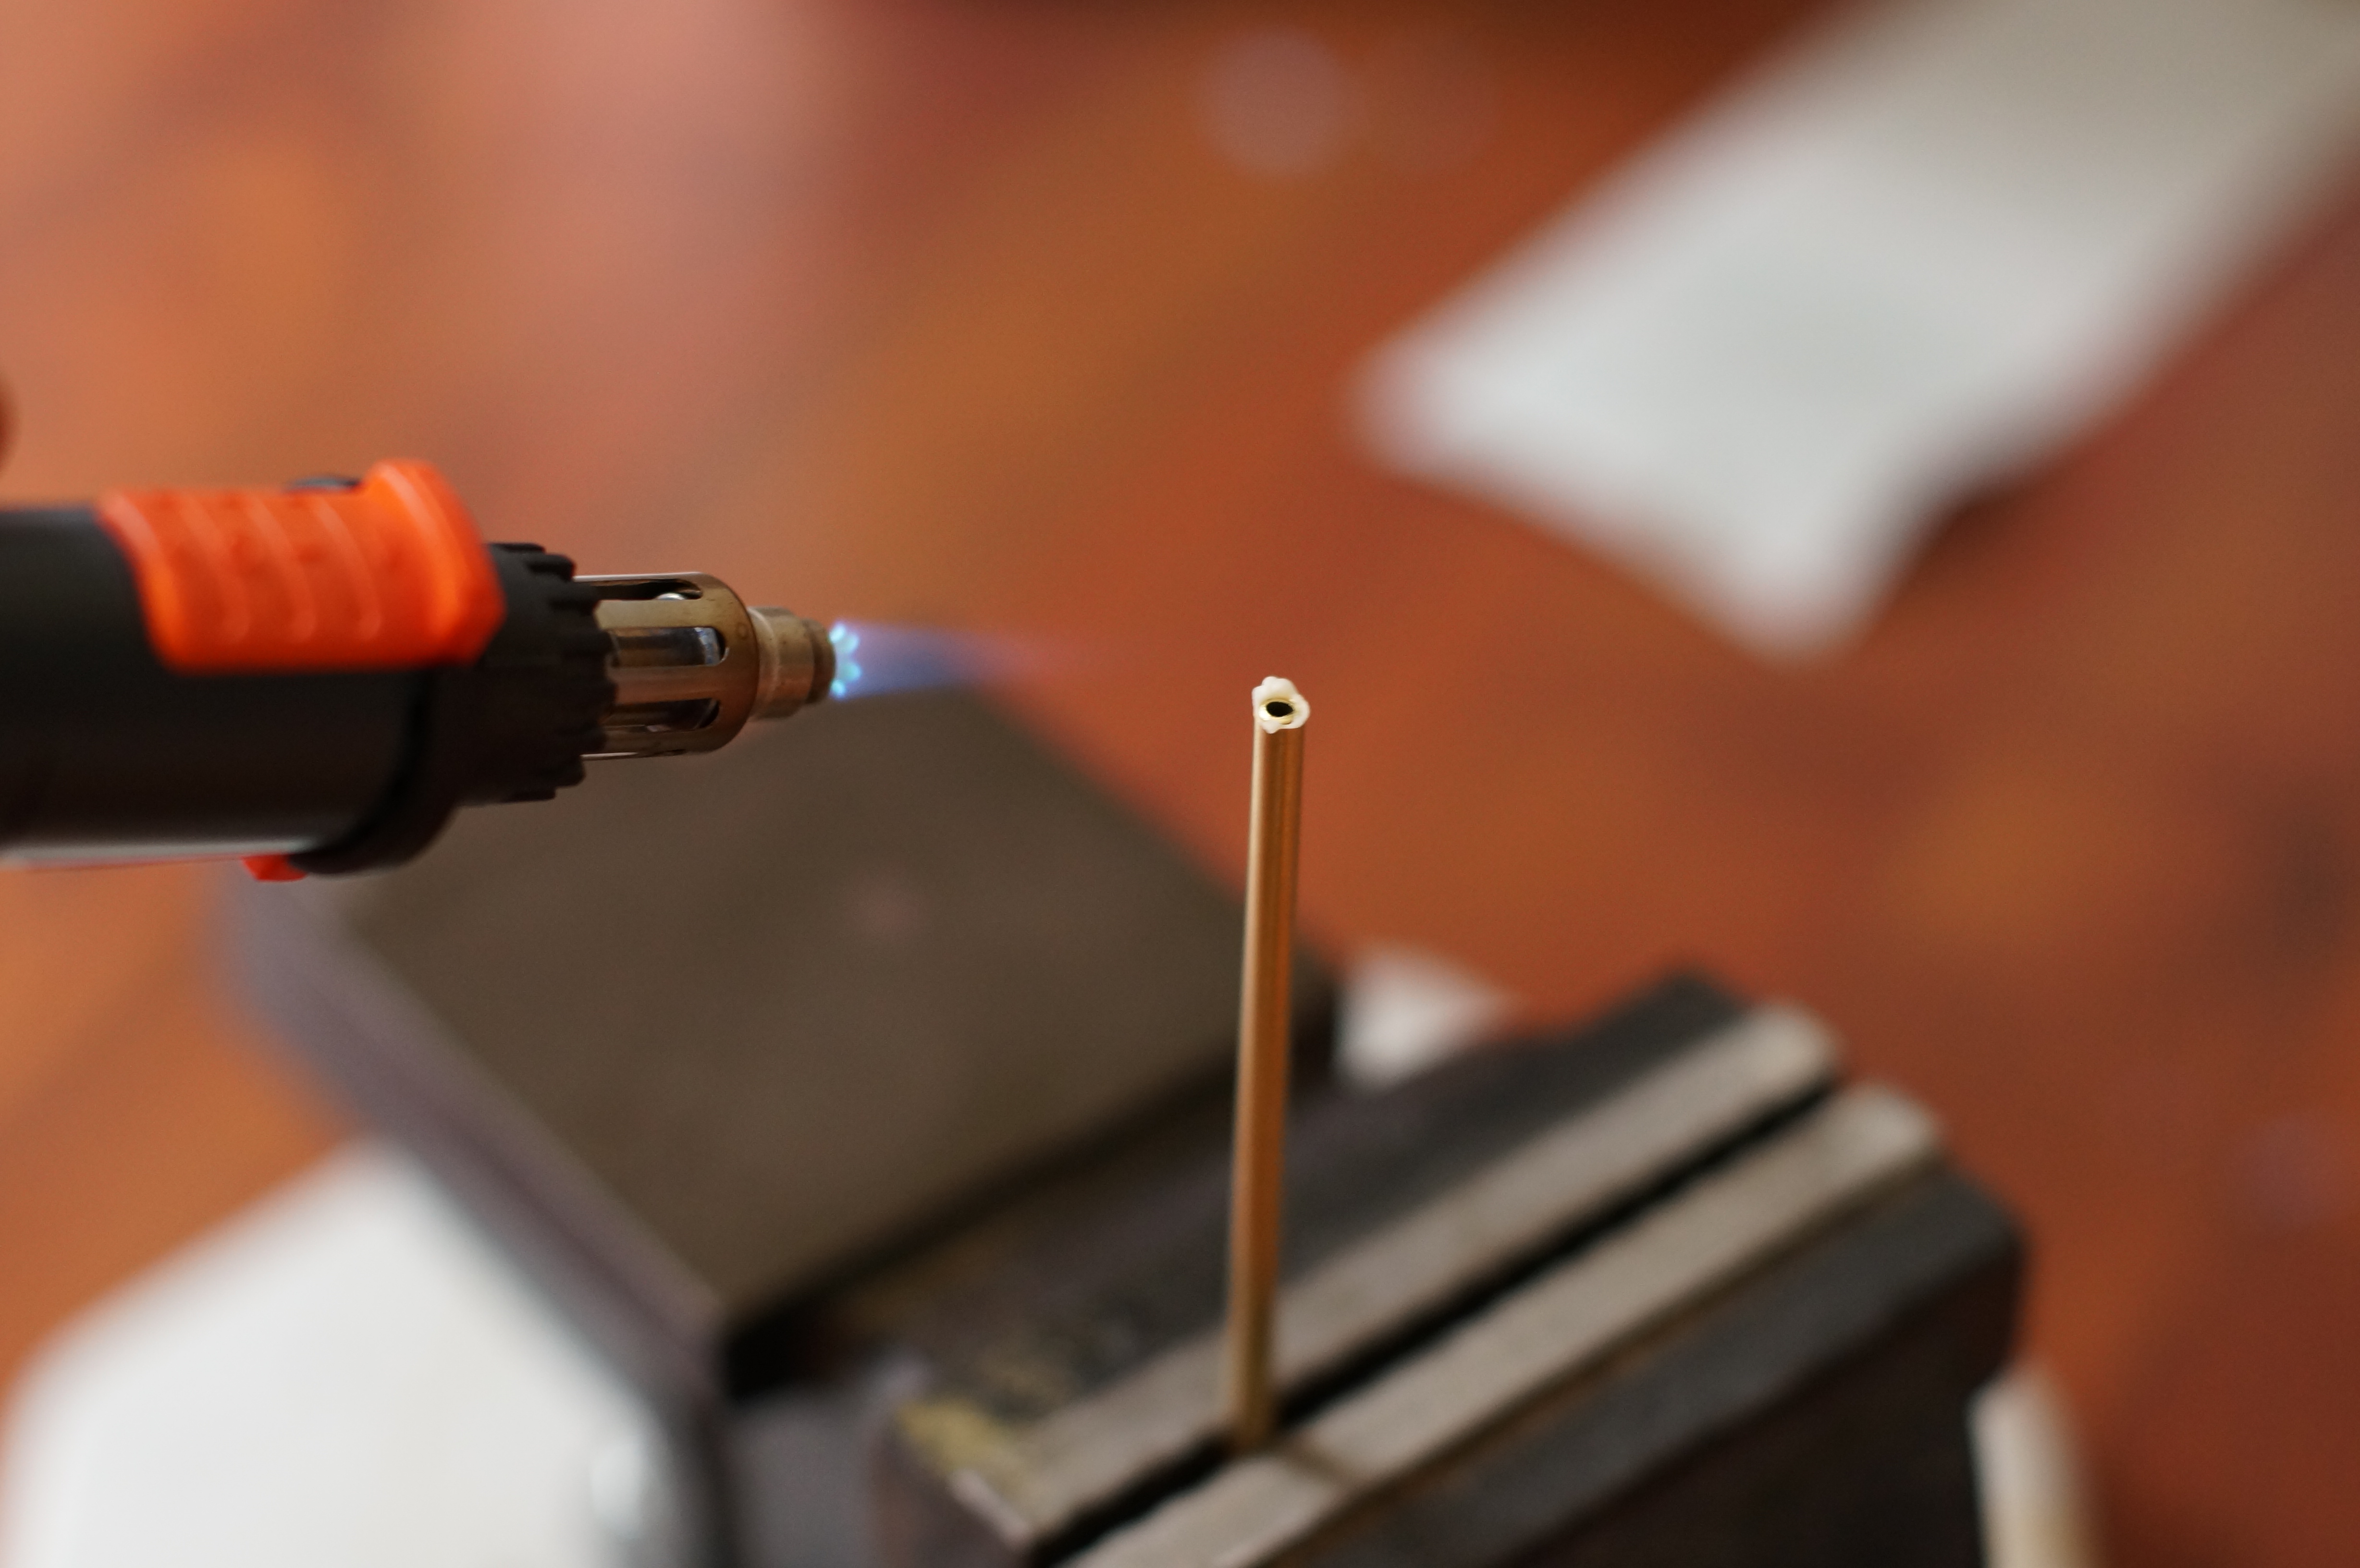
Let’s be honest. The hobby of 3D printing doesn’t really save any time. - Pencil Torch – Lastly a good quality torch or pencil torch does wonders. I burned through a few cheaper torches before I finally dropped a hundred dollars on a good quality Portasol. With a torch one can heat treat metals, solder, braze, and more. A person can cut plastics, weld plastics, and shrink heat shrink. It’s an essential tool.
For the rest I wouldn’t go nuts. I’d file them under, “buy as you need”. Of course there are things like screwdrivers etc. but this was intended for shaping operations, not general repair. I would recommend buying, not a tap and die set exactly, but picking a size of fastener (in my case, M3, M6, and M8) and buying the tap, die, and drill set for those.
In the end most prototyping, even today, ends up with a hacker having to still do some 19th century work to get it to fit. However, if you’ve ever seen a real watchmaker at work, you’ll know just how ridiculously far you can get on knowledge of metal backed up by skill with a file.
https://www.youtube.com/watch?v=QL35SAwDB6U
I know there are a lot of you out there with more and similar experience than I have with this sort of thing. At what point do you resort to modern tools? Any tasks that you found went faster the old-fashioned way? Any tools that I missed? Hand work isn’t a fading skill by any measure, but it’s easy to forget about it with 3D printers as cheap as they are. However, for any technical person it adds instant worth and a far deeper understanding of design and fabrication if you can do it by hand.


While traveling in India in the Eighties, I saw several instances where parts for small motors (mopeds, motorcycles, gas power tools) were fabricated by hand with little more than a file and the broken component as the example. I wouldn’t hazard a guess as to what sort of MTBF these replacement components enjoyed, but they must have done the job for a while, because it was quite common to see this being done.
A hacksaw is great, but my 3rd power tool would be an HF angle grinder. It is definitely a rough cut tool but the time savings is huge on any structural scale metal work. Also you forgot the Visegrips and the bar clamps for holding things together/in place while you fit them. You mentioned screwdrivers, but a socket set is also key. More tools are always better, but you have a good start there.
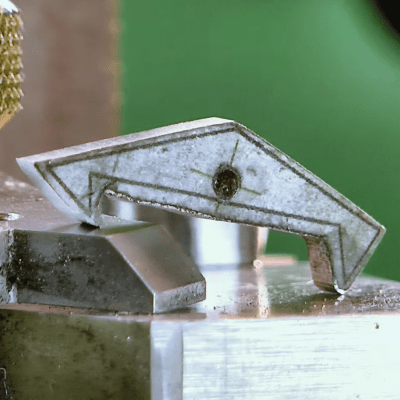
An angle grinder is also almost a precision tool. Some simple wooden jig and you have semi CNC capabilities. Likewise a drill in a vice and some tool rest, you can turn metal by hand. Either way you have to stop and measure every ten seconds or less, as you don’t have any dials, but the precision you can achieve is comparable to that of a machine shop. Likewise machineshop quality straight edges and flat surfaces are also achievable only with hand tools and improvised measurement tools. Only downside is time: A small precision part that has to fit to 1/100 mm takes hours even days to make sometimes.
The vibration and slop in the bearings of a regular drill won’t let you do “machine shop quality” work.
not all drills have plain bearings and can actually be adjusted. Finishing is with a small grinding stone just held to the axle with two fingers 1/20 of a thousands of a mm tolerance bearing shoulder bushing made this way. Took me 4 days to make four, went into a turbocharger jet engine, 120krpm, no vibrations.
A good angle grinder is a high precision tool. Even an HF unit can do good work. Somewhere in my files, I have a copy of a cert for grinding flat within 0.005″ (0.12mm, roughly) over a fairly large area, with a 4-1/2″ angle grinder for steamtight seats (with metallic gasket). I absolutely agree that it is a basic tool, as it can also be used for snagging, roughing, and sharpening (preferably with at least a minimal fixture to hold it)
The HF grinders are really nice for the casual (a few hours a month) grinding needs. Undoubtedly you’d ruin them with industrial all day grinding, but for the homegamer, really nice. Low vibration, high power, light, well-enough-made… I’m almost upset by it, I had a single day grinding job so I bought one and now I can’t get it to die. I honestly don’t even know if I’d buy a more expensive model if I did kill it at this point…Plus, my local hackerspace used them in the welding area for years, no issues even with the infestation of 300lb gorillas (myself included). Buy the name brand grinding discs and flap wheels though.
One thing that can be done cheaply to improve cheap angle grinders is replace the ball bearing on the output shaft with a higher quality one. Put a disc on and try to tilt it and move it radially (sideways). If you can, upgrade the bearing.
Most of those cheapies will only have a sleeve bearing for the top end of the output shaft. Some of them will have it slipping out of its hole in the housing. A few gentle hits around the outside with a center punch (with the bearing on its shaft) will rough it up enough for it to stay put. Check for closeness of fit on the shaft. If it’s loose and wobbly find a closer tolerance one.
You’ll still be in for far less $ than a name brand angle grinder and the cheap one with bearing upgrades will last longer than it would stock.
How about hacking it to have a ball bearing on the top end of the output shaft?
What if I’m already a coarse bastard? Do I need to buy another one?
A second one will mean you can stop rubbing your face against the part…
Face? Oh… I think he has been doing it wrong.
Realizing that most are brittle, they are prone to snapping under a little bit of lateral pressure. A spare is good. ;)
I would suggest with most these tools that a set of safety glasses is a must.
Personally I even wear a set of lightweight glasses for soldering, especially after reading on here about the guy who accidentally soldered his eye (not pretty!).
Ever since learning about how copper will destroy your retina’s in my intro to electronics class I do not do any circuit work that involves cutting or soldering without glasses. The stories of people losing vision weeks later from copper poisoned eyes will stick with me a while I think.
please provide a link! I’ve soldered since I was 10 – 36 years tears in my eyes because of smoke from burning flux and grinding Copper with all possible means. I don’t think my retina ever been hurt by that. My Cornea has taken multiple hits however from chemicals and swarf from rotating tools.
The risk is mostly from snipping small pieces of copper and having a chunk enter the eye. You then itch it not realizing that this happened. The piece of copper travels to the back of your eye where I do not think you have many pain receptors. It then can dissolve and cause damage.
Anyway, here is a link for you: https://books.google.com/books?id=srh9bd0rx9oC&pg=PA381&lpg=PA381&dq=copper+retinal+toxicity&source=bl&ots=LKUj78wPBk&sig=RiZy5COEn6hh9CSiz430lm-7mTU&hl=en&sa=X&ved=0ahUKEwjFnrCuyOzPAhVJ74MKHdsjCh8Q6AEIUTAI#v=onepage&q=copper%20retinal%20toxicity&f=false
My grandpa lost sight for several weeks because he was machining without safety glasses. Bit of metal got into his eye and didnt remeber it the next day, thought his corneas were degrading or detaching or whatever happens to you when you get old. He got seriously upset as he is a painter as well but finally went to the doc and had the shard out, his vision recovered almost immediately but now he wears glasses. Only 60 years late!
Thanks, I didn’t know that.
Great summary of the most needed tools, I fully agree! One thing (especially when the first power tools come into play) is missing though – protective glasses. But I guess everyone learns eventually, after removing a chip of aluminium or steel from the eye.
Above that level .. a drill press increases the workshop possibilities remarkably, even one for small rotary tools. At least when it is not the terrible plastic-made one from dremel.
This is our number one rule when we work (my sons and I). Safety glasses (and hearing protection when required) are mandatory for being anywhere near the shop while it’s in operation.
Also, we have another maxim for safety:
The best ways to avoid an accident are:
#1 – Not be there when it happens
#2 – Fix it beforehand so it doesn’t happen
It is amazing how many disasters can be avoided with these two simple provisos.
Anything in the market for small / accurate / portable / sufficiently powerful drill presses?
I’ve been really happy with my cheap-ass Skill drill press. It makes holes when I need ’em – not much more to say than that. Stage sucks, but it gets close enough. Get a set of clamps to clamp work down and “percussively adjust” the placement.
Small/accurate drill press: For dremel owners no idea what is good – but when you have a proxxon (they make dremels look lame anyway ;) ), search on amaz0n for the micromot drill stand .. I have one and they are great for precise small drilling jobs. Does not replace a decent larger drill press, of course.
The cheapo hold-your-drill drill presses are ok, but they have too much lateral play in the mechanism, and it will drive you nuts if you’re trying to drill a lot of small holes with precision. I was lucky enough to find a demo bench-mount 1/2″ drill press for half-price, and it’s an order of magnitude nicer to use, and also has much less play.
I’d add in a familiarity with wedges, bench hooks, and bench dogs (even just scrap temporarily screwed to the workbench) or even buying a couple wood working hold fasts for clamping needs. It’s amazing the amount of force these simple devices can exert on the work.
Tubal Cain once said something like: “Nowadays people dismiss many projects as impossible just because some specialized power tool or the other is not available”. He has seen some steam engines with slightly oval cylinders and pistons working just fine. A file and a square can do wonders.
Everyone will probably throw in “the thing you missed”, though it’s already a great start.
Here’s mine: A heat gun – one of those things that looks like a hair dryer but can cook a pizza (don’t ask). I use these to hand shape plastic/cook off adhesive bonds/peel paint/preheat metal all the time. It’s the thing you reach for before the blue wrench comes out.
With a bit of clever ductwork/metal box etc. you then have a general heat source or oven as required, and can even warm up a moderately cold garage if left running someplace safe for a while. $15 – 20 or so and no regrets.
Optical punch. Together with laser printer required to print the template allows everyone to manufacture parts with 0.05 mm accuracy.
I was stationed on Okinawa in the late ’70’s and purchased a set of ‘jeweler’s’ files made by Hozan (p/n K-155). Still have them and they are the best $8 I ever spent. Not so cheap now, (Ebay, for less than $40) but still worth it.
Not so far off! http://data.bls.gov/cgi-bin/cpicalc.pl?cost1=8.00&year1=1978&year2=2016 Maybe we should move to the Japanese Jeweler’s File standard for currency :P
I have a set of Swiss cut needle files, they’re some of the best tools to have when you need them. I’ve used them to make many, many, many keys. Some were lost, and one was for a car that the previous owner just couldn’t find.
Great article, i just wanted to add for anyone who is unaware: Gloves are great when you are handling material or using hand tools, but take them off before you use any power tools. Mixing power tools and gloves is a great way to lose a finger (or two).
+1
Nitrile/latex gloves for working with drills and sometimes grinding wheels. I’ve had a leather glove catch; very glad I hit the power switch.
Even latex gloves can be a hazard, the extra grip of the rubber can pull your hand into places it might not have otherwise gone.
That is good general advice, but there are times gloves are needed for protection. An angle grinder is one. The guide I use with students is: what prevents the glove from being caught and your hand being pulled in vs. what is the glove protecting you from.
With an angle grinder, the glove is protecting you from sparks, chips, grit, and a failed wheel. There is a guard (unless you are an idiot) between your hand and the moving part, the wheel is unlikely to grab the glove (unlike a pedestal or bench grinder with a rest), and two hands are tied to the tool for control (body/switch and side handle) in most cases. Risk is the wheel catching on the work and kicking into your hand or arm. Gauntlet gloves protect here with minimal risk.
On the drill press, the bit will snag and not let go, you are not actively holding the switch to keep it powered, your hands may need to be close to the moving parts in operation, it doesn’t throw chips or sparks you need protection from, the chips may be long and stringy and sharp enough to macerate anything but a chainmaille glove, there it little risk of a snag or kick (if the work is properly held in a vise or clamp, or properly braced against the column or a stop). Therefore: no gloves, as gloves increase the risk of being snagged by the tool or long swarf.
In either case, NEVER use thin latex of nitrile (or similar) gloves for physical hazards. They are only for chemical (liquid, primarily) hazard, as they will catch on moving parts much more readily than leather, kevlar, or other heavy material will.
I *never* wear gloves for metal working because I never hold the metal that I am working on. If I am hack-sawing then the metal is in a bench vice, for drilling it’s in a drill press vice bolted to the drill press platform, for TCT cutting it’s in the vice built into the cut-off saw. I do wear eye protection for practically everything.
I never wear gloves at the lathe because I’ve had a pair get caught on the work and start reeling me in. I totally agree with the drill press vice, it makes working so much easier. Even holding work on the drill press by hand I’ve never had a problem (except producing triangular holes in sheet metal) because I have learned to go for a light cut when the drill breaks out. I always advise newbies not to ever drill big holes in sheet metal though (which is roughly defined as drill diameter >= thickness of material) because I don’t want to see the drill press promptly turn into a table saw.
I’d love to see a breakdown of techniques for each tool listed to tackle different shaping needs. How to pick that elusive ‘right’ blade for hack / coping saws.
The rule is – a minimum of three teeth across the cutting vector and more teeth for harder materials. So 18TPI is good for plastic or plastic conduit, and 32TPI is best for aluminium / steel. 18TPI is rough cutting at a speed, 32TPI is fine cutting that is slower but more accurate especially before finishing with a file.
Just a note about the “cut-proof gloves”, they are not cut-proof…the will save you from a glancing blow, but a bad slip will cut them and you can stab right through them (voice of experience).
One more thing about gloves, NEVER WEAR THEM WHILE USING ANY ROTATING EQUIPMENT! All it takes is a single piece of swarf to catch them and your hand will be sucked into the chuck/spindle instantly. You will not be able to stop the motor in time and you will be injured, think losing fingers before you could make a sound. If the part is too hot or sharp to hold, use a vise; you should be anyway, but we’re all guilty of not using a vise when we should.
+1
Gloves are for heat protection and chemical protection. Any other use is just a false sense of security in doing things the wrong way when you should be using something else like a vice.
I thought they were devices to spread a noxious fluid evenly over the whole hand from the smallest nick by capillary action and surface tension.
LOL, I have those ultra thin latex type gloves here but I don’t use them often. I do use them for etching. I also have thick leather gloves for gardening which I should use more often. A week or two ago I tried to lop off the end of a finger with secateurs so that would have been a good time to wear them.
Most of my power tools are the sort of tools that you must be careful with because I predominantly work with metal mostly Aluminium but sometimes plastic project boxes as well. I have a 14″ 120 tooth tungsten carbide-tipped cut off saw for aluminium extrusion cutting, a drill press, plain, circular wood saw, angle grinder, small abrasive circular cutter and much larger bench top abrasive cutter. Gloves don’t add any protection for these tools so I have a collection of vices and clamps.
For a complete education in getting stuff done with simple hand and power tools, google “Popular Mechanics Shop Notes” published yearly from 1905, most in the public domain now. Most issues are different with the odd repeat article here and there.
And for those that don’t know… “Popular Mechanics”, “Popular Science”, “Mechanix Illustrated” and “Science and Mechanics” up to 1970 were Make magazine before it was cool. Gradual decline through to the 80s with the odd good article still until they descended into the “here’s the latest shit to buy” format. Many years of Popular Mechanics available on google books. Also, old editions of Model Engineer and such have some great articles… I mean you might not want to build an exact scale working replica of a Gresley Pacific, but just see how they make the parts is often quite an education in what can be done in a small shop.
They were rather good in their day, but I really didn’t like the faintly condescending, “Written so you can understand it” tagline PopSci used to have on their cover.
The video. That really would have been easier just using a 555.
Great video but I wasn’t able to open through the HAD posted link.
Just like the person that opens up Word to make a note and clicks print, runs to the printer and hands you the note on a whole piece of paper.
There’s a pen and the wastebasket is full of paper.
Good advice. Gonna print that out and post it up ;-)
Check hacksaw blades for “Strokes per minute” printed on the blade, which is a maximum. Stay under this (or use a coolant) and the blades will last for ages. It takes some practice to hold yourself under 30 per minute. In the long run, you will cut faster.
It’s a good day when you realize that you’ve been sweating for no reason. Tighten the hacksaw blade. Tighten it again. Put gentle pressure on it and cut like you have nowhere important to be. It goes through the material much faster.
Jewelry and model making suppliers/shops are great sources for some things. For example coping saws and blades, and tiny files, like diamond coated ones. Also tiny drill bits, small power tools, calipers, magnifiers, vises, glues, silicones, resins. So in case the normal suppliers stopped carrying an item, think about alternative sources like those, just try to find the industrial one instead of the small shop (due to prices mostly).
are those O.J.’s gloves?
With the anvil spot on a bench vise and a ball peen hammer you can do some sheet metal shaping. One time I needed to make a compound curved patch for a broken plastic shroud on an electric cooling fan. So I just clamped a Vise Grip on a random piece of galvanized sheet steel and started whacking on it with a hammer, using the ball end to stretch and curve it.
Got it to fit snugly to the area around the missing chunk. Clamped it in place, drilled a few 1/8″ holes then put in some pop rivets from the inside so they gripped into the metal. Finished off with a spritz of black paint.
Polymorph is my favourite material for small parts and repairs.A lot of things that I see 3D printed etc could be made in a couple of minutes.Maybe not so pretty but functional.
Yes! I’ve been loving playing with that stuff. Crazy how fast you can crank out a plastic part when needed.
Thanks for the tip!
https://en.wikipedia.org/wiki/Polycaprolactone#Hobbyist_and_prototyping
(Several brands and more info.)
Keep a few sets of cheap drill bits around too. If you’re doing a lot of work with a handheld drill you’re going to break and dull them, especialy 1/8 and smaller. Use the sacrificial bits outside of the press and expect to break or wear out whichever one you’re going to use the most in a given project, save the good ones for the press and lighter work.
Yeah, 1/8 and below you may as well buy by the 10 pack.
I only partially agree with you on this one. I’ve found dropping the extra on the slightly more expensive 1/8th bit (a nice domestically made and coated one) is at least 80% worth it. Excepting when you’re gonna be cutting abrasive stuff like fiberglass. It just makes everything more pleasant than smoking a fifteen cent drill bit through your material. They last awhile longer too.
The smaller sizes tend to be fragile so it’s always a good idea to kept a few spares on hand.
A good list. Thanks for reminding us that CNC is not the only way – especially good for those us trying to use lack of cash as an excuse :P
This was actually the most troubling realization I had when I finally came to admit this. There were so many projects I passed up waiting for a tool. How embarrassing. Heck you can etch circuit boards using drain cleaner and a sharpie. http://www.instructables.com/id/Stop-using-Ferric-Chloride-etchant!–A-better-etc/ (Not a chemist, so if you die following this tutorial I did not reccommend it.)
I have a lifetime’s worth of hand tools so you’re preaching to the converted. Kind of nice to have a decent workbenchbench and just about all the tools to do most nasic things.
One tip I’ll share – a marine electrician friend tirned me onto how fast you can remove material with a Dremel and their little sanding drums. It feels at least twice as fast as using a coarse file in plastics or wood.
But I am tempted to mess with some CNC because it’s just cool.
“Every tool has a use…”
People mentioned GLOVES are BAD.
Incorrect. Gloves are GREAT for CLEANING… AFTER Machining operations. Hot Rolled, Cold Roll and ANY type of Alloy swarf, chaff & chips. (Non-ferrous and otherwise minus toxic or radio active materials).
Leather, Mechanics or Kevlar gloves are invaluable for when you don’t want to lug out the shop vac.
If it doesn’t fit, you must acquit.
[youtube]ssQv2jTM2pI[/youtube]
if you have already have the skill set of making things just by manually. Imagine what you can do if you have the advance machines that you can use. that would be awesome!
Thanks for explaining the difference between bulk and fine removal when it comes to machining. It would make sense to find a shop that understands the difference between these two to help you out. My husband and I are looking for a machining shop, so we’ll have to find someone who is experienced.
Now people are more advanced and they prefer to take onsite machining or fabrication services to get the job done quickly and without any issue. Remote machining work is carried out with the help of mobile tools or shop that can move any time and in any situation or anywhere for their clients. Experts can repair, maintain heavy machines, make their part and perform other techniques for different jobs remotely. Thanks for sharing this useful info with us!
Thanks for making it clear that a real machinist’s square for everyday hacking isn’t really needed. I was told to try out custom machining. It’d be nice to get the right parts for it but I’ll see what I don’t need to use the real machinist’s square.
Something that won’t fit in your toolbox: a solid workbench or worktable. It needn’t be large. Make it as stable as possible, then brace it some more. Any movement while you’re sawing can ruin a job. A granite kitchen counter works well.
Vises need to be stable too. The movable jaw shouldn’t ride up when clamped & the jaws should be as parallel as possible. Most bench vises aren’t very good. As mentioned above, good vises can be -very- expensive if bought new. They can be worth every penny when doing accurate work.
Something to watch for if you’re printing a template: many printers do not print 1:1 scale. They can be off as much as 10%. The errors can change with different paper stock. Horizontal and vertical scales can differ. Print a test page with a grid covering the page & measure carefully. Then you can compensate for any scale error. This check is essential when printing a PCB mask.
Wiha brand hand tools are very well made and last. I have a small screwdriver/hex/spline set which fits screws precisely which makes it easy to loosen or tighten very stubborn ones.