Printing Yoda Heads: Re-Makers Riffing!

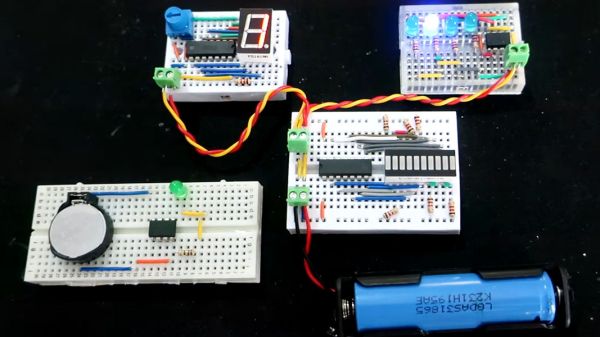
We had a comment recently from a nasty little troll (gasp! on the Internet!). The claim was that most makers are really just “copiers” because they’re not doing original work, whatever that would mean, but instead just re-making projects that other people have already done. People who print other peoples’ 3D models, or use other peoples’ hardware or software modules are necessarily not being creative. Debunking a cheap troll isn’t enough because, on deeper reflection, I’m guilty of the same generic sentiment; that feeling that copying other people’s work isn’t as worthy as making your own. And I think that’s wrong!

In the 3D printing world in particular, I’m guilty of dismissively classifying projects as “Yoda Heads”. About ten years ago, [chylld] uploaded a clean, high-res model of Yoda to Thingiverse, and everyone printed it out. Heck, my wife still has hers on her desk; and alone this is proof that straight-up copying has worth, because it made a sweet little gift. After a while, Yoda gave way to Baby Groots, and strangely enough we’re back to Yoda again, but it’s Baby Yoda now. Continue reading “Printing Yoda Heads: Re-Makers Riffing!”

The ATtiny Series Is A Great Companion In Isolation

As a consequence of the social distancing and self isolation, many a maker has been searching for ways to cure boredom. So what happens when you put a maker in a closed space with electronics parts. The answer is a bunch of random microcontroller projects that help beat boredom. [Danac1886] posts a video with a bunch of experiments with the ATtiny series of microcontrollers which can be a source of time-killing inspiration for these tough days of solitude.

The video is based upon a variety of controllers ranging from the ATtiny85 to the ATtiny84 and even includes the ATtiny2313. There is also a project with the ATtiny10, an SMD SOT23-6 package that is quite amazing to behold. All the devices can be programmed using the Ardino as an ISP so all you need is another Arduino lying around in case you do not have an AVR ICSP.

As for the projects themselves, there is an assortment of things that start with the basic blinking LED, adding an I2C LCD and then moving on to a 7 segment display counting up with variable speed controlled with a pot. We really loved how much these tiny projects inspire and can help someone get started with basic electronics and programming.

If you are looking to get started, have a look at the Jumbo LED with the Attiny10 and we assure you, it will brighten your day.

Continue reading “The ATtiny Series Is A Great Companion In Isolation”

Slipcasting Resin Prototypes

[Eric Strebel] doesn’t need an introduction anymore. If there is a picture of an elegantly designed part with a professional finish on our pages, there is a good chance he has a hand in it. This time he is sharing his method of making a part which looks like it is blow-molded but it is not. Blow-molded parts have a distinctive look, especially made with a transparent material and [Eric’s] method certainly passes for it. This could upgrade your prototyping game if you need a few custom parts that look like solidified soap bubbles.

Mold making is not covered in this video, which can also be seen below the break, but we can help you out with a tip or two. For demonstration’s sake, we see the creation of a medical part which has some irregular surfaces. Resin is mixed and degassed then rolled around inside the mold. Then, the big reveal, resin is allowed to drain from the mold. Repeat to achieve the desired thickness.

This is a technique adapted from ceramics called slipcasting. For the curious, an elegant ceramic slipcasting video demonstration can be seen below as well. For an added finishing touch, watch how a laquer logo is applied to the finished part; a touch that will move the look of your build beyond that of a slapdash prototype.

More education from this prolific maker can be seen in his video on painting with a professional-looking finish and his tips for working with foam-core.

Continue reading “Slipcasting Resin Prototypes”

Art, Craft, Make, Hack, Whatever

Anyone who has spent much time reading Hackaday, or in the real world in or around a few hackspaces, will know that ours is a community of diverse interests. In the same place you will find a breathtaking range of skills and interests, people working with software, electronics, textiles, and all conceivable materials and media. And oftentimes in the same person: a bare-metal kernel guru might spend their time in a hackspace making tables from freight pallets rather than coding.

Through it all run a variety of threads, identities if you will, through which the differing flavours of our wider community define themselves. Words like “Hacker” and “Maker” you may identify with, but when I mention words like “Crafter” or “Artist”, perhaps they might meet with some resistance. After all, artists paint things, don’t they, and crafters? They make wooly hats and corn dollies! Continue reading “Art, Craft, Make, Hack, Whatever”

Laser PCBs With LDGraphy

There are many, many ways to get a PCB design onto a board for etching. Even with practice however, the quality of the result varies with the process and equipment used. With QFN parts becoming the norm, the days of etch-resist transfers and a permanent marker are all but gone. Luckily, new and improved methods of Gerber transfer have be devised in recent years thanks to hackers across the world.

One such hacker, [Henner] is working on a project called LDGraphy in an attempt to bring high-resolution etching to the masses. LDGraphy is a laser lithography device that makes use of a laser and a Beaglebone green to etch the layout onto the board. The best part is that the entire BOM is claimed to cost under a $100 which makes it affordable to people on a budget.

The system is designed around a 500 mW laser and a polygon mirror scanner meant for a laser printer. The board with photoresist is linearly actuated in the X-axis using a stepper motor and the laser beam which is bounced off the rotating hexagonal mirror is responsible for the Y-axis. The time critical code for the Programmable Realtime Unit (PRU) of the AM335X processor is written in assembly for the fast laser switching. The enclosure is, naturally, a laser cut acrylic case and is made at [Henner]’s local hackerspace.

[Henner] has been hard at work calibrating his design and compensating for the inaccuracies of the components used. In the demo video below he presents a working version with a resolution of 6 mils which is wonderful considering the cost of the machine. He also shares his code on GitHub if you want to help out and you can track his updates on Google+. Continue reading “Laser PCBs With LDGraphy”

A Machine Shop In A Toolbox: Just Add Time

You don’t need any fancy tools. A CNC machine is nice. A 3D printer can help. Laser cutters are just great. However, when it comes to actually making something, none of this is exactly necessary. With a basic set of hand tools and a few simple power tools, most of which can be picked up for a pittance, many things of surprising complexity, precision, and quality can be made.

Not as pretty, but worked just the same.

A while back I was working on a ring light for my 3D printer. I already had a collection of LEDs, as all hackers are weak for a five-dollar assortment box. So I got on my CAD software of choice and modeled out a ring that I was going to laser cut out of plywood. It would have holes for each of the LEDs. To get a file ready for laser cutting ook around ten minutes. I started to get ready to leave the house and do the ten minute drive to the hackerspace, the ten minutes firing up and using the laser cutter (assuming it wasn’t occupied) and the drive back. It suddenly occurred to me that I was being very silly. I pulled out a sheet of plywood. Drew three circles on it with a compass and subdivided the circle. Under ten minutes of work with basic layout tools, a power drill, and a coping saw and I had the part. This was versus the 40 minutes it would have taken me to fire up the laser cutter.

Continue reading “A Machine Shop In A Toolbox: Just Add Time”

Build A Circular Aerofoil Kite

[Waalcko] fell in love with kites when he was 13 years old. He saw a NASA Para Wing kite fly and couldn’t get it out of his head. Now, years later, he shares how to build a circular foil kite design he came up with.

We’re all particular about our chosen hobbies. Some of us like one design direction and hate another. For [Waalcko], he really hates internal supports in kites. When he spied a single line kite in a circular foil configuration he was enraptured, but the design had those hideous spars. So, he got to work and pushed himself to the limit coming up with a kite that was a circular foil, flew with one line, and had no internal supports.

His instructable is a great read and goes into deep detail about the basics of kite construction. (After reading it we’re certain that even the shallows have depths when it comes kites.) It goes through the terminology used when talking about kits, the techniques used to assemble them, the common problems, and more.

Many hours later, if all goes well, one should end up with a really cool kite.