Early Monday morning, while many of us will be putting the finishing touches — or just beginning, ahem — on our Christmas preparations, solar scientists will hold their collective breath as they wait for word from the Parker Solar Probe’s record-setting passage through the sun’s atmosphere. The probe, which has been in a highly elliptical solar orbit since its 2018 launch, has been getting occasional gravitational nudges by close encounters with Venus. This has moved the perihelion ever closer to the sun’s surface, and on Monday morning it will make its closest approach yet, a mere 6.1 million kilometers from the roiling photosphere. That will put it inside the corona, the sun’s extremely energetic atmosphere, which we normally only see during total eclipses. Traveling at almost 700,000 kilometers per hour, it won’t be there very long, and it’ll be doing everything it needs to do autonomously since the high-energy plasma of the corona and the eight-light-minute distance makes remote control impossible. It’ll be a few days before communications are re-established and the data downloaded, which will make a nice present for the solar science community to unwrap.
machine shop6 Articles
Chainsaw Cuts More Than Timber
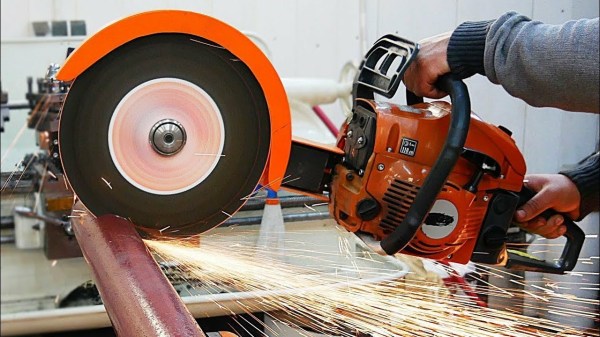
We often take electricity for granted, to the point of walking into a room during a power outage and still habitually flipping the light switch. On the other hand, there are plenty of places where electricity isn’t a given, either due to poor infrastructure or an otherwise remote location. To get common electric power tools to work in areas like these requires some ingenuity like that seen in this build which converts a chainsaw to a gas-driven grinder that can be used for cutting steel or concrete. (Video, embedded below.)
All of the parts needed for the conversion were built in the machine shop of [Workshop from scratch]. A non-cutting chain was fitted to it first to drive the cutting wheel rather than cut directly, so a new bar had to be fabricated. After that, the build shows the methods for attaching bearings and securing the entire assembly back to the gas-powered motor. Of course there is also a custom shield for the grinding wheel and also a protective housing for the chain to somewhat limit the danger of operating a device like this.
Even though some consideration was paid to safety in this build, we would like to reiterate that all the required safety gear should be worn. That being said, it’s not the first time we’ve seen a chainsaw modified to be more useful than its default timber-cutting configuration, like this build which turns a chainsaw into a metal cutting chop saw.
Heavy Metal Chess
Chess is a slow game of careful decision-making, looking several moves ahead of the current state of the board. So is machining, and combining the two is an excellent way to level up your machine shop chops. And so we have the current project from [John Creasey] who is machining a chess set out of stainless steel.
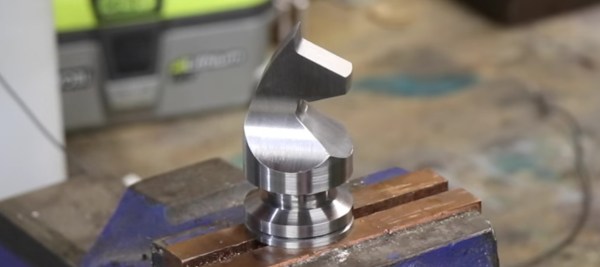
This isn’t that new-fangled computer numerical control at work, it’s the time-tested art of manual machining. Like chess, you need to plan several steps ahead to ensure you have a way to mount the part for each progressive machining process. In this first video of the series [John] is milling the knights — four of them, with two which will eventually get a black oxide treatment.
Milling the horse head is fun to watch, but you’ll be delighted when the work gets to the base. [John] is using a pipe fitting as a fixture to hold the already-milled horse-head-end while working the base on his lathe. The process begins by getting rid of the inner threads, then working the pipe fitting very carefully to the diameter of the chess piece for a perfect press fit. Neat!
At the end, [John] mentions it took “quite a few months of weekends to get to this point” of having four pieces made. They look great and we can’t wait to see the next piece in the set come to life. You’ll find the video embedded below, but if you can’t sink this kind of time into your own chess set, you may try three-dimensional laser cut acrylic pieces.
A Machine Shop In A Toolbox: Just Add Time
You don’t need any fancy tools. A CNC machine is nice. A 3D printer can help. Laser cutters are just great. However, when it comes to actually making something, none of this is exactly necessary. With a basic set of hand tools and a few simple power tools, most of which can be picked up for a pittance, many things of surprising complexity, precision, and quality can be made.
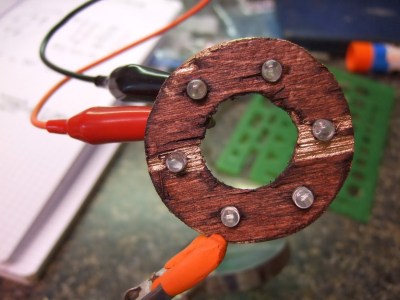
A while back I was working on a ring light for my 3D printer. I already had a collection of LEDs, as all hackers are weak for a five-dollar assortment box. So I got on my CAD software of choice and modeled out a ring that I was going to laser cut out of plywood. It would have holes for each of the LEDs. To get a file ready for laser cutting ook around ten minutes. I started to get ready to leave the house and do the ten minute drive to the hackerspace, the ten minutes firing up and using the laser cutter (assuming it wasn’t occupied) and the drive back. It suddenly occurred to me that I was being very silly. I pulled out a sheet of plywood. Drew three circles on it with a compass and subdivided the circle. Under ten minutes of work with basic layout tools, a power drill, and a coping saw and I had the part. This was versus the 40 minutes it would have taken me to fire up the laser cutter.
Continue reading “A Machine Shop In A Toolbox: Just Add Time”
The Wedding Band: Milling Titanium And Wrapping It In Palladium
You’ve got to admit that custom milling your own wedding band is pretty hard-core. In this case [Jeremy Swerdlow] is making it for his friend, but that doesn’t diminish the fun of the project. After the break you can watch him mill a titanium ring and wrap it with a palladium inlay.
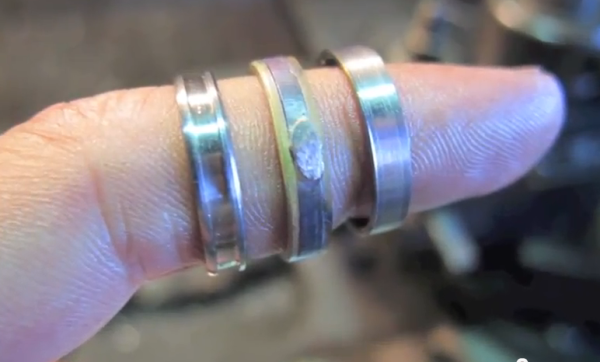
To solder palladium to titanium [Jeremy] would need special equipment, so he found another way to mate the dissimilar metals. He milled a dovetail groove in the center of the titanium band. To do that, he had to make a special cutting tool that was just the right size. Once had milled the ring’s rough dimensions, he had to fabricate a custom mandrel to hold the ring for the rest of the job. The dovetail was then filled with a palladium strip using a combination of heat and hammering. The two ends are soldered together using palladium solder. The ring in the middle shows this solder joint. To the right is a ring after the inlay is milled flush but before the final polishing which will bring out the best qualities of both metals.
If you don’t have the machine shop skills to pull this off you could always try your hand at 3d printed rings.
Continue reading “The Wedding Band: Milling Titanium And Wrapping It In Palladium”
The Best CNC Project Machines
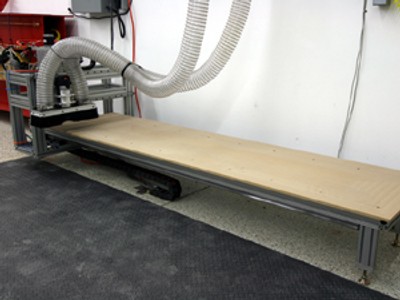
We’ve lost track of the number of home built CNC machines we’ve covered in the past, but we thought a comprehensive list of the best would help you understand why we’re so excited about the LumenLab CNC machine.


