UV Light Box Cures Both Sides Of A PCB

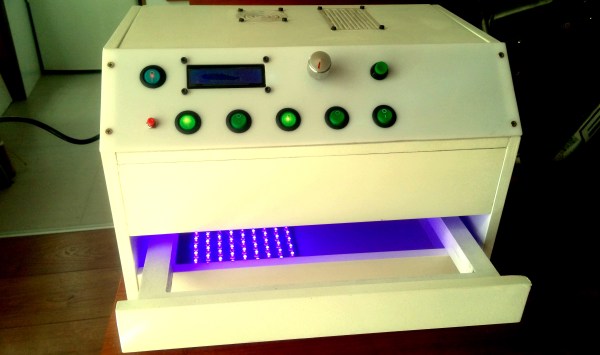
[GiorgiQ] needed a UV light to cure the etch resist on his printed circuit boards, and what better way to accomplish this than to build the perfect UV light box himself? The box consists of a custom PCB (of course) featuring a pair of 12V relays tripping quad 9×12 matrices of 400nm UV LEDs, with a total of 432 diodes in use — not to mention resistors to protect the LEDs. All of it is run by an Arduino Nano.

The enclosure is made out of 12mm MDF and 3mm cast acrylic, and the circuit board fits into a tray sliding on drawer sliders, allowing a resist-covered board to be placed in a carrier and slid back in.

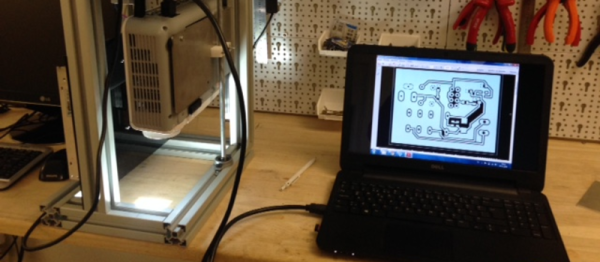
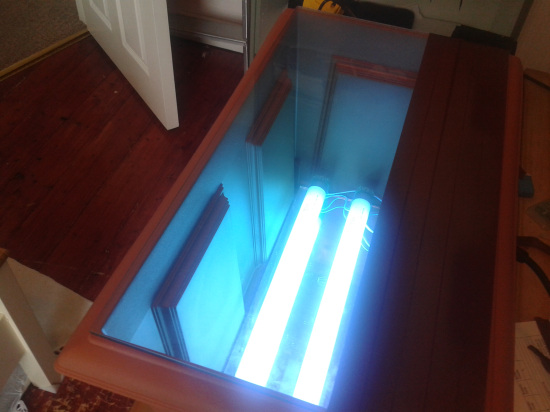
DIY light boxes mostly don’t look as slick as [GiorgiQ]’s, but they’re a fairly common project. This one also uses 9×12 matrices of UV LEDs, while a distinctly simpler project involves making a UV exposure box out of fluorescent lights.


Why Not Expose Your PCBs Through An LCD?

Most people who have dabbled in the world of electronic construction will be familiar in some form with the process of producing a printed circuit board by exposing a UV sensitive coating through a transparent mask, before moving on to etching. Older readers will have created their masks by hand with crêpe paper tape on acetate, while perhaps younger ones started by laser-printing from their CAD package.

How about a refinement of the process, one which does away with the acetate mask entirely? [Ionel Ciobanuc] may have the answer, in the form of an exposure through an LCD screen. The video below the break shows how it’s done, starting with a (probably a bit too lengthy) sequence on applying the photo-resist coating to the board, and then sitting LCD on top of UV lamp with the board positioned at the top of the pile.

It’s an interesting demonstration, and one that certainly removes a step in the process of PCB creation as it brings the pattern direct from computer to board without an intermediate. Whether or not it’s worth the expenditure on an LCD is up to you, after all a sheet of acetate is pretty cheap and if you already have a laser printer you’re good to go. We’re curious to know whether or not any plastic components in the LCD itself might be damaged by long-term exposure to intense UV light.

Continue reading “Why Not Expose Your PCBs Through An LCD?”

Make PCBs With DLP, OMG!

There’s so many ways to skin the home-fabrication-of-PCBs cat! Here’s yet another. [Nuri Erginer] had a DLP projector on hand, and with the addition of some reducing optics, managed to turn it into a one-shot PCB exposer.

If you’ve ever used photo-resist PCB material before, you know the drill: print out your circuit onto transparency film, layer the transparency with the sensitized PCB, expose with a UV light for a while, dissolve away the unexposed resist, and then etch. Here, [Nuri] combines the first three steps in one by exposing the board directly from a DLP projector.

The catch is that the projector’s resolution limits the size of the board that you can make. To fab a board that’s 10cm x 10cm, at XGA resolution (1024×768), you’ll end up with a feature size of around 0.004″ in the good direction and 0.005″ in the other.

For DIP parts, that’s marginal, but for fine-pitch or small SMT parts, that won’t do. On the other hand, for a smaller board, optimally one in the same 4:3 ratio, it could work. And because it exposes in one shot, you can’t beat the speed. Cool hack, [Nuri]!

When you need more precision, strapping a UV laser to an accurate 2D robot is a good way to go, but it’s gonna take a while longer.

Make Your Own UV Exposure Box For PCB Manufacture At Home

UV exposure box

[Shane] needed a UV exposure box to help speed up the process of making PCB’s at home. Not wanting to spend a few hundred on one, he decided to design and build his own, using a planter box!

Why a planter box? To be honest, it was simply the first opaque container [Shane] found, so he decided to base the design around it. Inside the planter box are two 15W fluorescent daytime bulbs which output a similar amount of UV to normal sunlight. A mirror is placed below them to help reflect all the useful light out of the box. A pane of glass was cut to fit on top of the planter box, giving you a nice surface to place curing PCB’s on.

All in all, it’s a pretty simple and inexpensive method to make your own UV exposure box. We’ve also seen it done before using UV LEDs and IKEA picture frames — just make sure you don’t start tanning your hands while you’re working!