Every PCB Has Its Place

Everyone has their favorite process for PCB fabrication, as long as you’re a happy hacker I don’t think it really matters. But in this post I thought it might be interesting to describe my personal process, and some of the options available.

Making your own at home

The Dirty Electronics Skull Etching Synth a great looking maskless board.

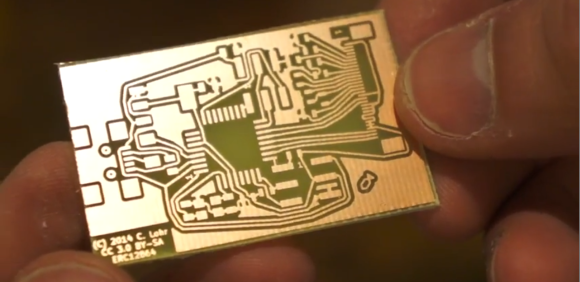
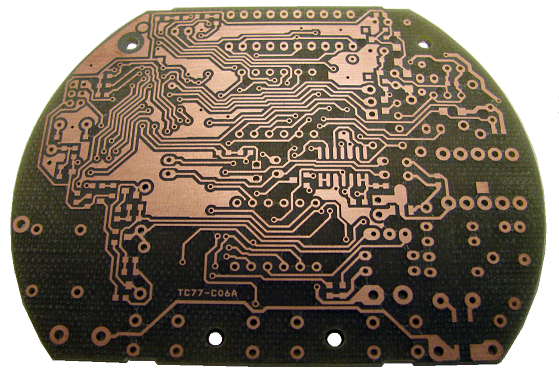
Etching is the classic PCB fabrication option for the home hacker. It’s been many, many years since I etched a PCBs but it can produce interesting results. Some people don’t like it, and I’d personally tend to avoid it as a messy and finicky process. But, if you only need 1 or 2 layer boards with large features (through-hole components are best of course) it can be a viable option. In some cases, I think etched boards look awesome and are a great fit. One example is the skull etching shown to the right. The oxidation and discoloration of the boards adds to the design aesthetic in this case.

Sample1
A simple design milled on an Accurate CNC

For those with a bigger budget a professional milling machine might be a viable choice. I’ve used an Accurate CNC in the past (LPKF and others make mills too), but this is an expensive option (no online pricing, but if $10,000 USD is a lot for you don’t bother). The accurate mill is pretty awesome, it can be fitted with a vacuum bed, automatic tool changer and vision system for alignment. The mill can produce high quality two layer boards with all the holes and vias drilled out. The final step of filling the vias is however manual, but compared to etched boards the results are pretty professional (the mill itself uses milled PCBs!). They claim a 0.1mm (4 mil) track size, I’ve never tried tracks this small but surface mount components were not a problem.

While a fun toy, it’s worth considering if you really need a PCB mill. The only case where they’re really valuable is if you want to be able to iterate over a design with less than a days turn around. This can be useful in RF or low noise designs where you might want to experiment with different layouts, but for other projects the price of a good mill can pay for quick turn around (1 or 2 days from order submission to delivery) on a lot of boards.

Commercial Fabrication

Years ago commercial fabrication used to be a very expensive and finicky process. For the most part you’d need to order a full panel putting the service outside of most hobbyists reach. Generating gerbers and drill files to the fabs specification could also be a process fraught with complication.

These days services that aggregate designs onto a single panel and break them out for distribution are common. For my work I mostly stick with OSHPark and SeeedStudio whose services complement each other well. I’ve also used Itead and found them compatible with Seeed (with the added benefit that they supply free boards for open projects).

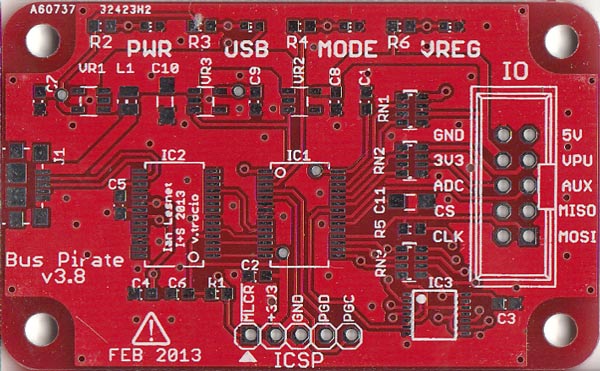
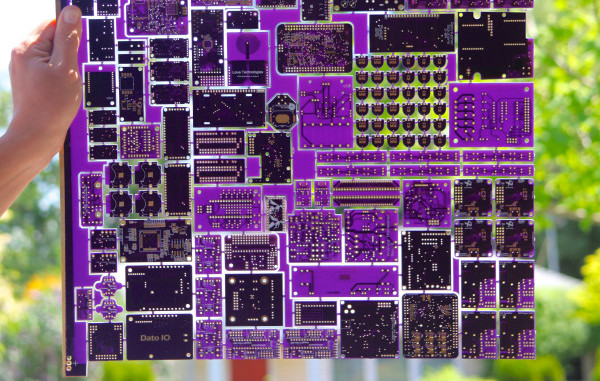
Using OSHPark gives me the warm fuzzies. A child of the hacker community, born out of DorkbotPDX, all OSHPark’s boards are fabbed in the US (check out the great amphour interview for more details). Their services are limited to either 2 or 4 layer boards (always in purple, and always coated with gold (ENIG)), in 6×6 (6 mil traces with 6 mil spacing) or 5×5. I rarely attempt BGA boards so the 2 layer service works out great for me. OSHPark’s minimum order is 3 boards, which is perfect for prototyping. The gold plating also provides a nice finish, which both protects the board from oxidation and provides a nice surface to solder to. The main reason I use OSHPark however is that they’re cheap for small boards and have a relatively fast turn around (I recently purchased 3 tiny 20x15mm boards for $2.40 including shipping which was unbeatable). From OSHPark in the US to the UK my boards take about 2 weeks to arrive. They’ve also automatically upgrade boards to their super-swift service for free when there’s spare capacity. Their service is pretty slick, and provides a rendering of the gerbers prior to ordering as a final check which comes in very handy.

oshseeed2
Zigbee to esp8266 interface fabricated by Seeed (left) and OSHPark (right) (more complex boards here)

Seeed on the other hand are much cheaper for larger size boards and volume orders. They also provide more color and finishing options. The cheapest option at Seeed is green PCBs with HASL finish (hot air solder leveling). From Seeed, my boards usually take about a month to arrive (there are a few delivery options, but in my experience this is about as fast as it gets and faster shipping services often make using Seeed less attractive).

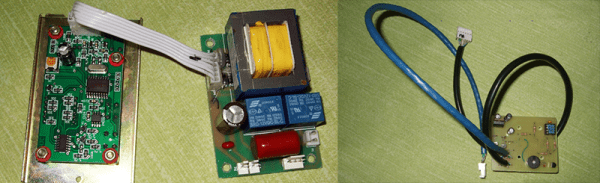
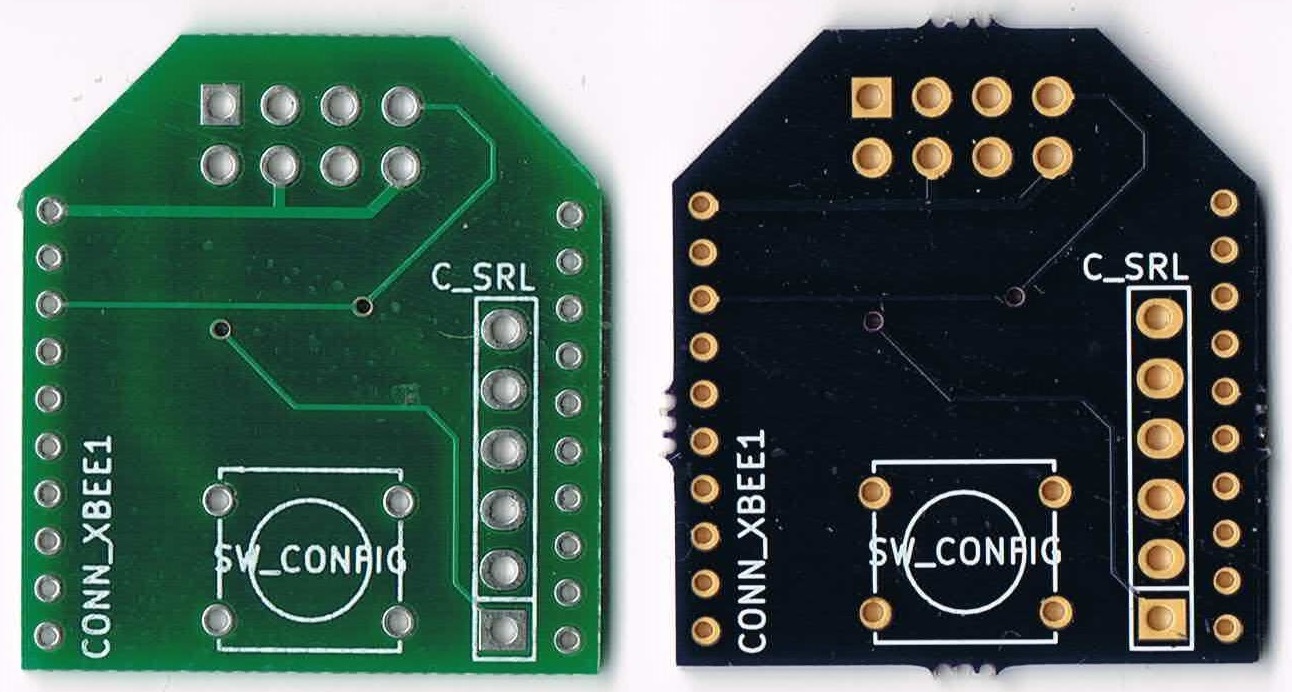
The image to the right shows a couple of very simple boards I had manufactured at both OSHPark and Seeed. I’ve never had a fabrication issues with boards from either service (though I prefer the ENIG finish).

Partly due to the limitations imposed by using commercial fabs I pipeline my projects. I send projects out to fab early in the design process and then switch to another design. When the board comes back I bring it up, bodge as required, and iterate over the layout. This works well with a two-week turn around, so I mostly use OSHPark while prototyping.

My boards also tend to be quite small (Arduino shield size or a little bigger). With small boards like this OSHPark is usually on-par or cheaper than ordering from Seeed (whose minimum quantity is 10 boards). With boards of about 100x100mm or larger I consider Seeed as they become significantly cheaper.

As a hobbyist I also rarely need huge numbers of boards, but for workshops when I need 10 or 20 boards I order from Seeed based on the final iteration of my prototypes. This is not only much cheaper than OSHPark, but I can get boards in a variety of colors to make workshops more interesting too.

This post has described some of the available options and my personal process. I hope it’s been interesting, but I’d love to hear about your favorite fabrication techniques, services and experiences both good and bad too. Please comment below!

Upgrading A Laminator For Toner Transfer PCBs

If you need a circuit board now, you’re probably looking at a toner transfer process; all you need to make a PCB is a copper clad board, a laser printer, some special paper, and the usual etching chemicals. The quality of these boards is highly dependant on the quality of transferring toner to the copper, and getting the process right is as much an art as it is a science. A clothes iron is the easy way of transferring the toner to the board, but if you’re looking for repeatability, you’ll probably want a laminator.

Laminators, too, also vary in quality. The king of toner transfer laminators is the Apache AL13P. With four heated rollers and a steel chassis, it’s enough to do some serious heating. [mosaicmerc] came up with an amazing mod for his Apache laminator that takes all the guesswork out of the settings, and does it all in one pass for maximum repeatability and PCB quality.

The Apache laminator in question is a beast of a machine that drives four rollers with a synchronous motor and also has a ‘reverse’ button that sends the laminations out the front end of the printer. Stock, a toner transfer PCB would require dozens of passes through the Apache, but [merc]’s mod takes care of everything for you.

The addition that makes this possible is a small board with a PIC12 microcontroller. This microcontroller connects the motor driver board and the display interface together, triggering the reverse button to move the board 5/8″ forward and 1/2″ back, giving the laminator an effective speed reduction of 12:1. This method also has the bonus of not tampering with the motor or control circuitry, and allows for multiple passes in the same run.

With this modification, the Apache AL13P becomes the perfect solution to transferring toner to a piece of copper, with the ability to transfer 10mil traces on 1oz copper. The board also offers some other features like thermal sensor failure shutdown and a cool-down mode that overrides the heater. If you’re looking for an easy way to step up your toner transfer PCBs, you can’t do much better than this mod.

One-Off Kapton Solder Masks

soldermask

With the proliferation of desktop routers, and a number of easy methods to create PCBs at home, there’s no reason anyone should ever have to buy a pre-made breakout board ever again. The traditional techniques only give you a copper layer, however, and if you want a somewhat more durable PCB, you’ll have figure out some way to create a solder mask on your homebrew PCBs. [Chris] figured Kapton tape would make a reasonable soldermask, and documented the process of creating one with a laser cutter over on the Projects site.

The solder mask itself is cut from a piece of Kapton tape, something that should be found in any reasonably well-stocked tinkerer’s toolbox. The software for [Chris]’ laser cutter, a Universal Laser Systems model, already has a setting for mylar film that came in handy for the Kapton tape,

Of course, getting the correct shapes and dimensions for the laser to cut required a bit of fooling around in Eagle and Corel Draw. The area the laser should cut was taken from the tCream and tStop layers in Eagle with a 1 mil pullback from the edges of the pads. This was exported to an .EPS file, opened in Corel Draw, and turned into a line art drawing for the laser cutter.

The result is a fast and easy solder mask that should be very durable. While it’s probably not as durable as the UV curing paints used in real PCBs, Kapton will be more than sufficient for a few prototypes before spinning a real board.

Dirt Cheap Dirty Boards Offers Dirt Cheap PCB Fab

When your project is ready to build, it’s time to find a PCB manufacturer. There are tons of them out there, but for prototype purposes cheaper is usually better. [Ian] at Dangerous Prototypes has just announced Dirt Cheap Dirty Boards, a PCB fabrication service for times where quality doesn’t matter too much. [Ian] also discussed the service on the Dangerous Prototypes forum.

The boards are definitely cheap. $12 USD gets you ten 5 cm by 5 cm boards with 100% e-test and free worldwide shipping. You can even choose from a number of solder mask colors for no additional cost. [Ian] does warn the boards aren’t of the best quality, as you can tell in the Bus Pirate picture above. The silkscreen alignment has some issues, but for $1.2 a board, it’s hard to complain. After all, the site’s motto is “No bull, just crappy PCBs.”

The main downside of this service will be shipping time. While the Chinese fab house cranks out boards in two to four days, Hong Kong Post can take up to 30 days to deliver your boards. This isn’t ideal, but the price is right.

Hackaday Links: April 6, 2014

hackaday-links-chain

Back in September we saw this awesomesauce wristwatch. Well, [Zak] is now kitting it up. Learn more about the current version, or order one. [Thanks Petr]

Home automation is from the future, right? Well at [boltzmann138’s] house it’s actually from The Next Generation. His home automation dashboard is based on the LCARS interface; he hit the mark perfectly! Anyone thinking what we’re thinking? This should be entered in the Hackaday Sci-Fi Contest, right? [via Adafruit]

PCB fab can vary greatly depending on board size, number of layers, number of copies, and turn time. PCBShopper will perform a meta-search and let you know what all of your options are. We ran a couple of tests and like what we saw. But we haven’t verified the information is all good so do leave a note about your own experience with the site in the comments below. [via Galactic Studios]

We recently mentioned our own woes about acquiring BeagleBone Black boards. It looks like an authorized clone board is poised to enter the market.

Speaking of the BBB, check out this wireless remote wireless sensor hack which [Chirag Nagpal] is interfacing with the BBB.

We haven’t tried to set up any long-range microwave communications systems. Neither has [Kenneth Finnegan] but that didn’t stop him from giving it a whirl. He’s using Nanobridge M5 hardware to help set up a system for a triathlon happening near him.

[CNLohr] Demos His Photoetch PCB Process

etch

If you’re going to learn something, it only makes sense to learn from a master. [CNLohr] is known around these parts for his fablous PCBs, and he’s finally started to document his entire fabrication process.

[CNLohr] is using a photoetch process, where a mask is created with a laser printer on overhead transparencies. He covers the copper clad boards with a Riston photosensitive mask—available here, and they accept Bitcoin—sent through a laminator, and exposed with the laser printed mask and a UV grow bulb. After the mask has developed, [CNLohr] drops his boards into a ferric chloride bath that eats away the unexposed copper. He then removes the photomask with acetone and cuts the boards with a pair of aircraft snips, and they’re ready to be soldered up with components.

Yes, home PCB etching tutorials are pretty much a solved problem, but [CNLohr]’s work speaks for itself. He’s also the guy who made a microcontroller/Linux/Minecraft thing on a glass microscope slide. Learning from a guy with these skills means you’re learning from one of the best.

Video below, and there’s also a video going over the design of a PCB using KiCAD (!) and TopoR (!!!) available here.

Continue reading “[CNLohr] Demos His Photoetch PCB Process”

Building A Six-channel Floppy Drive Synth From Start To Finish

floppy

We’ve seen scores of floppy drives play music, but never before have we seen a project as clean as [Rupert]’s Moppyduino. It’s an Arduino-based board that controls the stepper motors in six separate floppy drives, coaxing them in to playing music from a MIDI file.

The Moppyduino is more than just a convenient way to control the stepper motors in six floppy drives. It’s also a great example of what can be done with home PCB fabrication; the entire project was designed and constructed in [Rupert]’s workshop.

After designing the circuit, [Rupert] printed it out on a laser printer onto a plastic transparency sheet. This was transferred over to a copper clad board, etched, and drilled. After assembly, [Rupert] attached a USB FTDI controller to receive data converted from MIDI data with a Java app.

The end result – housed in a custom Corian enclosure – is one of the best looking floppy drive synths we’ve ever seen. You can check out the process of building this awesome instrument after the break.

Continue reading “Building A Six-channel Floppy Drive Synth From Start To Finish”