VCF East: PR1ME And AT&T Unix Boxes

unix

At the Vintage Computer Festival last weekend, there was a wonderful representation of small 8 and 16-bit home computers from the 80s, an awful lot of PDP and VAX-based minicomputers, and even some very big iron in the form of a UNIVAC and a Cray. You might think this is a good representation of computing history, but there was actually a huge gap in the historical reality. Namely, workstations and minicomputers that weren’t made by DEC.

[Ian Primus] was one of the very few people to recognize this shortcoming and brought his PRIME minicomputer. This was a huge, “two half racks, side by side” computer running PRIMOS, an operating system written in FORTRAN. Of course this made it extremely popular with engineering teams, but that doesn’t mean [Ian] can’t have fun with it. He had two terminals set up, one running Dungeon (i.e. Zork pre-Infocom) and a text-based lunar lander game.

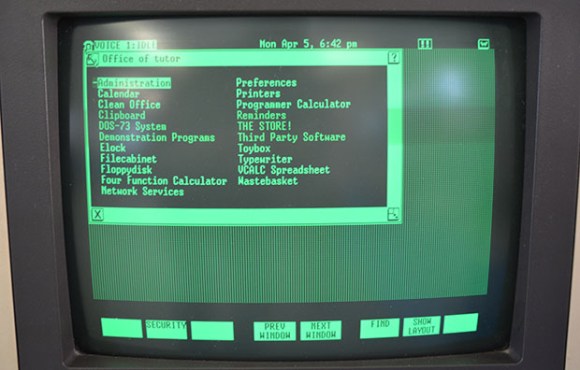
Because the VCF East is held in New Jersey, it’s probably no surprise a few vintage AT&T Unix boxes showed up. [Anthony Stramaglia] brought in a few very cool vintage Unix workstations, dating from the early to mid 80s. In the video, he shows off two AT&T boxes. The first is a UNIX PC, containing a 68010 clocked at a blistering 10 MHz. Next up is the UNIX PC’s bigger brother, the 3B2 400. This is the workstation found on just about every desk at Bell Labs in the 80s, meaning this is the same computer [Ken Thompson] and [Dennis Ritchie] used for their work on UNIX.


Continue reading “VCF East: PR1ME And AT&T Unix Boxes”

Serial Monitor Without A PC

serial01

A serial monitor is an easy way to debug your projects. As we step through code, it’s nice to see a “Hey! I’m working, moving to next thing!” across the monitor, and not so nice to see nothing – the result of a bug that needs debugging. This has always meant needing a PC loaded with your favorite serial terminal program close at hand.

Most of the time this is not an issue, because the PC is used to compile the code and program the project at hand. But what if you’re in the field, with a mission of fixing a headless system, and in need a serial monitor? Why lug around your PC when you can make your own External Serial Monitor!

[ARPix] built this fully functional serial monitor based on an Atmega328 and a 102 x 64 LCD display. While it doesn’t have a keyboard port like this microcontroller based serial terminal, tact switches allow access to the user interface to start and stop the reading and set the baud rate. The Atmega328 has 2K of SRAM, which is needed for the project. Apparently, 1K was not enough to handle all the data. All code, schematics and a very well done parts layout are available, making this sure to be your next weekend project!


Designing A Front Panel For A DIY Project

DIY Front Panel


When building a one-off DIY project, appearances tend to be the least of our priorities. We just want to get the device working, and crammed into some project case. For those that like to build nicer looking prototypes [JumperOne] came up with a slick method of building a custom front panel for your DIY project.

The first step is to get the dimensions correct. You CAD tool will generate these from your design. [JumperOne] took these measurements into Inkscape, an open source vector graphics tool. Once it’s in Inkscape, the panel can be designed around the controls. This gets printed out and aligned on a plastic enclosure, which allows the holes to be marked and drilled.

With the electronics in place, the front panel gets printed again on a general purpose adhesive sheet. Next up is a piece of cold laminating film, which protects the label. Finally, holes are cut for the controls. Note that the display and LEDs are left covered, which allows the film to diffuse the light. The final result looks good, and can provide all the needed instructions directly on the panel.

[Thanks to Ryan for the tip]

Festo Creates Bionic Kangaroo; Steve Austin Unimpressed


festo-roo

[Dr. Wilfried Stoll] and a team at Festo have created an incredible robot kangaroo. Every few years the research teams at Festo release an amazing animal inspired robot. We last covered their smartbird. This year, they’ve created BionicKangaroo (pdf link). While The Six Million Dollar Man might suggest otherwise, Bionics is use of biological systems in engineering design. In this case, Festo’s engineers spent two years studying the jumping behavior of kangaroos as they perfected their creation.

Kangaroos have some amazing evolutionary adaptations for jumping. Their powerful Achilles tendon stores energy upon landing. This allows the kangaroo to increase its speed with each successive jump. The kangaroo’s tail is essential for balancing the animal as it leaps through the air. The Festo team used a thick rubber band to replicate the action of the tendons. The tail is controlled by electric servomotors.

Festo is known for their pneumatic components, so it’s no surprise that the kangaroo’s legs are driven by pneumatic cylinders. Pneumatics need an air supply though, so the team created two versions of the kangaroo. The first uses an on-board air compressor. The second uses a high-pressure storage tank to drive the kangaroo’s legs. An off the shelf Programmable Logic Controller (PLC) acts as BionicKangaroo’s brain. The PLC monitors balance while controlling the pneumatic leg cylinders and electric tail motors. Unfortunately, BionicKangaroo isn’t completely autonomous. The Thalmic Labs Myo makes a cameo appearance in the video. The Kangaroo’s human controller commands the robot with simple arm movements.

While the BionicKangaroo is graceful in its jumps, it still needs a bit of help when turning and taking simple steps. Thankfully we don’t think it will be boxing anytime soon.

Continue reading “Festo Creates Bionic Kangaroo; Steve Austin Unimpressed”

Zenotron: The Looks Of A Kaypro II With The Soul Of A Nebulophone

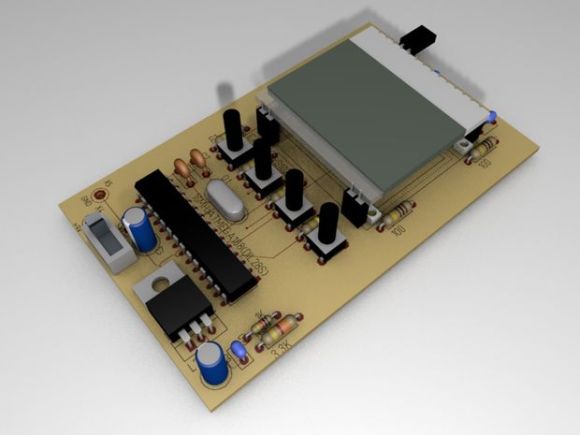
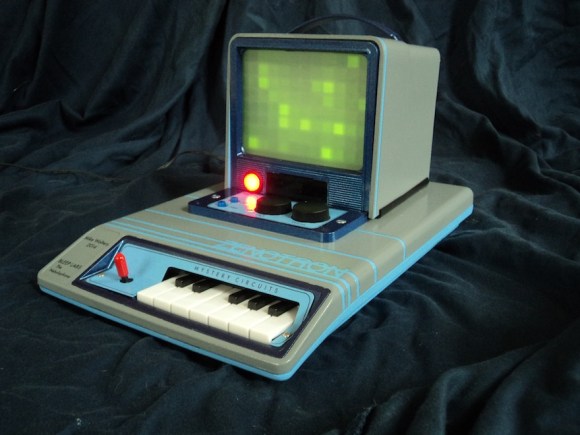
This beautiful instrument of musical delight is called the Zenotron, and it was built by [Mike Walters] for his friend [Zeno] in exchange for some keyboards. The Zenotron is the latest musical hack in a long line of awesome from the same guy who built the Melloman, its successor, the Mellowman II, and Drumssette, a programmable sequencer.

The sweet sounds of those babies all come from tape loops, but the Zenotron is voiced with a modified [Bleep Labs] Nebulophone synthesizer. Instead of the Nebulophone’s pots controlling the waveform and arpeggio, he’s wired up a 2-axis joystick. He left the LFO pot wired as-is. When it’s turned all the way down, he’s noticed that the joystick takes over control of the filter. [Mike] fed the audio through a 4017 decade counter and each of the steps lights up an array of four to five of the randomly-wired 88 LEDs.

[Mike] made the case from the top half of a small filmstrip viewer and an old modem, which is way better than the Cool Whip container housing we made for our Nebulophone. He re-purposed a toy keyboard and made a contact board for it with small tactile switches. This results in nice clicky feedback like you get from mouse buttons.

Of course there’s a demo video. You know the drill.


Continue reading “Zenotron: The Looks Of A Kaypro II With The Soul Of A Nebulophone”

Heroes Of Hardware Revolution: Bob Widlar

Bob Widlar (1937-1991) is without a doubt one of the most famous hardware engineers of all time.  In fact, it would not be an exaggeration to say that he is the person who single-handedly started the whole Analog IC Industry. Sure, it’s Robert Noyce and Jack Kilby who invented the concept of Integrated Circuits, but it’s Widlar’s genius and pragmatism that brought it to life. Though he was not first to realize the limitations of planar process and designing ICs like discrete circuits, he was the first one to provide an actual solution – µA702, the first linear IC Operational Amplifier. Combining his engineering genius, understanding of economic aspects of circuit design and awareness of medium and process limitations, he and Dave Talbert ruled the world of Analog ICs throughout the 60s and 70s. For a significant period of time, they were responsible more than 80 percent of all linear circuits made and sold in the entire world.

Continue reading “Heroes Of Hardware Revolution: Bob Widlar”

Dirt Cheap Dirty Boards Offers Dirt Cheap PCB Fab

When your project is ready to build, it’s time to find a PCB manufacturer. There are tons of them out there, but for prototype purposes cheaper is usually better. [Ian] at Dangerous Prototypes has just announced Dirt Cheap Dirty Boards, a PCB fabrication service for times where quality doesn’t matter too much. [Ian] also discussed the service on the Dangerous Prototypes forum.

The boards are definitely cheap. $12 USD gets you ten 5 cm by 5 cm boards with 100% e-test and free worldwide shipping. You can even choose from a number of solder mask colors for no additional cost. [Ian] does warn the boards aren’t of the best quality, as you can tell in the Bus Pirate picture above. The silkscreen alignment has some issues, but for $1.2 a board, it’s hard to complain. After all, the site’s motto is “No bull, just crappy PCBs.”

The main downside of this service will be shipping time. While the Chinese fab house cranks out boards in two to four days, Hong Kong Post can take up to 30 days to deliver your boards. This isn’t ideal, but the price is right.