Arduino-Controlled Marquee Arrow Points The Way To Whatever You Like

Reader [pscmpf] really digs the scrolling light look of old marquee signs and as soon as he saw some Christmas lights with G40 bulbs, he was on his way to creating his own vintage-look marquee arrow.

We must agree that those bulbs really do look like old marquee lights or small vanity globes. [pscmpf] started by building, varnishing, and distressing the wooden box to display the lights and house the electronics. He controls the lights with an Arduino Pro and an SSR controller board. The 24 lights are divided into ten sections; each of these has its own solid-state relay circuit built around an MC3042 as the opto-coupler, with a power supply he made from a scrap transformer.

[pscmpf] shares some but not all of his code as it is pretty long. There are five patterns that each play at three different speeds in addition to a continuous ‘on’ state. In his demonstration video after the jump, he runs through all the patterns using a momentary switch. This hack proves that Arduino-controlled Christmas lights are awesome year-round.

Continue reading “Arduino-Controlled Marquee Arrow Points The Way To Whatever You Like”

Hackaday Links: April 6, 2014

hackaday-links-chain

Back in September we saw this awesomesauce wristwatch. Well, [Zak] is now kitting it up. Learn more about the current version, or order one. [Thanks Petr]

Home automation is from the future, right? Well at [boltzmann138’s] house it’s actually from The Next Generation. His home automation dashboard is based on the LCARS interface; he hit the mark perfectly! Anyone thinking what we’re thinking? This should be entered in the Hackaday Sci-Fi Contest, right? [via Adafruit]

PCB fab can vary greatly depending on board size, number of layers, number of copies, and turn time. PCBShopper will perform a meta-search and let you know what all of your options are. We ran a couple of tests and like what we saw. But we haven’t verified the information is all good so do leave a note about your own experience with the site in the comments below. [via Galactic Studios]

We recently mentioned our own woes about acquiring BeagleBone Black boards. It looks like an authorized clone board is poised to enter the market.

Speaking of the BBB, check out this wireless remote wireless sensor hack which [Chirag Nagpal] is interfacing with the BBB.

We haven’t tried to set up any long-range microwave communications systems. Neither has [Kenneth Finnegan] but that didn’t stop him from giving it a whirl. He’s using Nanobridge M5 hardware to help set up a system for a triathlon happening near him.

VCF East: PetPix, Streaming Images To A Commodore PET

PETaday

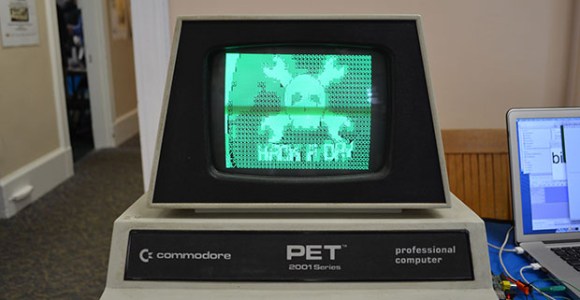
Thought the Vintage Computer Festival would just be really old computers with hundreds of people pecking 10 PRINT “HELLO” 20 GOTO 10? Yeah, there’s plenty of that, but also some very cool applications of new hardware. [Michael Hill] created PetPix, a video player for the Commodore PET and of course the C64.

PetPix takes any video file – or streaming video off a camera – and converts 8×8 pixel sections of each frame to PETSCII. All the processing is done on a Raspberry Pi and then sent over to the PET for surprisingly fluid video.

There is, of course, a video of PetPix available below. There are also a few more videos from [Michael] going over how PetPix works.

Continue reading “VCF East: PetPix, Streaming Images To A Commodore PET”

Reusable Vacuum Bag Saves You Money

FTWP5L5FLROLXM5.MEDIUM

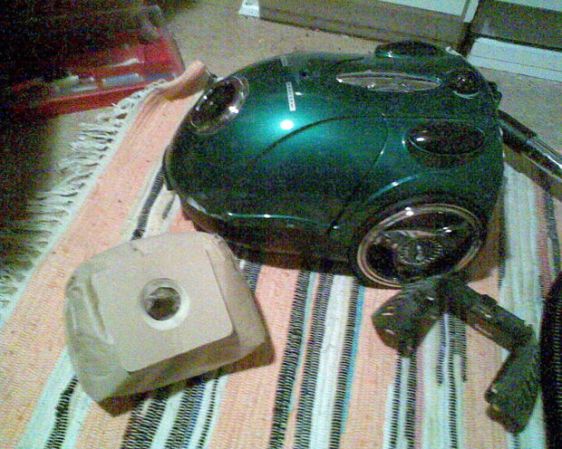
Vacuum dust bags are annoying. They’re expensive, one time use, and if you have an older vacuum cleaner, good luck finding replacements! [Karl] got fed up so he decided to make his own reusable dirt bag instead.

He’s using an old t-shirt as the new bag material but notes that you can use any other sufficiently drafty material as well — as long as it stops the dust but lets air through, you’re good! To seal the bag he’s using a piece of rubbery vinyl with a hole cut in it to seal against the intake pipe. This is sewn to the t-shirt with a piece of cardboard sandwiching the fabric. From there it’s just a matter of adding a zipper or Velcro, and you’re done!

He’s been using this filter for over a year and hasn’t had any problems with it yet — you can even wash it! While you’re at it, why not make a wet-spill attachment for your vacuum cleaner too?


VCF East: The Swyft Card

Ninety five percent of the population will say Apple computers is the brainchild of [Steve Jobs]. The other five percent will be right, but what nearly no one knows is that the Macintosh project was originally conceived by [Jef Raskin]. He holds the honor of turning the Mac into an, ‘information appliance’ and being one of the first people to seriously consider how millions of people would interact with computers.

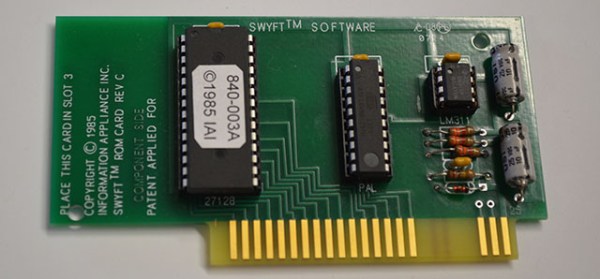
The Mac wasn’t [Jef]’s first project at Apple, though. Before the Mac project he was working on something called Swyft – an easy to use command line system that was first implemented as a firmware card for the Apple IIe. [Mike Willegal] was kind enough to bring one of these Swyft cards to the Vintage Computer Fest this weekend, and did a demo of it for us.

The basic idea behind the Swyft card was to have an integrated word processor, calculator, and access to Applesoft Basic. Holding down a ‘leap’ key – in the case of the Apple IIe add-on, the open apple key – allowed the user to search for text and perform operations on any result. It’s odd, but it just makes sense in some strange way.

[Mike] is doing a build class at the VCF today where anyone attending can build their own Swyft card. He also has instructions for building your own, should you want to experiment with one of the ‘could have beens’ of user interface design.

Continue reading “VCF East: The Swyft Card”

CPLD Tutorial: Learn Programmable Logic The Easy Way

The guys over at hackshed have been busy. [Carl] is making programmable logic design easy with an 8 part CPLD tutorial. (March 2018: Link dead.  Try the Wayback Machine.) Programmable logic devices are one of the most versatile hardware building blocks available to hackers. They also can have a steep learning curve. Cheap Field Programmable Gate Arrays (FPGA) are plentiful, but can have intricate power requirements. Most modern programmable logic designs are created in a Hardware Description Language (HDL) such as VHDL or Verilog. Now you’ve got a new type of device, a new language, an entirely new programming paradigm, and a complex IDE to learn all at once. It’s no wonder FPGAs have sent more than one beginner running for the hills.

The tutorial cuts the learning curve down in several ways. [Carl] is using Complex Programmable Logic Devices (CPLD). At the 40,000 foot level, CPLDs and FPGAs do the same thing – they act as re-configurable logic. FPGAs generally do not store their configuration – it has to be loaded from an external FLASH, EEPROM, or connected processor. CPLDs do store their configuration, so they’re ready as soon as they power up. As a general rule, FPGAs contain more configurable logic than CPLDs. This allows for larger designs to be instantiated with FPGAs. Don’t knock CPLDs though. CPLDs have plenty of room for big designs, like generating VGA signals.

[Carl] also is designing with schematic capture in his tutorial. With the schematic capture method, digital logic schematics are drawn just as they would be in Eagle or KiCad. This is generally considered an “old school” method of design capture. A few lines of VHDL or Verilog code can replace some rather complex schematics. [Carl’s] simple designs don’t need that sort of power though. Going the schematic capture route eliminates the need to learn VHDL or Verilog.

[Carl’s] tutorial starts with installing Altera’s Quartus II software. He then takes the student through the “hardware hello world” – blinking an LED.  By the time the tutorial is done, the user will learn how to create a 4 bit adder and a 4 bit subtractor. With all that under your belt, you’re ready to jump into big designs – like building a retrocomputer.

[Image via Wikimedia Commons]

Creative Continuity Tester Made For A Few Bucks

13595431395_4be0feaf4f_b

No multi-meter? For troubleshooting most household things, a continuity tester is extremely handy. And as it turns out, you can make your own from the dollar store for next to nothing.

[Carlyn] shows us how to make two different styles of continuity testers — a light up version using a bicycle light, or a buzzer version using one of those cheap window alarms. The leads are made of 1/8″ audio cables — and everything for both these testers cost less than $5 from their local dollar store. It’s a very simple build process that you can probably figure out just from this one photo, but [Carlyn] has also taken pictures of every step along the way.

Compared to building one of these out of components from Radio Shack, this method is much more MacGyver, and cheap! Hooray for taking advantage of mass produced consumer products!

Not functional enough? How about building a talking multimeter instead? No? Have you ever wanted two multi-meters in one? Say hello to the Mooshimeter!