DsPIC-based Spectrum Analyzer

spectrum_analyzer

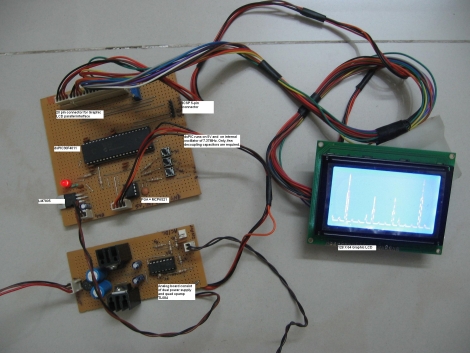
[Debraj] wrote to us describing a project he recently completed – a  simple, compact spectrum analyzer using a 16-bit dsPIC microcontroller.

The analyzer is fed an analog signal, which is passed through a large resistor followed by an opamp. A DC offset is then applied to the signal, after which it is passed through a software-programmable gain amplifier before being fed into the dsPIC’s analog input. A Fast Fourier Transform calculation is done using code provided by the PIC’s manufacturer once 128 samples have been collected. The results are then displayed on the attached LCD in real-time.

If you get a chance, take a look at the video embedded below for a walkthrough and demonstration of his analyzer. [Debraj] says that the analyzer was built to measure harmonics in his home power lines, but for demonstration purposes, he has used a simple function generator instead.

If you’re interested in seeing some other spectrum analyzers, be sure to check out these items we featured in the past.

Continue reading “DsPIC-based Spectrum Analyzer”

Toothpaste Diode

While reading the back of a tube a toothpaste [Underling] noticed that one of the ingredients was hydrated silica, gears turned, sparks flew and he wondered if he could possibly make a transistor out of the stuff. After thinking about it he decided that making a diode out of toothpaste would be easier and still prove the idea.

The quick n dirty explanation of this is he smeared some toothpaste on a bit of chrome and set it on fire with a propane torch. When set on fire the result is silica and sodium, heat causes the sodium to bond with the silica and since sodium is negatively charged this forms an n-type semiconductor or half of the diode. Chrome is used for the second half of the diode, for a few reasons, he had some lying around, its positivity charged, and the toothpaste contains a little bit of lye which oxidizes the chrome and burns off, bonding the silica to the metal.

What is left is a thin layer of chrome doped silicon under a layer of sodium doped silicon, which in spots where everything is perfect, acts like a diode, blocking current in one direction but not the other.

Motorcycle Sound Effects

[Winfred] was thinking one day, of how the world would be a different place if everything we owned had little start up and shut down sounds like our computers. Historically computers would just beep after passing their power on self test, and many PC’s still do, but in the 1980’s as machines became more powerful and home users wanted more flexibility in their hardware, startup chimes started to creep into our lives. And why not extend that little moment of joy to other objects, like adding Windows XP startup and shutdown sounds to your motorcycle.

Electronically the bill of materials looks like hobby shop catalog, featuring a Freeduino (Arduino variant), Adafruit wave shield, marine speakers, and a cheap-o mp3 amplifier from ebay. While admittedly not the cheapest way to play an audio clip [Winfred] offers a few suggestions to help drop the 100$ price tag, including just skipping it all together and mimicking the sounds with your voice.

Its a fun idea, its sure to earn some odd looks from his neighbors, and it will probably make you chuckle a little too.

PWM-controlled LED Display Is Truly A Gift From The Heart

led_heart_panel

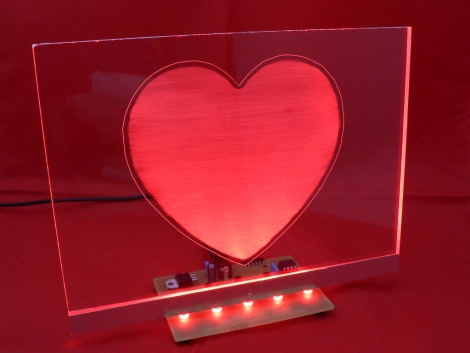
Instructables user [Simon] admits he addicted to electronics. Lucky for him, his wife of 15 years is pretty cool with, or at least tolerant of his need to fiddle with anything that plugs in. As a gift for their wedding anniversary, he decided it would be neat to combine his love for his wife with his love for electronics. The result is the the RGB LED “Love Heart” you see above. He built an RGB LED circuit controlled by a PIC12F683 microcontroller, which shines into a hand-etched plexi-glass panel.

The LED color is controlled using PWM, as you would expect. What you might not expect however, is the lengths [Simon] would travel to ensure nearly perfect color and brightness matching across the 5 LEDs he used in his project. Since RGB LEDs do not have a uniform output brightness, he used a Lux meter to precisely measure the white balance of each LED. He then plotted the results in Excel before coding the PWM driver. Now that’s devotion! Once the LEDs were settled, he went about constructing the rest of the LED panel.

If you are interested in building one for your sweetheart, [Simon] has you covered – he provides all of the schematics, templates, and source code required to get the job done.

Continue reading to see a video of his heart panel in action.

Continue reading “PWM-controlled LED Display Is Truly A Gift From The Heart”

Cooking Up Piezo Crystals At Home

piezo_crystal

[Collin] loves piezos – and why not?

According to him, they are about as close to magic as you can find in the world. We can’t really disagree on that one – there’s something oddly enchanting about piezoelectric materials.

Most commercially used piezoelectric devices that you find today are constructed out of man-made ceramic materials such as Lead zirconate titanate, and can be found in grill starters, gas-powered water heaters, etc. While they are common, it’s not exactly easy to synthesize these sorts of ceramic materials at home.

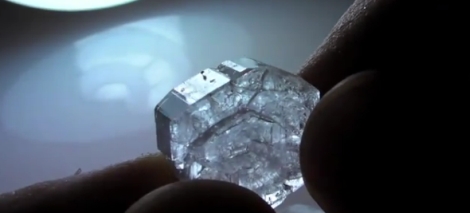
You can however, create piezoelectric crystals in your kitchen, using just a few simple ingredients. In his video, [Collin] shows us how to create Rochelle Salt, one of the first known materials found to exhibit piezoelectricity. The recipe calls for three ingredients, cream of tartar, sodium carbonate (soda ash), and water – that’s it. The procedure is quite simple, requiring you to heat a solution of water and cream of tartar, adding the soda ash a little at a time once it reaches the proper temperature. The solution is filtered after it turns clear and then left to sit overnight while the crystals form.

Take a look at the video embedded below to see how his Rochelle Crystals turned out, and be sure to try this out with your kids if they are interested in electronics. Making crystals that generate electricity when tapped is far cooler than making rock candy any day, trust us on this.

Continue reading “Cooking Up Piezo Crystals At Home”

The Evil Genius Simulator: Kinect Controlled Tesla Coils

The London Hackspace crew was having a tough time getting their Kinect demos running at Makefair 2011. While at the pub they had the idea of combining forces with Brightarcs Tesla coils and produced The Evil Genius Simulator!

After getting the go ahead from Brightarcs and the input specs of the coils they came up with an application in Openframeworks which uses skeletal tracking data to determine hand position. The hand position is scaled between two manually set calibration bars (seen in the video, below). The scaled positions then speeds or slows down a 50Hz WAV file to produce the 50-200Hz sin wave required by each coil. It only took an hour but the results are brilliant, video after the jump.

There are all these previously featured stories on the Kinect and  we’ve seen Tesla coils that respond to music, coils that  make music, and even MIDI controlled coils, nice to see it all combined.

Thanks to [Matt Lloyd] for the tip!

Continue reading “The Evil Genius Simulator: Kinect Controlled Tesla Coils”

Automated Harmonica Plays Simple Tunes

e-sharp_self_playing_harmonica

It seems that nearly everything is automated these days. Everywhere you look, people are being removed from processes in order to make them more efficient and less prone to mistakes. [Jon] however, saw one process that automation has yet to touch in a significant way – playing the harmonica.

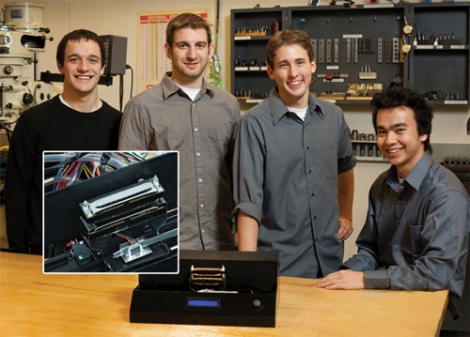
He constructed a harmonica-playing machine that can play a handful of simple songs with a few button presses. The machine was constructed using three PIC controllers, an air compressor, and a pair of harmonicas. A master PIC controller manages the whole operation, taking input from the PIC driving LCD, then handing off playing instructions to the PIC that manages the harmonicas.

Once the machine is started and a song is selected, the machine plays away, prompting for a new song once it has finished. The machine doesn’t quite play the harmonica like a human does, however. The reeds of one harmonica were reversed so that the player only needs to blow air, rather than require a vacuum to provide suction for the drawing motion typically used in harmonica playing.

As you can see in this video, the rig works decently, though it probably needs a bit more work to achieve that “human” feel.

[Thanks, Ben]