Cooking Up Piezo Crystals At Home

piezo_crystal

[Collin] loves piezos – and why not?

According to him, they are about as close to magic as you can find in the world. We can’t really disagree on that one – there’s something oddly enchanting about piezoelectric materials.

Most commercially used piezoelectric devices that you find today are constructed out of man-made ceramic materials such as Lead zirconate titanate, and can be found in grill starters, gas-powered water heaters, etc. While they are common, it’s not exactly easy to synthesize these sorts of ceramic materials at home.

You can however, create piezoelectric crystals in your kitchen, using just a few simple ingredients. In his video, [Collin] shows us how to create Rochelle Salt, one of the first known materials found to exhibit piezoelectricity. The recipe calls for three ingredients, cream of tartar, sodium carbonate (soda ash), and water – that’s it. The procedure is quite simple, requiring you to heat a solution of water and cream of tartar, adding the soda ash a little at a time once it reaches the proper temperature. The solution is filtered after it turns clear and then left to sit overnight while the crystals form.

Take a look at the video embedded below to see how his Rochelle Crystals turned out, and be sure to try this out with your kids if they are interested in electronics. Making crystals that generate electricity when tapped is far cooler than making rock candy any day, trust us on this.

Continue reading “Cooking Up Piezo Crystals At Home”

The Evil Genius Simulator: Kinect Controlled Tesla Coils

The London Hackspace crew was having a tough time getting their Kinect demos running at Makefair 2011. While at the pub they had the idea of combining forces with Brightarcs Tesla coils and produced The Evil Genius Simulator!

After getting the go ahead from Brightarcs and the input specs of the coils they came up with an application in Openframeworks which uses skeletal tracking data to determine hand position. The hand position is scaled between two manually set calibration bars (seen in the video, below). The scaled positions then speeds or slows down a 50Hz WAV file to produce the 50-200Hz sin wave required by each coil. It only took an hour but the results are brilliant, video after the jump.

There are all these previously featured stories on the Kinect and  we’ve seen Tesla coils that respond to music, coils that  make music, and even MIDI controlled coils, nice to see it all combined.

Thanks to [Matt Lloyd] for the tip!

Continue reading “The Evil Genius Simulator: Kinect Controlled Tesla Coils”

Automated Harmonica Plays Simple Tunes

e-sharp_self_playing_harmonica

It seems that nearly everything is automated these days. Everywhere you look, people are being removed from processes in order to make them more efficient and less prone to mistakes. [Jon] however, saw one process that automation has yet to touch in a significant way – playing the harmonica.

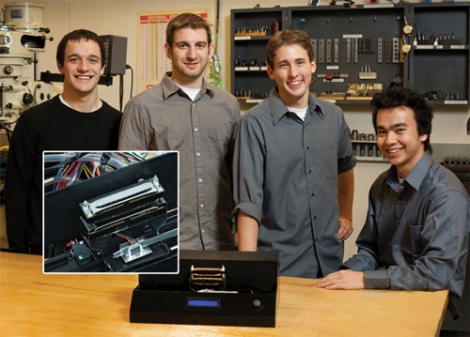
He constructed a harmonica-playing machine that can play a handful of simple songs with a few button presses. The machine was constructed using three PIC controllers, an air compressor, and a pair of harmonicas. A master PIC controller manages the whole operation, taking input from the PIC driving LCD, then handing off playing instructions to the PIC that manages the harmonicas.

Once the machine is started and a song is selected, the machine plays away, prompting for a new song once it has finished. The machine doesn’t quite play the harmonica like a human does, however. The reeds of one harmonica were reversed so that the player only needs to blow air, rather than require a vacuum to provide suction for the drawing motion typically used in harmonica playing.

As you can see in this video, the rig works decently, though it probably needs a bit more work to achieve that “human” feel.

[Thanks, Ben]

Electronic Diaper Bag Reminds You To Pack Everything But The Baby

lilypad_diaperbag

[jnorby] knows what it’s like to leave the house with her baby in tow, only to realize that she has left something she needs at home. Instead of relying on a paper checklist, she decided to craft her own diaper bag that alerted her if she had forgotten to pack a particular item.

She built her bag from scratch, wiring small circuits into each of the pockets she created on the inside of the bag. Wires were run to each half of a snap fastener, so that they would complete the circuit when the snaps touch. The LEDs and snaps were then connected to a LilyPad Arduino, which checks the status of the snap circuits, lighting the appropriate LED once the proper item has been packed.

While we like the idea of a bag that uses functional indicators that remind you to pack items, we do think that the use of the Arduino, or any microprocessor for that matter, is massive overkill. We would ditch the LilyPad and snap fasteners for reed switches or perhaps normally closed micro leaf switches that turn the LEDs off once the proper item has been packed, rather than the other way around.

PICAXE Using LEDs To Communicate

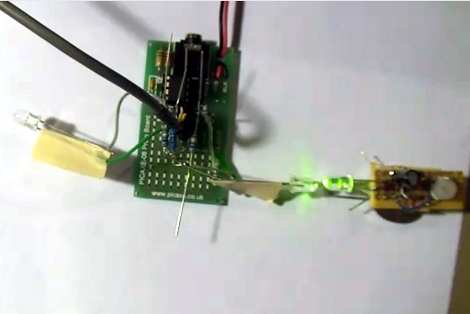
[Relwin] has being working on using LEDs as bi-directional devices. The setup above allows him to use each LED as an input, looking for a bright light source and then syncing up with the activity it receives. It is the most basic of communications using the components. The hardware at the heart of the system is a PICAXE development board on the left. The blinking light to the right causes the LED on the left of the picture to blink, but moving the blinking source over to that side will reverse the effect. The chip is programmed to play a tune on a piezo buzzer whenever a connection is lost. What is interesting to us is that these green LEDs will not detect a red LED flashing because the voltage threshold is different on the detector side of things.

He’s got some code available, but we’re really looking for the ideas of what to do with this concept. Maybe something along the lines of LED matrix video puzzles, or a variation on this laser-pointer LED game. Watch the demo video after the break and then let us know what you would use it for by leaving a comment.

Continue reading “PICAXE Using LEDs To Communicate”

Tilt And Pivot Camera Base Uses Just Two Servos

[Caled] shows us how to build a tilt and pivot camera base. One of these can be quite handy for taking precisely aligned images that can later be stitched together into panoramic, or even spherical images. We have grand visions of being able to produce something along the lines of these stunning interactive images with hardware that is cheaper and easier to build than this other motorized rig.

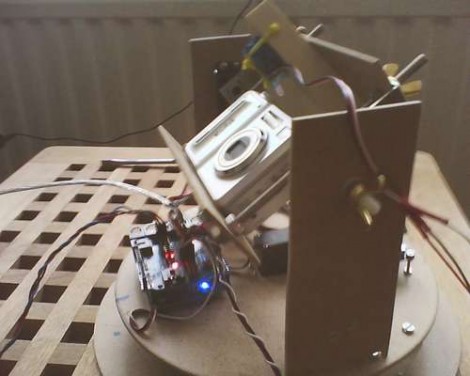
The design utilizes just two servo motors. In the image above you can just make out a pair of discs that serve as the base for the rig. In the center of the upper disc is the first servo, pointing downward, which rotates the camera. Two upright supports on either side of the point-and-shoot provide the framework for the tilt feature. The camera is mounted in a frame whose center is a threaded rod on the near side, and the second servo motor on the far side. An Arduino with a servo shield controls the movements along with a button pad and LCD screen as a user interface. The last step in the project log points to software options for combining the captured photos.

PIC Based Frequency Counter

Here’s a PIC based frequency counter that outputs the count via an RS232 serial connection. [Oakkar7] tipped us off about it after seeing the AVR based counter we featured yesterday. This project is a bit older and a bit dirtier.

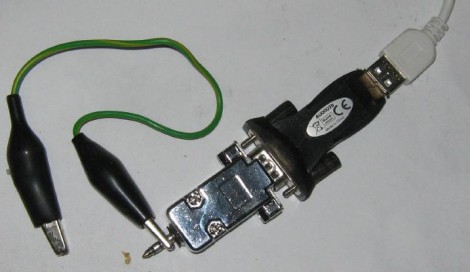
Inside the metal DB9 housing you’ll find just seven parts. The most important is a PIC 16F628 which handles both the counting and the serial communications. We’re not quite sure how it’s managing to talk to that USB-to-Serial converter without some type of level conversion. Since this microcontroller is not a dedicated counter chip a little bit of trimming must be done to bring the accuracy into spec. There’s also some physical trimming involved. In order to get everything to fit into the small enclosure the circuit was free-formed without a PCB or protoboard and the case of the DIP chip had to be ground down just a bit. As for the readout, a simple script can grab the data and display it in a terminal.

[via Piclist]