LED Matrix Pendants

If you want to mess around with some microcontrollers but don’t really have a purpose in mind this project is perfect for you. It’s cheap, easy to assemble, and there’s blinking LEDs! [TigerUp] shows us how he  put together some LED matrix pendants using just five components.

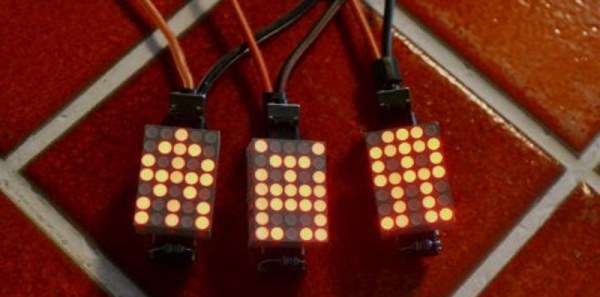
He calls the project Tiny Matrix, which is fitting as the pendant outline is barely 0.5″ by 0.7″. On the back an ATtiny2313 chip has been soldered directly to the legs of the LED display. They just happen to line up with I/O pins on the chip which makes for super simple soldering. Power comes from a coin-cell which is connected to the pendant by a red and black wire which make up the necklace for the device. The last two components not yet mentioned are a momentary push switch for changing modes, and a pull-up resistor on the reset pin. The bill of materials rings in at $4 and his firmware offers up nine different modes as you can see in the clip after the break.

[TigerUp] was inspired by this 8×8 matrix project.

Continue reading “LED Matrix Pendants”

Stellaris Launchpad Library To Drive The TM1638 UI Board

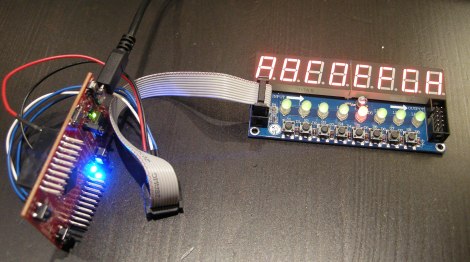
For those that grabbed one of these TM1638 UI boards you can now easily use it with your Stellaris Launchpad. [Dan O] took it upon himself to publish an ARM library for the UI board.

There’s not a lot of new stuff to talk about here. We’ve already seen this being driven by an FPGA. [Dan] also links to both an Arduino and an MSP430 library for the board. The one thing that is good to know is that the board seems to run fine from the 3.3V supplied by the Stellaris Launchpad.

The ARM chip has four different hardware SPI modules which could have been used to drive this display. But [Dan] opted to bit bang instead. This give him more flexibility, like easily changing the pin mapping and foregoing the need for external components. All it takes is direct connections from three I/O pins which are used for clock, data in, and data out. We’ve embedded the obligatory demo video after the break.

Continue reading “Stellaris Launchpad Library To Drive The TM1638 UI Board”

Nook Simple Touch As A Glider Computer

Look at the beautiful screen on that Nook Simple Touch. It has a lot of advantages over other hardware when used as a glider computer running the open source XCSoar software. The contrast of the display is excellent when compared to an LCD or AOMLED. That’s quite important as gliding through the wild blue yonder often includes intense sunlight. The display is also larger than many of the Android devices that have been used for this purpose. There are a few drawbacks though. One is that unlike other Android devices, this doesn’t have a GPS module built into it. But the price point makes up for the fact that you need to source an external module yourself.

This isn’t the first time we’ve seen the device used as a navigational display. This other hack put a simple touch on a sailboat for the same direct-sunlight-readability reason. For $100, and with the ability to root the system for use as an Android device, we expect to see this to keep popping up all over the place as a simple interface for a multitude of projects.

After the break you can see a video comparing the software running on a Nook display to one on a Dell Streak 5 LCD tablet.

Continue reading “Nook Simple Touch As A Glider Computer”

Malting Kiln Controller For Preparing Beer Brewing Grains

A quick primer is in order: when it comes to hobby brewing there’s two main types, extract brewing and all-grain brewing. The former uses a syrup that has been extracted from the grains at a factory while the latter adds the steps to do this yourself. But in both cases the brewing grains have already been malted. This is a careful process of soaking the grains and then kiln drying them. [Richard Oliver] built his own malt kiln controller to add the preliminary step to his home brewing ritual. Now the only thing he’s not doing himself is growing the grains (and perhaps culturing the yeast).

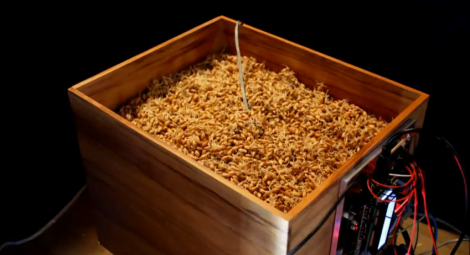
His original design used a food dehydrator for the drying step, but this didn’t work because the temperature wasn’t at the correct level. The new build uses the ceramic heating element from a 300W hot air gun. A blower directs air through the element and into the wooden box that serves as the kiln. An Arduino monitors the heated air to keep it right in the sweet spot. He’s included a graphing GUI for easy monitoring, which is shown in the video after the break.

Continue reading “Malting Kiln Controller For Preparing Beer Brewing Grains”