LED Fun And Light Painting With The PyMCU

pymcu-led-pov-writing

Recently [Richard] at [pyMCU] was nice enough to send me one of their units to try out. As featured here before, this little board allows you to control physical things using your computer and the Python programming language. After evaluating it and making a LED blink, there were a couple other LED projects I wanted to try.

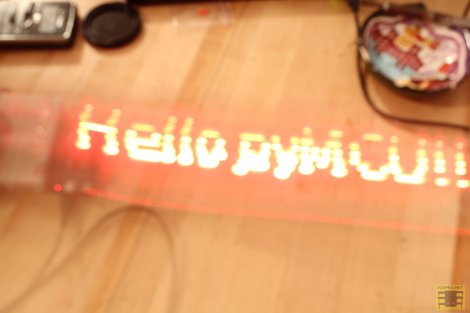
The first idea was to make a LED chaser. This was quite simple, using a little code and plugging in a few LEDs. From this, since you can make the LEDs chase each other, then in the right sequence it should be able to be used to display images using long-exposure photography. Be sure to check out the video after the break of this 10 LED chaser/light bar being assembled.

The results of this LED light bar experiment were really cool, writing some simple text and image with 10 LEDs. Considering the low component count, this is one of the simplest light bar builds that we’ve seen. Programming was simple as well, since the computer using Python does all the processing of the drawing as well as physically turning the LEDs on and off. Of course this setup isn’t without its limitations, having to be connected to a computer being the most obvious. Continue reading “LED Fun And Light Painting With The PyMCU”

MR-808 Is A Mechanical Version Of The Most Famous Drum Machine

Anyone who has listened to any music from the 80s has heard the percussive effects of the infamous TR-808 drum machine. To the modern ear, it sounds like an antique. Being the most popular drum machine of all time means it must have some redeeming qualities, right?

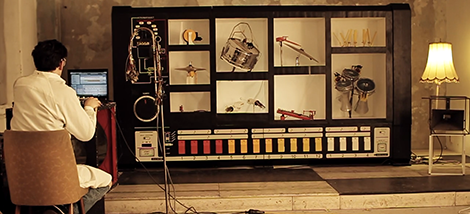
[Moritz Simon Geist] decided he wanted nothing to do with the wimpy computer-based emulations of a TR-808. Instead, he chose a more mechanical version that puts robots inside a gigantic 808 enclosure to play snares, high hats, cowbells, and drums in time with any MIDI drum track.

[Moritz] calls his build the MR-808 and puts a real-life bass drum, snares, hats, toms, claps, and a ride into a 3.3 x 1.7 meter ( 10.8 x 5.5 foot) case. The sound triggers are handled by Max/Msp communicating with a pair of Arduinos to handle the solenoids and light effects. You can read more about the hardware setup in [Moritz]’ behind the scenes look.

After the break you can see the MR-808 in action, both alone and by providing the percussion for [Moritz]’ band. A very cool build that now cries out for an Arduinofied bassist placed into an overgrown TB-303 enclosure.

Continue reading “MR-808 Is A Mechanical Version Of The Most Famous Drum Machine”

Skittles Sorting Machine Sorts Skittles, Keeps The Band Happy

In 1982, Van Halen had the biggest stage show around. Their rider – a document going over the requirements for the show – reflects this. In the middle of the requirements for the lighting and sound rigs, Van Halen placed a rather odd request; one (1) bowl of M&M, (ABSOLUTELY NO BROWN ONES). The theory being if the request for no brown M&Ms wasn’t followed, the lighting and sound rigs probably weren’t up to spec either.

It’s not M&Ms this time (they wouldn’t fit in the machine), but [egenriether] came up with a seriously clever solution for sorting Skittles by color. Why? We have no idea, other than, ‘just because.’

The build details are a little scant, but we know [egenriether] used a BASIC Stamp 2 for the electronics portion of the build. To sort the Skittles by color, a TAOS RGB color sensor reads the red, green, and blue values for each Skittle and actuates a servo that guides each piece of candy into its respective bowl.

It’s a very, very cool, if completely useless build. Still, we’re thinking it could be put to use if [egenriether] is ever backstage setting up before the band arrives.

Videos after the break. Thanks [Andrew] for sending this one in.

Continue reading “Skittles Sorting Machine Sorts Skittles, Keeps The Band Happy”

[Jeri] Shows Off A Delta Sigma ADC

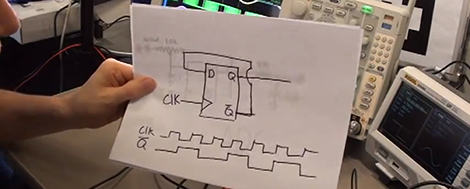
[Jeri] has had a bear of a time moving up to Valve Software, but electron microscope is safely in her garage (!) and her electronics lab is slowly taking shape. Since she can’t bring out the real-life gravity gun she’s working on, she decided to show off a one-bit ADC that uses just a flip-flop to sample an analog waveform  into digital data.

By toggling the clock input of a 74xx74 (or any flip-flop, really) and feeding the complimentary output to back into the data input, [Jeri] can get an output that is a 50% duty cycle feeding into the input of the chip. Adding an audio input to this data input with 10k pot to this feedback loop will cause the duty cycle to change in relation to the analog input, making a one-bit ADC.

As with any electronic shortcut, there are a few drawbacks: the clock cycle feeding into the flip-flop has to be pretty fast; at least a few dozen kilohertz if you’re sampling audio. Still, if you don’t have a free ADC pin, or you’d just like to build a bitcrushing guitar pedal, it’s a very simple (and cheap) way to get analog into a digital micro.

Continue reading “[Jeri] Shows Off A Delta Sigma ADC”

Thinking Cap Is Also Party Hat

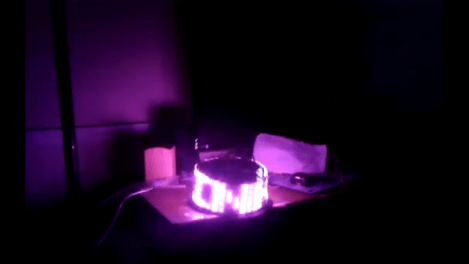
The Thinking Cap is a piece of wearable signage that lets you display what’s on your mind. The hat uses a Teensy 2.0 connected to a Bluetooth radio to allow the wearer to update the message on the fly, letting the room know what their thinking at that instant.

This hack is based off of LPD8806 controlled LED strips, which are becoming very popular for adding lots of LEDs to anything. There are five strips that need to be controlled over SPI, but the Teensy only has one SPI peripheral.

This lead to the use of multiplexer to allow for controlling each strip individually. The hat uses an interesting and low cost scheme to multiplex five channels using two 744052 dual 4 channel multiplexors and a 7400 inverter.

The Teensy can receive messages using the Bluetooth serial port protocol. The 5 x 7 pixel characters are stored in a framebuffer, and shifted around the hat to create the animation.

The result is a bright message circling around the user’s head, which can be updated with a smartphone over Bluetooth. Check out a video demo of the hat after the break.

Continue reading “Thinking Cap Is Also Party Hat”

Hackaday Links: November 4, 2012

Wait, you’re using a Dremel to cut PCBs?

Cutting copper-clad board or – horrors – depanelizing PCBs is a pain if you don’t have the right tool. Over at Hub City Labs they’re using a small, cheap metal shear & break. Bonus: it can cut and bend sheet metal, so the Hub City folks can also make enclosures.

Color Codes? Yes, Color Codes.

[Joe] sent in a cool utility he whipped up called resisto.rs. Plug in a resistor value, and it’ll spit out the 4-band, 5-band, and surface mount labels for that resistor value. Pretty neat.

Parallel Ports

Parallel ports may be a dying breed, but that didn’t stop [Electroalek] from putting together a VU meter that connects to his LPT port. It’s an extremely simple design; just connect some LEDs and resistors to the pins of a parallel port, and you can easily control them via software on a computer. Playing around with an LPT port used to be common knowledge, so we’re glad to see [Electroalek]’s work here.

The power is out, but Radio Shack is still open

[Jason] is stuck in New Jersey without power and needed a way to charge his phone. He whipped up a cell phone charger using an RC car battery and an LM317 voltage regulator. It’s an easy circuit to piece together, and judging from [Jason]’s picture will hopefully keep his cell phone charged until the power comes back on.

Shooting 50 Nerf darts all at once

If [Rob]’s project log is to be believed, it looks like they’re having a lot of fun over in the Sparkfun warehouse. They decided to have a full-scale Nerf gun war for a summer intern’s last day. [Rob] came up with a DIY Nerf shotgun that shoots 50 darts across the room, just waiting to be found sometime in the next decade.

There’s a great video of [Rob] firing the single barrel (yeah, they made a trident-shaped one as well) gun at well prepared but unsuspecting coworkers. Be sure to check out the comments of this post to see Hackaday readers frothing at the mouth because PVC pipe isn’t a pressure vessel guys. You’ll all surely die.

Turning The Raspberry Pi Into A Cocktail MAME Coffee Table

Ah, the cocktail arcade cabinet. With the right design, its able to blend right in to any living room decor, much more than any traditional stand-up cabinet, at least. [graham] over on Instructables didn’t tear apart a 30-year-old arcade cabinet for his new coffee table. Instead, he built one from scratch, connected it to a Rasberry Pi, and brought hundreds of arcade classics right in front of his couch.

The build began by cutting up some wood to house the 24″ LCD screen, Raspi, and arcade controls. The LCD screen is supported with a rather clever system of cross braces screwed into the VESA mount, and of course a piece of perspex protects the screen from the inevitable spills and scratches.

The joystick two blue ‘player’ buttons and the player 1 and player two buttons are wired directly to the GPIO pins of the Raspberry Pi. The Raspi boots up into a selection of MAME games, but there’s also an option for opening up the window manager and browsing the web.

It’s a very neat build that’s a lot smaller (and easier to build) than a traditional cocktail cabinet. As [graham] is using it for a coffee table, it might get more use than a regular MAME build, to boot.