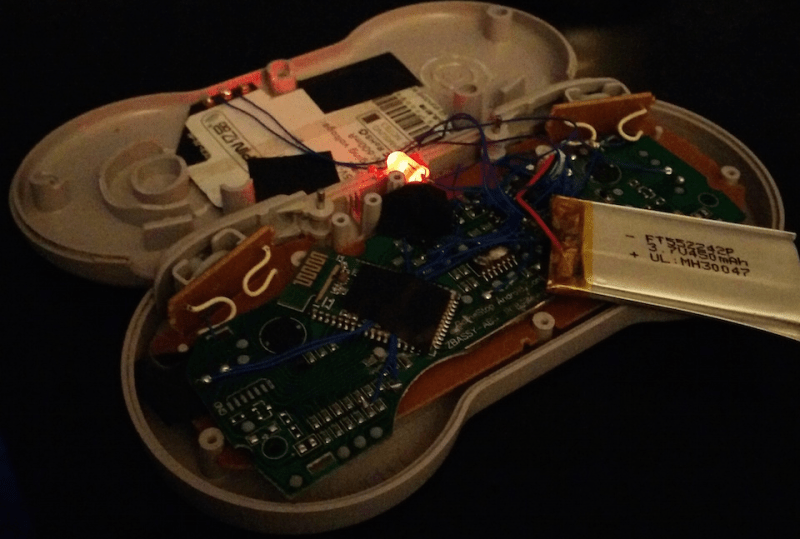
[Pat] was looking for a way to wirelessly control his Fire TV unit. He could have just went with one of many possible consumer products, but he decided to take it a step further. He modified a unit to fit inside of an original SNES controller. All of the buttons are functional, and the controller even features a wireless charger.
[Pat] started out with a Bluetooth video game controller marketed more playing video games on tablets. The original controller looked sort of like an XBox controller in shape. [Pat] tore this controller open and managed to stuff the guts into an original SNES controller. He didn’t even have to remove the original SNES PCB. [Pat] mentions that it was rather tedious to rewire all of the buttons from the original controller, but in the end it wasn’t too difficult. The only externally visible modification to the original controller is a small hole that was made for a power button.
In order to make this unit completely wireless, [Pat] also installed a Qi wireless charging module. Now, placing the controller on a charging pad will charge up the small LiPo battery in just about 45 minutes. This controller would be the perfect addition to a RetroPi or other similar project. If you’re not into Bluetooth, you can try using a Logitech receiver instead.


Yes, in these controllers will fit a Arduino with BT module, LiPo and a wireless charger. :)
At the moment, I have no time. But give me a few week and I will also document my NES-BT-controller. I promise!
Since we’re talking about our own controllers…..I did one for the Gamecube that was featured on Hackaday way back in 2007. The HAD link no longer seems to be exist but my original page is still up at http://www.ppl-pilot.com/SnesHack/index.htm. I used ASK transmitters which were a cheap option at the time, were I to repeat it these days I’d definitely use the HC-05s like he did (they’re currently selling for USD$1 each on EBay, intl shipping included).
Oh wow, I had no idea this was a pretty standard part! This could definitely make the whole thing smaller than what I came up with, but at $8 with a battery + charging circuit I couldn’t pass it up. I totally remember your project though. I was only 14 at the time and I wanted one of these so bad.
The wireless recharger in your project is a really nice touch, I want start looking into adding that to my own projects now. In my controller I used an iPad Nano battery which I charged by plugging it directly into a power adapter….it added a nice “i really hope this doesn’t catch fire one day” element :)
This is pretty sweet.
When I saw this in my email I read the title as “SNES controller modified to be completely useless” and expected a fail of the week.
Now I want the other half, a receiver on the SNES side.
finally a use for my firestick besides streaming
just picked up the controller this morning at gamestop, ordered the qi charger on amazon
now just gotta find an old snes controller , then when i get home sideload a snes emulator to my firestick
https://www.youtube.com/watch?v=ESV2UZeLFz8&feature=youtu.be
A couple of tips:
1. The controller can act in gamepad or keyboard mode set by the switch in the back. It works best in gamepad mode.
2. Some of the points are reachable by the test point pads which make it easy.
3. I’d avoid soldering directly to the bluetooth daughterboard. I burnt out one of mine on accident doing this.
4. The Qi receiver is too big and has to be cut down with scissors. You have to cut pretty close to the coil, so be careful.
Let me know how it goes!