How I Learned To Stop Worrying And Love My 3D Printer

So, you’re thinking about finally buying a 3D printer? All the cool kids have one. Plus, how hard can it be anyways? Well, before you pull the trigger, it might be best to read this cautionary tale of one user’s experience in getting started with his first 3D printer.

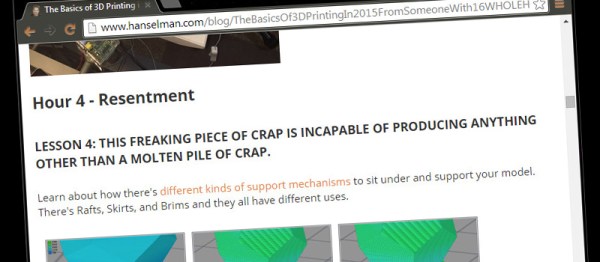
[Scott Hanselman] is a programmer and teacher who started out with zero knowledge of 3D printing. In his informative (and somewhat humorous) blog post, you can follow along with [Scott] hour-by-hour as he unravels the some of the common mysteries that almost everyone will encounter with their first 3D printer.

His adventure begins with the frustration of z-axis calibration, an important part of any 3D printer. Some of the newer printers are automating this step (as well as bed-leveling) with sensors and clever software, but even then it might need small tweaks to lay down the all-important first layer. By hour five with his new printer, this slight annoyance turns into disgruntlement, as he finds that although there is tons of documentation on-line, a lot of it can be outdated or simply unhelpful.

In the end, [Scott] got his printer up and running, and learned a lot along the way.  We bet you can too – with a little effort that is. As the quality of printers on the market keeps going up, and the price continuing to fall for an entry-level printer, now might be the perfect time for you to get started. But you might want to read [Scott’s] journey to help manage your out-of-the-box expectations.

Plant Watering System

Automated Plant Watering System Uses Car Parts

[Shane] recently built an automated plant watering system for his home. We’ve seen several similar projects before, but none of them worked quite like this one. Shane’s system is not hooked into the house plumbing and it doesn’t use any off-the-shelf electronic valves.

Instead, [Shane’s] build revolves around a device that looks like it was intended to spray weed killer. The unit works sort of like a Super Soaker. The user fills the jug with water and then pumps a handle multiple times to build up some pressure inside the jug. Then a button can be pressed and the air pressure forces water out of the nozzle. [Shane] came up with a way to automate all of these mechanical motions.

First [Shane] had to find a way to pump up the bottle. He purchased a car door electronic lock actuator from eBay. It’s a pretty simple device. It’s just a DC motor with a gear box that turns the rotational motion of the motor into linear motion. This is mounted to a wooden jig and attached to the pump. A dsPIC microcontroller rotates the motor back and forth, which in turn pumps up the bottle.

The dsPic is also hooked up to a small servo. The servo is mounted to the same wooden jig as the car door actuator. A small arm is mounted to the servo so that when it rotates, the arm presses the pressure release button. This sends the water out of the bottles nozzle. [Pat] hooked up a small length of hose to the nozzle so he can direct the water into his plants. The video below demonstrates how the unit works. Continue reading “Automated Plant Watering System Uses Car Parts”

Hardware for a ST4 to USB interface

Cheap USB Control For Your Telescope

There’s many complex systems for automatically pointing a telescope at an object in the sky, but most of them are too expensive for the amateur astronomer. [Kevin]’s Arduino ST4 interface lets you connect your PC to a reasonably priced motorized telescope mount, without ripping it apart.

The ST4 port is a very basic interface. There’s one pin per direction that the mount can move, and a common pin. This port can be added to just about any motorized mount with some modification to the controller. To connect to an Arduino, a TLP521-4 quad optoisolator is used. This keeps the Arduino and PC fully isolated from the motor circuits. but lets the Arduino take control of the mount.

With the hardware in place, [Kevin] cranked out some software which is available on Google Code. A simple Arduino sketch provides the USB interface, and a custom driver allows the ASCOM Platform to control the mount. Since many astronomy software tools support ASCOM, this allows the mount to be controlled by existing software.

With the interface in place, the mount can be used to find objects (GOTO) and automatically follow them with high accuracy (autoguiding). You can watch the telescope move on its own after the break.

Continue reading “Cheap USB Control For Your Telescope”

Wireless SNES Controller

SNES Controller Modified To Be Completely Wireless

[Pat] was looking for a way to wirelessly control his Fire TV unit. He could have just went with one of many possible consumer products, but he decided to take it a step further. He modified a unit to fit inside of an original SNES controller. All of the buttons are functional, and the controller even features a wireless charger.

[Pat] started out with a Bluetooth video game controller marketed more playing video games on tablets. The original controller looked sort of like an XBox controller in shape. [Pat] tore this controller open and managed to stuff the guts into an original SNES controller. He didn’t even have to remove the original SNES PCB. [Pat] mentions that it was rather tedious to rewire all of the buttons from the original controller, but in the end it wasn’t too difficult. The only externally visible modification to the original controller is a small hole that was made for a power button.

In order to make this unit completely wireless, [Pat] also installed a Qi wireless charging module. Now, placing the controller on a charging pad will charge up the small LiPo battery in just about 45 minutes. This controller would be the perfect addition to a RetroPi or other similar project. If you’re not into Bluetooth, you can try using a Logitech receiver instead. Continue reading “SNES Controller Modified To Be Completely Wireless”

Hacklet 35 – BeagleBone Projects

The Raspberry Pi 2 is just barely a month old, and now that vintage console emulation on this new hardware has been nailed down, it’s just about time for everyone to do real work. You know, recompiling stuff to take advantage of the new CPU, figuring out how to get Android working on the Pi, and all that good stuff that makes the Pi useful.

It will come as no surprise to our regular readers that there’s another board out there that’s just as good in most cases, and in some ways better than the Pi 2. It’s the BeagleBone Black, and for this edition of the Hacklet, we’re focusing on all the cool BeagleBone projects on Hackaday.io.

lcd
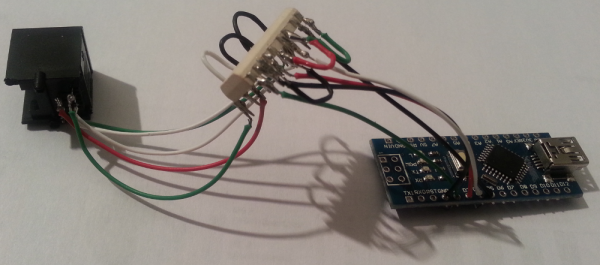
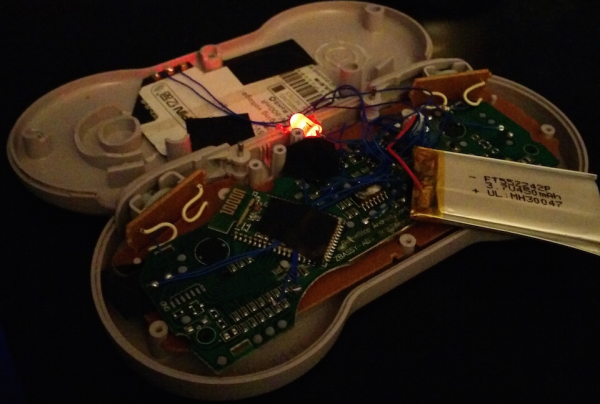
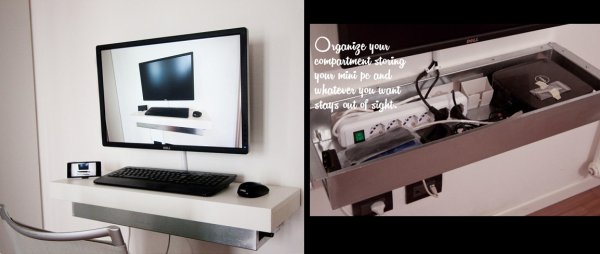
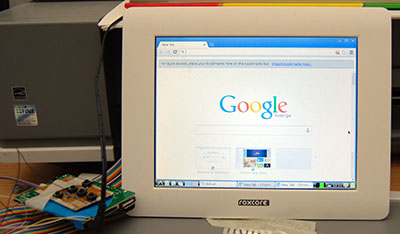
So you have a credit card sized Linux computer and a small, old LCD panel. If it doesn’t have HDMI, VGA or composite input, there’s probably no way of getting this display working, right? Nope. Not when you can make an LCD cape for $10.

[Dennis] had an old digital picture frame from a while back, and decided his BeagleBone needed a display. A few bits of wire and some FPC connectors, and [Dennis] has a custom display for his ‘Bone. It’s better than waiting for that DSI display…

bed[THX1082] is making a bed for his son. This isn’t your usual race car bed, or even a very cool locomotive bed. No, this is a spaceship bed. Is your bed a space ship? No, I didn’t think so.

Most of the work with plywood, MDF, paint, and glue is done, which means the best feature of this bed – a BeagleBone Black with an LCD, buttons, a TV, and some 3D printed parts – is what [THX] is working on right now. He’s even forking a multiplayer networked starship simulator to run in the bed. Is your bed a starship simulator?

beer

Beer. [Deric] has been working on a multi-step fermentation controller using the BeagleBone Black. For good beer you need to control temperatures and time, lest you end up with some terrible swill that I’d probably still drink.

This project controls every aspect of fermentation, from encouraging yeast growth, metabolization of sugars, and flocculation. The plan is to use two circuits – one for heating and one for cooling – and a pair of temperature sensors to ensure the beer is fermenting correctly.


If you’re looking for more BeagleBone Projects, there’s an entire list of them over on Hackaday.io with GLaDOs Glasses, Flight Computers, and Computer Vision.

minimalist desk

Sliding Minimalist Computer Desk Starts Life As Ikea Shelf

Where are you right now? You’re probably sitting at a desk staring at a computer screen. Us tinkerers/makers/hackers/diyers use computers all the time… they are a great tool and an easy way to spread and gather information. Since we spend so much time sitting at a computer, why shouldn’t the computer’s desk be made to enhance the experience?

Self-proclaimed web guru [Ellis] admits to being a minimalist and wanted a super sleek computer desk. He couldn’t find a commercially available model that he liked so he built his own.

The desk started as an Ikea floating shelf. The shelf comes with a metal bracket that secures to a wall, then the shelf completely slides over the bracket so that the shelf looks as if it is floating in air. Once the u-shaped bracket was installed to the wall, a custom compartment was made to fit in between the bracket’s arms. This compartment will hold a power strip, mini Dell computer and other accessories. On the outside of each bracket arm, [Ellis] mounted drawer slides. The stock shelf was then modified to mount to the newly added drawer slides allowing it to be pulled forward for typing or to expose the hidden compartment. When closed, the shelf-desk looks clean and blends into the wall color.

A wide screen monitor is mounted directly on the wall just above the desk and a wireless keyboard/mouse combo supports the clean look. [Ellis] now has the minimalist computer desk he’s always wanted that doesn’t distract him from his work (or ‘net browsing).

A protoboard layout for an ATtiny85 door chime

AES-CMAC On An ATtiny85

[Blancmange] built a custom door chime using an ATtiny85. Unlike most commercial products out there, this one actually tries to be secure, using AES-CMAC for message signing.

The hardware is pretty simple, and a protoboard layout is shown in the image above. It uses the ATtiny85 for control, with an LM380N audio amplifier, and a low cost 315 MHz receiver.

The more impressive part of the build is the firmware. Using AVR assembly, [Blancmange] managed to fit everything into the 8 Kbytes of flash on the ATtiny85. This includes an implementation of AES-CMAC, an AES cypher based message authentication code. The transmitting device signs the request with a key shared between both devices, and the receiver verifies that the message is from a trusted transmitter.

Fortunately, the assembly code is very well commented. If you’ve ever wanted to take a look into some complex ASM assembly, this is a great project to check out. The source code has been released into the public domain, so the rest of us can implement crypto on this cheap microcontroller with much less effort.