Super NES Cartridge Pulls A Sneaky, Plays Minecraft

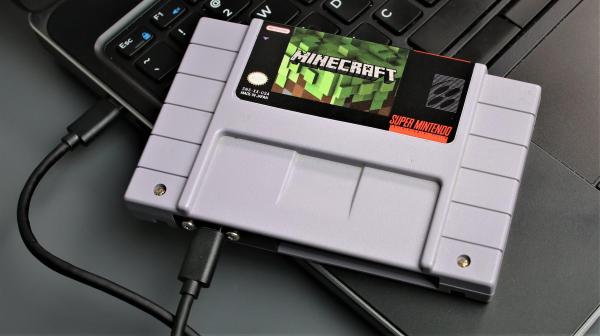
Sometimes it’s the little touches and details that make a project. That’s certainly the case with [Franklinstein]’s Super Nintendo (SNES) Cartridge Hard Drive. It might only be an enclosure for a solid-state hard drive with a USB interface, but the attention to detail is what really makes it worth checking out.

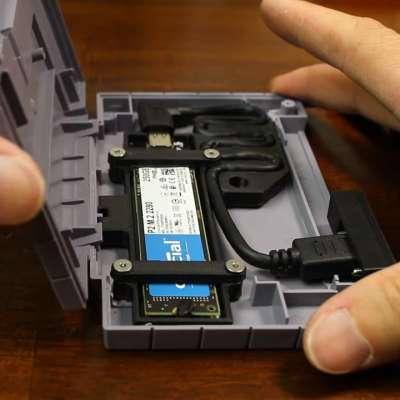
A SNES cartridge has a pretty standard clamshell-ish construction, but fitting the solid-state drive plus cable adapter turned out to be a bit of a challenge.

Since [Franklinstein] wanted the cartridge to look as original as possible, careful measuring and cutting was needed to securely fit the drive and provide an unobtrusive USB-C port tucked discreetly into the cartridge’s opening. We like the technique of using a 3D printed fixture to take up the slack on the cable by exactly the right amount, resulting in a 100% rattle-free end product. A custom Minecraft sticker label provides the finishing touch.

Being able to plug it into a computer and actually play Minecraft is a neat gimmick, but it really shows that some careful construction and assembly can be what makes something look like a clean build instead of a hack job. Take a look at additional build detail and pictures, and check out the video of the build, embedded below.

Hey, if sneaky cartridge mod tricks intrigue you, then you’ll absolutely want to check out how it was possible to play DOOM on a NES from a cartridge. Maybe that’s the next evolution for a cartridge with a Minecraft label on it?

Continue reading “Super NES Cartridge Pulls A Sneaky, Plays Minecraft

A SNES Music Player You Can Control With A Browser

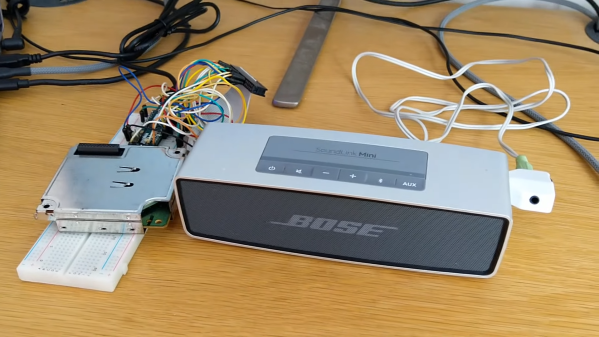
Listening to chiptunes on an emulator or software-based player is fine, but sometimes you just gotta have that real hardware charm. [Kazhuu] is one such enthusiast who feels this way, and set about building a hardware player for SNES chiptunes that can be controlled from a browser.

The build relies on an Arduino Micro to control the SNES Audio Processing Unit (APU), featuring the Nintendo S-SMP as produced by Sony and designed by Ken Kutaragi. Yes, the father of the PlayStation designed the capable wavetable synthesis chip in the Super Nintendo, and it’s that same hardware that [Kazhuu]’s project interfaces with modern hardware.

With the Arduino’s IO lines hooked up to the APU, song data can be piped out to the Arduino over a serial connection to a PC. This can be handled by a Python script, or more intuitively via a browser-based front-end. This uses WebUSB in order to take input from the browser and then send data out over the USB-serial connection to the Arduino.

It’s a neat demonstration of both working with vintage Nintendo sound hardware and how to code modern browser applications to work with embedded systems. If you’re a SEGA kid, though, you might prefer this build instead. Video after the break.

Continue reading “A SNES Music Player You Can Control With A Browser”

Understanding Custom Signal Protocols With Old Nintendos

For retro gaming, there’s really no substitute for original hardware. As it ages, though, a lot of us need to find something passable since antique hardware won’t last forever. If a console isn’t working properly an emulator can get us some of the way there, but using an original controller is still preferred even when using emulators. To that end, [All Parts Combined] shows us how to build custom interfaces between original Nintendo controllers and a PC.

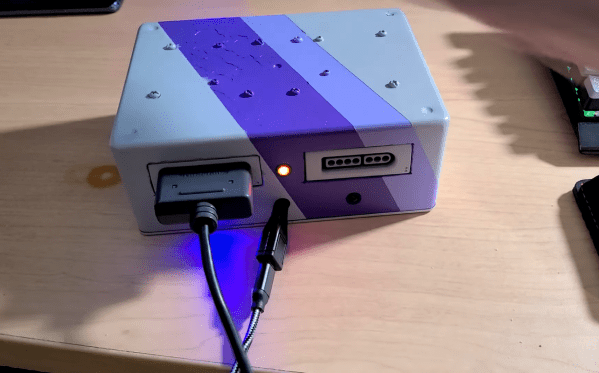
The build starts by mapping out the controller behavior. Buttons on a SNES controller don’t correspond directly to pins, rather a clock latches all of the button presses at a particular moment all at once during each timing event and sends that information to the console. To implement this protocol an Adafruit Trinket is used, and a thorough explanation of the code is given in the video linked below. From there it was a simple matter of building the device itself, for which [All Parts Combined] scavenged controller ports from broken Super Nintendos and housed everything into a tidy box where it can be attached via USB to his PC.

While it might seem like a lot of work to get a custom Nintendo controller interface running just because he had lost his Mega Man cartridge, this build goes a long way to understanding a custom controller protocol. Plus, there’s a lot more utility here than just playing Mega Man; a method like this could easily be used to interface other controllers as well. We’ve even seen the reverse process where USB devices were made to work on a Nintendo 64.

Continue reading “Understanding Custom Signal Protocols With Old Nintendos”

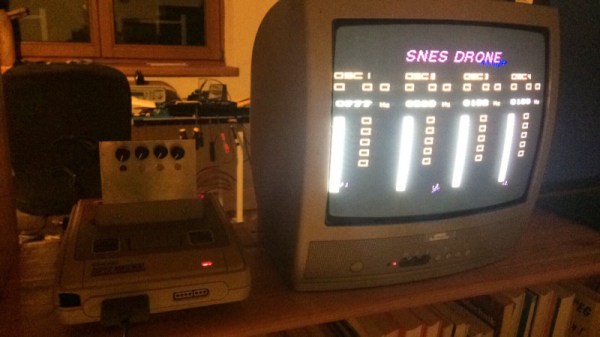
SNES Drone Aims To Rock The SPC700

Way back when, home computers and consoles didn’t have the RAM or storage space for full-length recorded audio tracks. Instead, a variety of techniques were used to synthesize music on the fly. The SNES was no exception, using the SPC700 Wavetable Synthesis chip to bust out the tunes. [Foxchild] wanted to use this chip as a standalone synthesizer, but didn’t want to hack up a console to do so. Thus, the SNES Drone was born!

Instead of gutting the console for the juicy chips inside, à la most SID based builds, the SNES Drone takes a different approach. It consists of a cartridge which interfaces with a stock SNES console, making the install easy and non-invasive.

The build is in an alpha state, with the oscillators in the SNES generating continuous tones, with frequency and volume controlled by potentiometers mounted on the cartridge. Having physical controls on the cartridge makes the build feel more like a real synth, and promises to look awesome on stage for a chiptune performance.

[Foxchild] is looking for others to get involved to help get the project to the next stage, so if you’re interested, reach out on the Hackaday.io page. We’ve seen other projects to liberate the awesome chip sounds of yesteryear, too. Video after the break.

Continue reading “SNES Drone Aims To Rock The SPC700”

Adding A Co-Processor To Help SNES Games With Slowdown

The Super Nintendo port of Gradius III is notable for being close to the arcade original, with its large, bright and colorful graphics. However, due to the limitation of the console’s hardware, the port is also well known for having constant slowdowns during gameplay, particularly during later sections. [Vitor] hacked away at the game and made a patched version of the ROM use a co-processor to eliminate those issues.

The slowdown seen here in Gradius is not uncommon to SNES players, many games of that era suffer from it when several sprites appear on the screen at once. This is partially due to the aging CPU Nintendo chose, supposedly in order to maintain NES backwards compatibility before the idea got scrapped. Unable to complete its tasks by the time the next frame needs to be shown, the hardware skips frames to let the processor catch up before it can continue. This is perceived as the aforementioned slowdown.

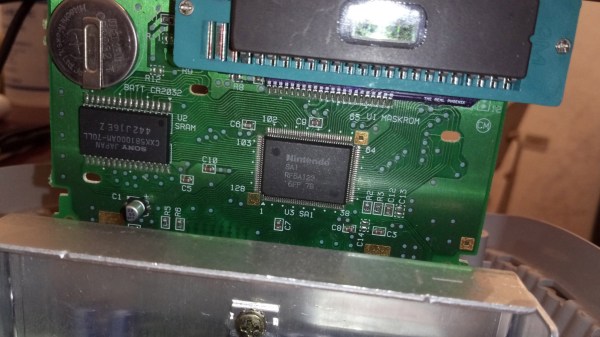
Around the later stage of the SNES’s life, games started using additional chips inside the cartridges in order to enhance the console’s performance. One of them is the SA1, which is a co-processor with the same core as the main CPU, only with a higher clock rate. By using it, games had more time to run through the logic and graphics manipulation before the next frame. What [Vitor] did was port those parts of Gradius III to the SA1, essentially making it just like any other enhanced cartridge from back in the day.

Unlike previous efforts we’ve seen to overclock the SNES by giving it a longer blanking time, this method works perfectly on real unmodified hardware. You can see the results of his efforts after the break, particularly around stage 2 where several bubbles fill the screen on the second video.

Continue reading “Adding A Co-Processor To Help SNES Games With Slowdown”

Creative Limitation And The Super Nintendo Sound Chips

The Super Nintendo recently experienced a surge in popularity, either from a combination of nostalgic 30-somethings recreating their childhoods, or because Nintendo released a “classic” version of this nearly-perfect video game system. Or a combination of both. But what made the system worthy of being remembered at all? With only 16 bits and graphics that look ancient by modern standards, gameplay is similarly limited. This video from [Nerdwriter1] goes into depth on a single part of the console – the sound chips – and uses them to illustrate a small part of what makes this console still worth playing even now.

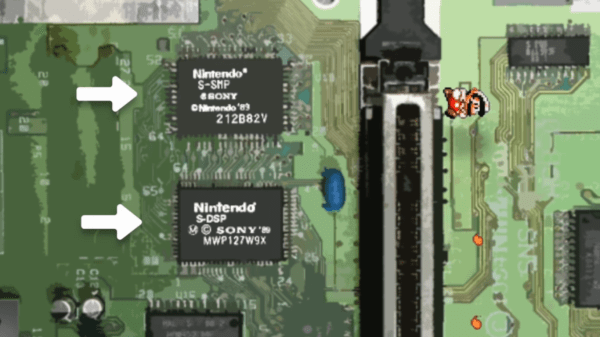
The SNES processed sound with two chips, a processing core and a DSP. They only had a capacity of 64 kb, meaning that all of a game’s sounds and music had to fit in this tiny space. This might seem impossible if you’ve ever played enduring classics like Donkey Kong Country, a game known for its impressive musical score. This is where the concept of creative limitation comes in. The theory says that creativity can flourish if given a set of boundaries. In this case it was a small amount of memory, and within that tiny space the composer at Rare who made this game a work of art was able to develop a musical masterpiece within strict limitations.

Even though this video only discusses the sound abilities of the SNES, which are still being put to good use, it’s a good illustration of what made this system so much fun. Even though it was limited, game developers (and composers) were able to work within its limitations to create some amazingly fun games that seem to have withstood the test of time fairly well. Not all of the games were winners, but the ones that were still get some playtime from us even now.

Continue reading “Creative Limitation And The Super Nintendo Sound Chips”

A Steady Hand Makes This Chip Work Again

What do you do when you’re working with some vintage ICs and one of the tiny legs pops off? That’s what happened to [Kotomi] when working with an old Super Nintendo. A single lead for the sound chip just snapped off, leaving [Kotomi] one pin short of a working system (the Google Translatrix). This is something that can be fixed, provided you have a steady hand and a rotary tool that’s spinning at thousands of RPM.

Fixing this problem relies on a little bit of knowledge of how integrated circuits are built. There’s a small square of silicon in there, but this tiny die is bonded to a metal leadframe, which looks like the ribcage of a robotic centipede. This leadframe is covered in epoxy, the pins are bent down, and you have an IC. Removing just a tiny bit of epoxy grants access to the leadframe which you can then solder to. Don’t breathe the repair, it’s not pretty, but it does work.

While this technique makes use of a Dremel to break into the chewy nougat center of a vintage chip, and in some ways this could be called decapsulation, it really isn’t. We’ve seen people drop acid to get to the center of a chip and a really hot torch will get to the middle of a ceramic chip, but this technique is just accessing the lead frame of the IC. All ICs have a stamped (or photoetched) metal frame to which the silicone die is bonded. Running a Dremel against some epoxy doesn’t access the silicon, but it does grant access to the signals coming off the chip.