I print something nearly every day, and over the last few years, I’ve created hundreds of practical items. Parts to repair my car, specialized tools, scientific instruments, the list goes on and on. It’s very difficult for me to imagine going back to a time where I didn’t have the ability to rapidly create and replicate physical objects at home. I can say with complete honesty that it has been an absolutely life-changing technology for me, personally.
But to everyone else in my life, my friends and family, 3D printers are magical boxes which can produce gadgets, weapons, and characters from their favorite games and movies. Nobody wants to see the parts I made to get my girlfriend’s 1980’s Honda back on the road before she had to go to work in the morning, they want to see the Minecraft block I made for my daughter. I can’t get anyone interested in a device I made to detect the algal density of a sample of water, but they all want me to run off a set of the stones from The Fifth Element for them.
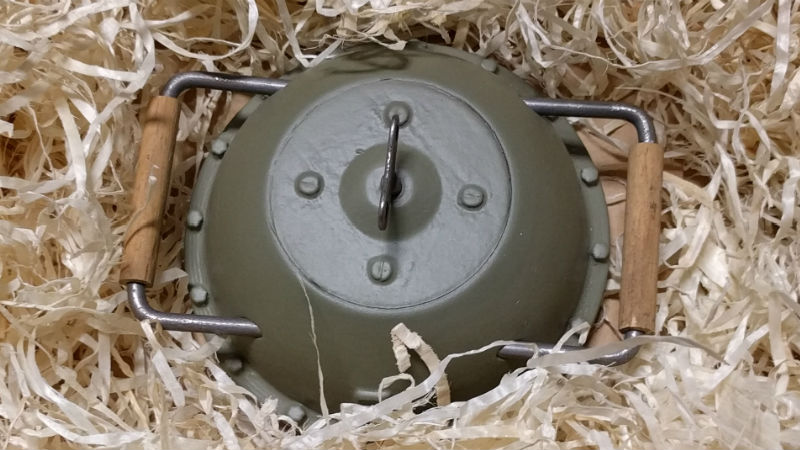
As I recently finished just such a project, a 3D printed limpet mine from Battlefield 1, I thought I would share some thoughts on the best practices for turning fiction into non-fiction.
Getting the Model
Before you can print it, you need to model it. Or ideally, have somebody else model it for you. Generally speaking, when it comes to games or movies that have a considerable fandom, you should be able to find 3D models to work from fairly easily. Unless it’s something obscure that only you and your circle of friends are into, there’s an excellent chance somebody has already slaved away at a high-quality 3D model of it that you can base your project on.

If you’re lucky, you can find a suitable model in the “Prop” category of sites like Thingiverse or MyMiniFactory, ideally something that even has some pictures of the final painted product to give you a guide. These models might not be 100% suited for your needs, but they’re likely to get you pretty close and beat having to start from scratch.
If you can’t find what you’re looking for on the usual sites, and you’re serious about getting the thing made, you might expand your search to sites like CGTrader or Renderosity. But keep in mind that these models are not always suitable for printing. There are many people out there who simply 3D model things from their favorite fictional universe for the fun of it, and never intend on actually printing it. This is characterized by models which either don’t have appropriate real-world dimensions or have far too much surface detail to be printable on your standard desktop 3D printer. You can still use these models, but they’ll need some work.
Modifying STLs
In a perfect world, you’d find the exact model you needed and it would be printable without jumping through any hoops. But we don’t live in a perfect world, so more often than not you’ll need to fiddle with the STLs for the design you’ve found to get what you need. You’ll then discover if you didn’t know already, that modifying STL files sucks.
The problem is, STL files aren’t really meant to be modified. It’s very similar to how an exported image in GIMP or Photoshop is “flattened”, losing the separate layers used to create it. An STL is a single object, and it can’t be easily separated back into its principle components. Ideally, any model you download would also have the “source” used to create the STL, but in most cases, they don’t, so we just have to play the hand we’re dealt.
In general, this means you’ll have to load up the STL you want to modify and either add or subtract new elements to it to get the desired effect. For the limpet mine, I was lucky enough to find a nice model of it on Thingiverse, but there were certain parts of the original model I wanted to delete.
To make room to insert neodymium magnets inside the base so the mine, I imported the original STL for the base into OpenSCAD, created an array of short cylinders arranged in a circle, and finally used the difference() command to subtract it from the original STL.
A similar trick was used to delete the “key” at the top of the mine, leaving an empty hole in its place.
Don’t Print What You Don’t Have To
 That leads us to the next point: don’t waste time and material printing something you can otherwise source. Many of the designs you’ll find online will have nuts, bolts, and screw heads worked into the design. Printing these little details works well enough if you want to knock something out with the minimum amount of effort, but why not just use real hardware? Adding real hardware to your printed projects will give them a much more realistic final appearance, and all you need to do is put a hole in the STL to insert it.
For the limpet mine, I cruised eBay until I found an old clockwork key that looked close enough to the one used in the game and was about right size-wise to be in scale. Then I just stuck it into the hole created in the previous step. I didn’t even glue it in, the ability to turn and remove the key is a nice interactive feature of the final product.
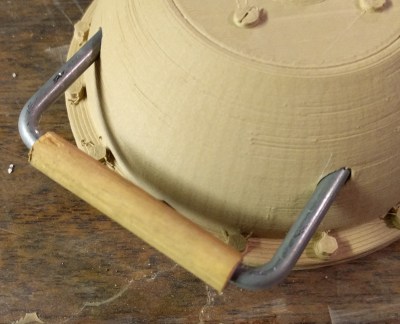
I also replaced the printed handles with bent pieces of round stock steel and wooden dowels I hollowed out on the drill press. I was especially happy with this addition, as it gives the final mine a much more realistic appearance that would be difficult to duplicate with painted plastic.
Finish Work

The biggest part of creating a good-looking prop is unquestionably the finish work. Printing it, and even adding real hardware, will only get you so far. Unless you put the effort into sanding and painting the printed model, it’s never going to look like anything but extruded plastic and some bits of metal.
I’ve already gone into great detail about the basic approach I take to finishing 3D prints, so I won’t go over them again here. But there’s something I didn’t really mention in the previous article: things don’t always need to be perfect. In fact, they rarely need to be perfect. Real-world objects are often rough and dinged up, and you can use that to your advantage during the finishing process.
If you’re working on a weapon of some type, battle damage is really essential. If you’ve got a ding or nick in the print, consider using that to your advantage rather than attempting to fill it in. Try painting the low spot with a metallic color, followed by the final color on top of it. Then you can use some sandpaper to strategically remove the top color and expose the “metal” underneath. This will give the effect of a dent that caused the paint to flake away.
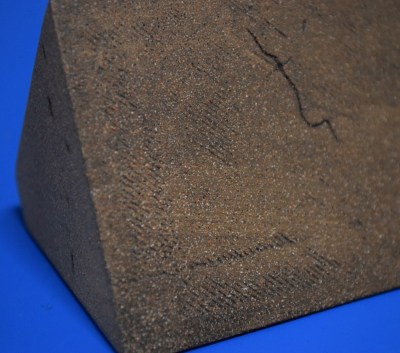
Similarly, if the object is meant to have a rough texture, don’t waste your time sanding the print smooth. A few layers of filler primer and texture paint will more than cover up the print striations.
Practice Makes Perfect
These are a few tips that came to mind while working on this recent project, but there’s more to building good-looking props than reading a couple of pointers online. Like any other skill, it takes practice to put these ideas to use. It’s something of a vicious circle: to get good at producing high-quality 3D printed objects, you need to keep making more of them. Your shelves will soon be filled with all manner of props and toys in various levels of completion. Of course, there are worse fates than being surrounded with neat little trinkets.
Do the good readers of Hackaday have their own tips and tricks for turning rolls of plastic into something worthy of display on your shelf?


You need to get some more maker / hacker friends in your life! Personally, I couldn’t care less about the “gadgets, characters, and weapons” stuff, except to admire the quality, craftsmanship, and problem-solving. But I’d want to see and hear all about the parts made to fix or modify other gear, to build new equipment, etc.
“the parts I made to get my girlfriend’s 1980’s Honda back on the road”
Dude! Hack a Day! Take care of your own. Pay your writers will ya?!?!
I drive the cheapest car honda made 12 years ago. It has 60,000 miles.
In three years I’m going to put classic plates on it.
Wha?! Tom’s girlfriend is Brian?!?!
solid math and reading skills there, mango.
Your world isn’t ready for our love.
The definition of classic is a bit wacky.
79 lime green VW bus here, but mine is not eligible for classic plates because it has an 88 Golf block in it. But your vehicle would be..
Damn. You must live really close to where you work and all of the other places you frequent. I have an 09 Silverado that I have put 186,000 miles on, bought it at the end of the model year, and didn’t even drive it for 6 months while working in Afghanistan.
drive a car you love, rather than trying to keep up with the misconception that cars over 3/4 years old are evil and unreliable(Also stops supporting the industry trend of thousands of basically identical boxes with wheels on them)
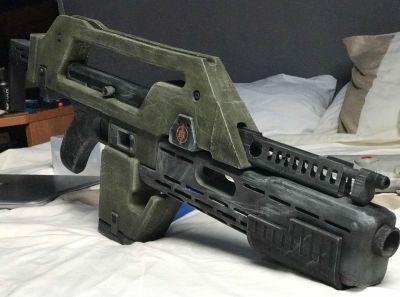
Have to put an orange tip on that gun. ;-)
probably not in the US. (in australia, yes, orange tip required).
If I saw that “mine” in a public space, I’d think it was real and call the cops!
B^)
STL is the most trash tackular file format to send mechanical design data across the net. Every time some one post their STL’s and claims they made an open source device I just want to punch them in the face. STL do not convey the original design intent, just try to figure out the center of a hole from an STL or its diameter with any degree of accuracy.
STEP files at minimum should be use to share open source mechanical design data.
+1 at least.
I’m surprised Thingyverse even allows projects with only STL files (as ‘open source’).
Wanted to modify a component tester case and was very disappointed. It was my first rodeo with (modifying) a 3d CAD design.
Yet the open source tools for manipulating STEP are not really that great either.
But step can be imported into Autodesk products or solidworks, which both have free trials to be properly modified.
There are good open source projects for manipulating STEP, like Freecad or blender.
https://www.freecadweb.org/
Every time I see one of these dramatic, over-reaction posts, I want to punch the commenter in the face.
See what I did there? In all seriousness though, maybe word it like this:
“To any uncompensated individual spending their limited free time working on an opensource project, THANK YOU! If possible, could you please, use STEP files though? They make it easier for others to further modify your work. Much appreciation. Sorry for my past behavior. I was acting childish.”
The High Horse award goes to Internet citizen of the year!
“Nobody wants to see the parts I made to get my girlfriend’s 1980’s Honda back on the road before she had to go to work in the morning…”
I do, actually. What parts were there? Were they moving parts? Load-bearing parts? Safety-critical parts?
Opening stones like in Fifth Element would be nice how to detect dirt anyone ?
Piezo microphone and board from a roomba. Does dsp to detect dirt from larger objects
+1 on the .stl sentiment. It’s an end use file format like .pdf, designed for final output, not editing or modification.
I always make a habit of providing .step and the native file format (.3dm in my case) when posting to the likes of thingiverse etc.
When I want to modify an .stl, I usually find it is easier to just remodel the whole thing, using the .stl as a template. That way I have a much easier time tweaking and modifying it in the long run.
Plus I can set my own tesselation settings to make a much higher poly count and hence smoother .stl, unlike many of the horribly low-poly .stl files you find everywhere.
I found that poly count has an effect on part accuracy and not the way that would seem apparent. To high of a poly count seems to lend to a larger cumulative error over large parts. At least that has been my experience so far with FDM. If I used a high poly count to convert models to .stl I always had to mess with scale to get accurate parts, total pain. Now I use a “medium” surface deviation and my parts come out accurately with out having to change the scale.
I’ve definitely found myself just starting a design over rather than trying to fiddle with somebody else’s STL. Sometimes I’ll import the original STL and use that as a “stencil” to make the new model, and then just remove the imported STL and have something I can actually work with.
Fusion 360, while not being free-as-in-speech, is in my experience hands down the best tool for that:
You can fit (as in least-square) lines, circles and splines in a sketch to the stl and use that to create extrusions, lofts etc. Also, for more organic forms you can create objects from T-splines directly, which you can then have fusion “pull” to the stl.
In particular the fitting has helped me on a numbe of occasions!
Or use Ansys Spaceclaim to quickly reverse engineer a solid body from what ever fragmented and facetted piece of stl crap you found…