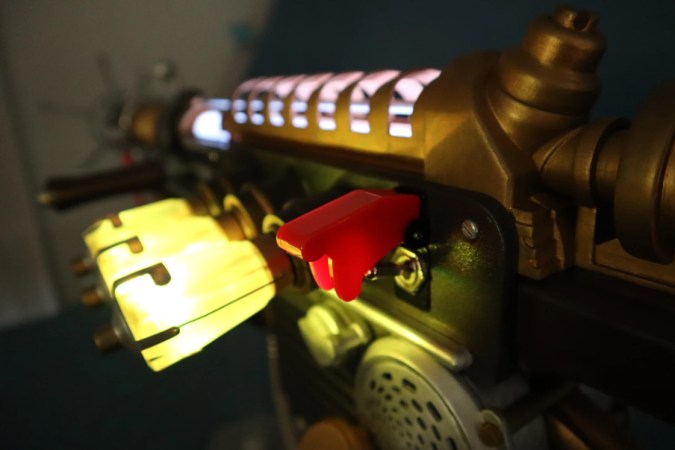
A functioning model of the Wunderwaffe DG-2 from Call of Duty: Zombies.

DIY Wunderwaffe And Others Make Up This Open-Source Arsenal

Unless you stay up all night and have a dozen printers going, it’s probably way too late to make one of these beautiful prop weapons designed by [Andrew] of The Ray Gun Project in time for Halloween. Most of them are from Call of Duty: Zombies, though there is an awesome little disco grenade from Fortnite as well.
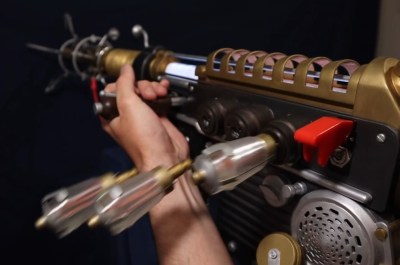
All of the projects are fantastic, but we chose to highlight the Wunderwaffe DG-2 from COD: Zombies because, well, vacuum tubes. For those unfamiliar with the ‘waffe’s operation, those vacuum tubes act as ammo magazines. Once they’re empty, you power them down with that big red switch and eject them one at a time with the lever, just like in the game.

Inside is a Feather M0 Express that runs the RGB LEDs and uses a Hall effect sensor to read magnets in the quick-change ammo magazine. You can see how it works in the demo video after the break.

There are BOMs for several of the prop weapons, along with assembly drawings and support forums for anyone who wants to build their own. Don’t feel like gathering all the bits and bobs yourself? [Andrew] is selling hardware packs for the ray gun, but you’ll have to scrounge the parts yourself if you want to build the Wunderwaffle.

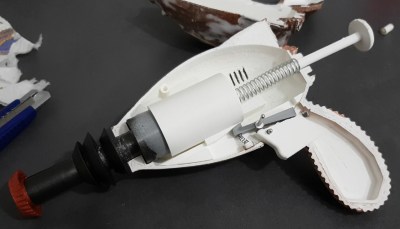
Are you a Grinch who wants to keep kids off of your lawn? Scare ’em off with a giant NERF gun.

Continue reading “DIY Wunderwaffe And Others Make Up This Open-Source Arsenal”

Null Shard Build Blurs Line Between Game And Reality With Laser Cutting, Mold Making, 3D Printing

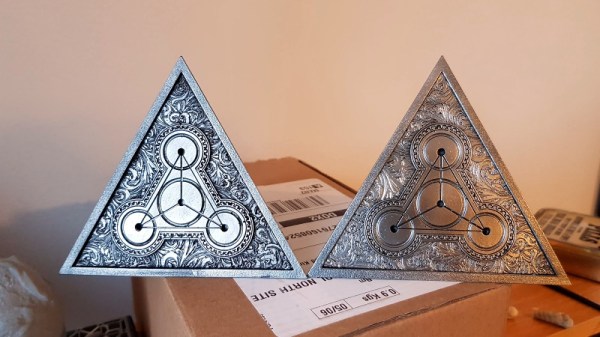
In The Room Three, players are tasked with collecting mysterious objects known as “Null Shards”. But it seems one player, who goes by the name [Juiceman], took this challenge a bit literally. Starting with promotional art released for the game, he embarked on an epic journey to create a replica “Null Shard” that ended up looking so good that one of them is currently residing in a place of honor at the headquarters of developer Fireproof Games.

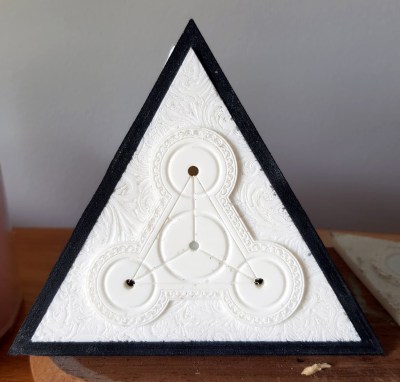
The developers had previously released image files to create a papercraft version of the Null Shard on their website, so [Juiceman] based his initial CAD work on these designs. But it turned out the surface texture was a little too complex to laser etch into acrylic without making a soupy mess. He simplified it a bit, while trying to retain the overall effect. From the superb laser-etched acrylic master he made a silicone mold started casting the eight triangular panels needed for two copies of the Shard.

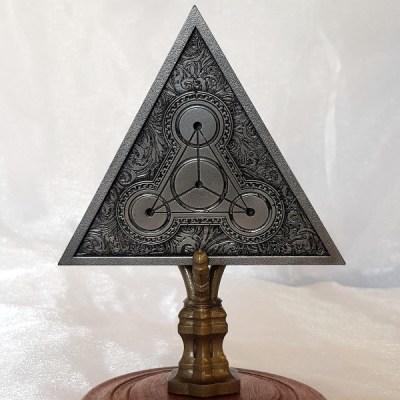
To hold it all together [Juiceman] create a “skeleton” pyramid by first experimenting with designs on a traditional plastic FDM printer. After a few tries he had a workable design and switched over to a laser sintering machine, giving the final frame a gorgeous texture. With the cast panels installed and a few coats of paint, he had his Null Shards.

The final step was to turn down a piece of ash to make a nice base, and 3D print the feet and “claw” mount for the Shard using the same laser sintering process. The finished product looks fantastic, and apparently lives on a shelf next to a similarly constructed replica of the “Lament Configuration” puzzle cube from the Hellraiser films. [Juiceman] says the two replicas are the first entries into his “Geometries of Hell” collection, which incidentally, we’ve decided will officially be the name of our first metal album. All we need to do now is learn how to play instruments.

We’ve previously looked at how 3D printing and a dash of dedication can create some incredible prop builds, and once upon a time, we even ran a Sci-Fi Contest that challenged our readers to bring their favorite movie and game objects into the real world. Builds like this are a perfect example of what happens when a dedicated hacker or maker gets inspired by a piece of entertainment that really resonates with them.

[Thanks to Lauren for the tip]

Prop WWII Machine Gun Courtesy Of Home Depot

There’s perhaps nothing worse than working on a project and realizing you don’t have the part you need to complete it. You look through all your stuff twice, maybe three times, on the off chance it’s hiding somewhere. Perhaps even reach out to a few nearby friends to see if they might have something you can use. Forget local stores, what you need is so specific that nobody’s going to keep it in stock. You’re stuck, and now everything has to be put on hold.

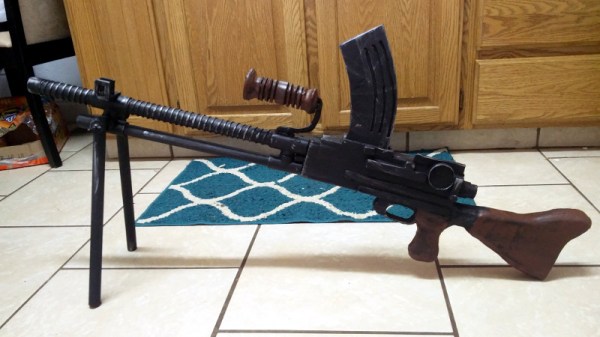
That’s precisely what happened to [Nathan Cragun] recently. He needed a Japanese Type 96 Light Machine Gun for a particular scene in the independent World War II film he’s working on, and couldn’t find one anywhere. Out of options, he ended up building a replica with parts from the hardware store. OK, so it isn’t exactly like being short a passive component or two on that new PCB you’re putting together. But while we can’t say a project of ours has ever been short a 70+ year old Japanese machine gun, we can definitely relate to the feeling.

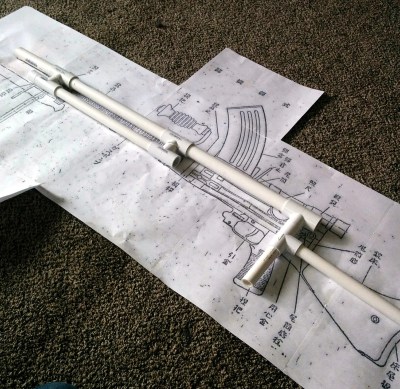
To start his build, [Nathan] printed out a full size diagram of the Type 96 and starting placing PVC pipes on top of it to get a sense for how it would all come together. Once the basic tubular “skeleton” of the weapon was completed, he moved on to cutting the rest of the parts out of EVA foam.

The major pieces that needed to be made were the stock and receiver, but even small details like the spiral ribbing on the barrel and the sights were created to scale using pieces of foam. In a particularly nice touch, [Nathan] even made the magazine removable. If we had to guess, some Japanese soldiers will be shown reloading the weapon onscreen for added authenticity.

The important thing to remember with a filming prop like this is that it doesn’t need to look perfect, just close. It might be used in the background, or seen only for a second during a fast pan. Even in professionally produced TV and movies, many of the props are little more than carved foam. With the excellent job [Nathan] did painting and weathering this build, we have no doubt it will look completely believable in the final production.

We’re no strangers to prop builds here at Hackaday, but they are generally of the science fiction or video game variety, so a historical build is a nice change of pace.

Beat This Mario Block Like It Owes You Money

People trying to replicate their favorite items and gadgets from video games is nothing new, and with desktop 3D printing now at affordable prices, we’re seeing more of these types of projects than ever. At the risk of painting with too broad a stroke, most of these projects seem to revolve around weaponry; be it a mystic sword or a cobbled together plasma rifle, it seems most gamers want to hold the same piece of gear in the physical world that they do in the digital one.

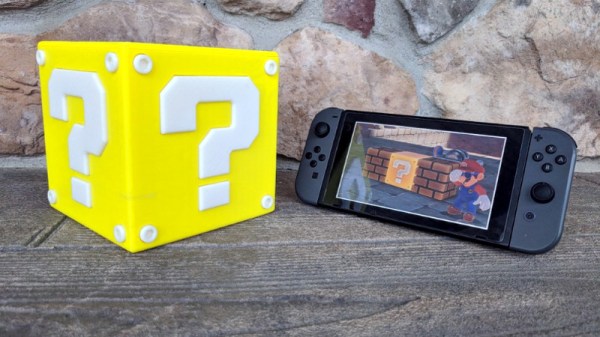
But [Jonathan Whalen] walks a different path. When provided with the power to manifest physical objects, he decided to recreate the iconic “Question Block” from the Mario franchise. But not content to just have a big yellow cube sitting idly on his desk, he decided to make it functional. While you probably shouldn’t smash your head into the thing, if you give it a good knock it will launch gold coins into the air. Unfortunately you have to provide the gold coins yourself, at least until we get that whole alchemy thing figured out.

Printing the block itself is straightforward enough. It’s simply a 145 mm yellow cube, with indents on the side to accept the question mark printed in white and glued in. A neat enough piece of decoration perhaps, but not exactly a hack.

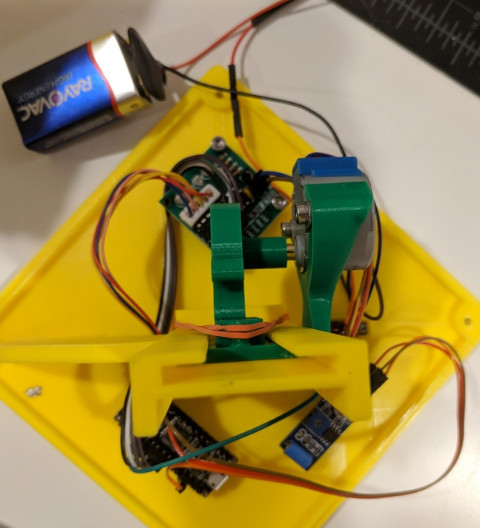
The real magic is on the inside. An Arduino Nano and a vibration sensor are used to detect when things start to get rough, which then sets the stepper motor into motion. Through an ingenious printed rack and pinion arrangement, a rubber band is pulled back and then released. When loaded with $1 US gold coins, all you need to do is jostle the cube around to cause a coin to shoot out of the top.

If this project has got you interested in the world of 3D printed props from the world of entertainment, don’t worry, we’ve got you covered.

Continue reading “Beat This Mario Block Like It Owes You Money”

The Era Of Orville Props Has Officially Begun

Over a decade after the last Star Trek show warped off of television, we finally have a new series in the form of Star Trek: Discovery. But much to the chagrin of many old school Trek fans, Discovery has gone all in on the gritty and hyper-serialized storytelling that’s taken over TV since Starfleet last patrolled the airwaves. But for those who are looking for somewhat more lighthearted space adventures, Seth MacFarlane (of Family Guy fame) has created a show which is essentially a love-letter to Star Trek: The Next Generation called The Orville. Some have gone as far as to claim that The Orville is the true continuation of the Trek legacy, though such discussion sounds awfully close to a Holy War to us so we’ll steer clear.

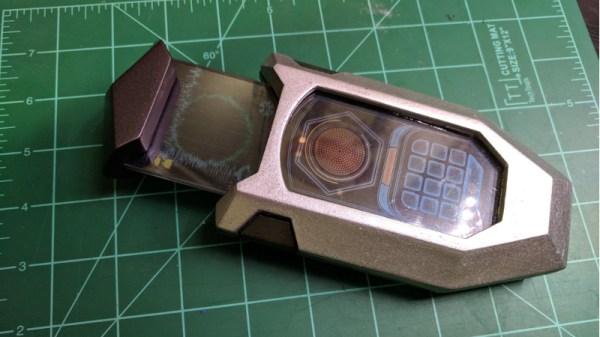
Unfortunately for The Orville fans, the series doesn’t have nearly the commercial draw of Trek. Accordingly, the market for things like replica uniforms and props from the show is still in its infancy, meaning fans of the show have to go the DIY route. [JohnSmallBerries] is one such fan, and his 3D printed “Comscanner” from The Orville is a shot across the bow to the well established Trek prop-making scene.

Without so much as an official toy version of the device, [John] was forced to do his initial 3D rendering based completely on screenshots from the show. Even the scale of the device had to be guessed, as it’s usually only seen being held in a crew member’s hand. In the end he reasoned it’s probably supposed to be about the size of a large smartphone.

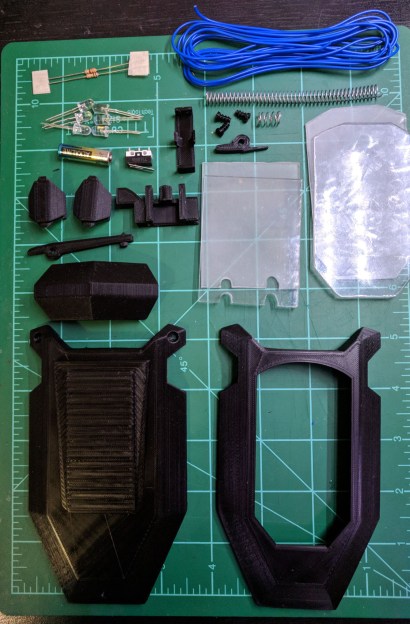
Not content with just a static prop, [John] managed to integrate not only the spring-assisted retractable display of the scanner from the show, but also some LED backlit panels complete with a screen-accurate user interface. Judging by the internal shots of the scanner, it looks like there’s still plenty of room inside to add some more advanced electronics. The next evolution of this prop will surely be to add in a microcontroller and potentially even a real screen to add some more elaborate effects and (relatively) practical functions.

We’ve seen plenty of impressive builds of Star Trek gadgets, arguably bringing the devices much closer to reality than the original show runners ever did. It will be interesting to see if The Orville inspires a new generation of engineers to bring their favorite fictional pieces of kit into the real world.

Bringing Fiction To Life With 3D Printing

I print something nearly every day, and over the last few years, I’ve created hundreds of practical items. Parts to repair my car, specialized tools, scientific instruments, the list goes on and on. It’s very difficult for me to imagine going back to a time where I didn’t have the ability to rapidly create and replicate physical objects at home. I can say with complete honesty that it has been an absolutely life-changing technology for me, personally.

But to everyone else in my life, my friends and family, 3D printers are magical boxes which can produce gadgets, weapons, and characters from their favorite games and movies. Nobody wants to see the parts I made to get my girlfriend’s 1980’s Honda back on the road before she had to go to work in the morning, they want to see the Minecraft block I made for my daughter. I can’t get anyone interested in a device I made to detect the algal density of a sample of water, but they all want me to run off a set of the stones from The Fifth Element for them.

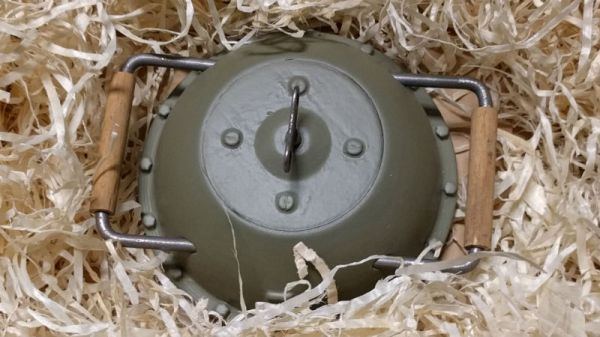
As I recently finished just such a project, a 3D printed limpet mine from Battlefield 1, I thought I would share some thoughts on the best practices for turning fiction into non-fiction.

Continue reading “Bringing Fiction To Life With 3D Printing”

Fully 3D Printed Nerf Thirst Zapper

In case you weren’t aware, there is a whole community out there that revolves around customizing NERF guns. In that community is a subculture that builds their own NERF guns, and within that group is a sub-subculture that 3D prints NERF guns. So next time you are contemplating how esoteric your little corner of the hacking world is, keep that in mind.

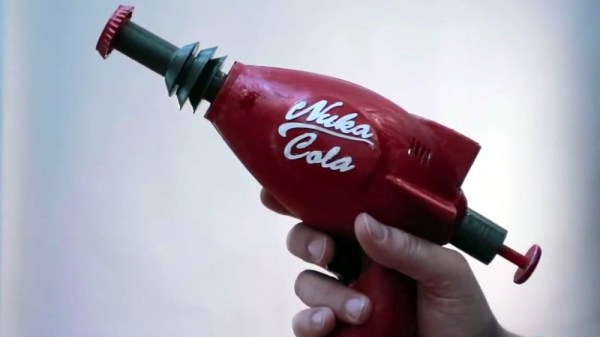
Anyway, [Wekster] is currently making his way in the world of 3D printed one-off NERF guns, and has unveiled his latest creation: a fully 3D printed “Thirst Zapper” from Fallout 4. Except for the springs, each and every piece of this gun was printed on his CR-10 printer. You could even wind your own springs if you really wanted to, and keep the whole thing in-house. Because if you’re going to do something this niche, you might as well go all in.

Even if you aren’t a member of the NERF-elite, the video [Wekster] has put together for this project is a fantastic look at what it takes to design, print, and finish a custom build. From creating the model to mixing the paint to match the in-game model, this video has a little something for everyone.

This isn’t the first time we’ve covered 3D printed NERF guns, but it’s surely the most ornate we’ve ever seen. Interestingly, the bar is set pretty high for Fallout-themed builds in general, so perhaps there’s some unwritten rule out there in regards to Fallout prop builds.

Continue reading “Fully 3D Printed Nerf Thirst Zapper”