While complex devices assembled from 3D printed components are certainly impressive, it’s the simple prints that have always held the most appeal to me personally. Being able to pick an object up off the bed of your printer and immediately put it to use with little to no additional work is about as close as we can get to Star Trek style replicators. It’s a great demonstration to show off the utility of your 3D printer, but more importantly, having immediate access to some of these tools and gadgets might get you out of a jam one day.
With that in mind, I thought we’d do things a little differently for this installment of Printed It. Rather than focusing on a single 3D model, we’ll be taking a look at a handful of prints which you can put to practical work immediately. I started by selecting models based on the idea that they should be useful to the average electronic hobbyist in some way or another, and relatively quick to print. Each one was then printed and evaluated to determine its real-world utility. Not all made the grade.
Each model presented here is well designed, easy to print, and most critically, legitimately useful. I can confidently say that each one has entered into my standard “bag of tricks” in some capacity, and I’m willing to bet a few will find their way into yours as well.
Soldering Fingers (LED Mod)
This little gadget is about as simple as they come: a big block of plastic with tapered slots in the top you can force a wire down into to hold it still. With slots on both sides, wires can easily be held in position for doing splices. This model is created by [Tristan Fritz], and is actually a modification of an earlier soldering assistance tool by [Domenic]. By adding a series of holes into one side, components such as resistors and LEDs can be held in place for quick soldering.


Classically one would use a “Third-Hand” soldering aid for these kinds of tasks, but I really like how much smaller and lighter this version is. You can just toss it into your bag and it’s available whenever you need it. A piece of felt on the bottom might not be a bad idea, but otherwise this is ready to go as soon as the printer is done doing its thing. Personally I’ve printed this in PLA and had no issues while soldering, but if you’re a bit heavy handed with the iron and are worried it might get too hot, doing it in PETG wouldn’t hurt.
Cross Tweezer
There are a lot of printable designs out there for tweezers, and selecting just one was pretty tough. Whether you need extra long ones or super strong ones, somebody’s got a model floating around out there for you. But in the end I picked “Cross Tweezer” by [Johannes]. Rather than printing in a single piece, these tweezers are three separate components that you then assemble (a drop of glue helps, but is not strictly required). The clever design of theses tweezers combined with the natural flexibility of the plastic causes them to continually pull themselves closed with enough force to easily lift up small components.


I’m really very impressed with these tweezers. Their grip force is perfect for the kind of work you’d be using this sort of thing for, and the fact that it automatically locks onto whatever you pick up prevents hand fatigue. As an added bonus, it’s a bit safer around sensitive electronics than traditional tweezers since it’s plastic. These are fast and easy to print, though the very tips of the tweezers can curl up if you don’t have good bed adhesion.
Cable Clip
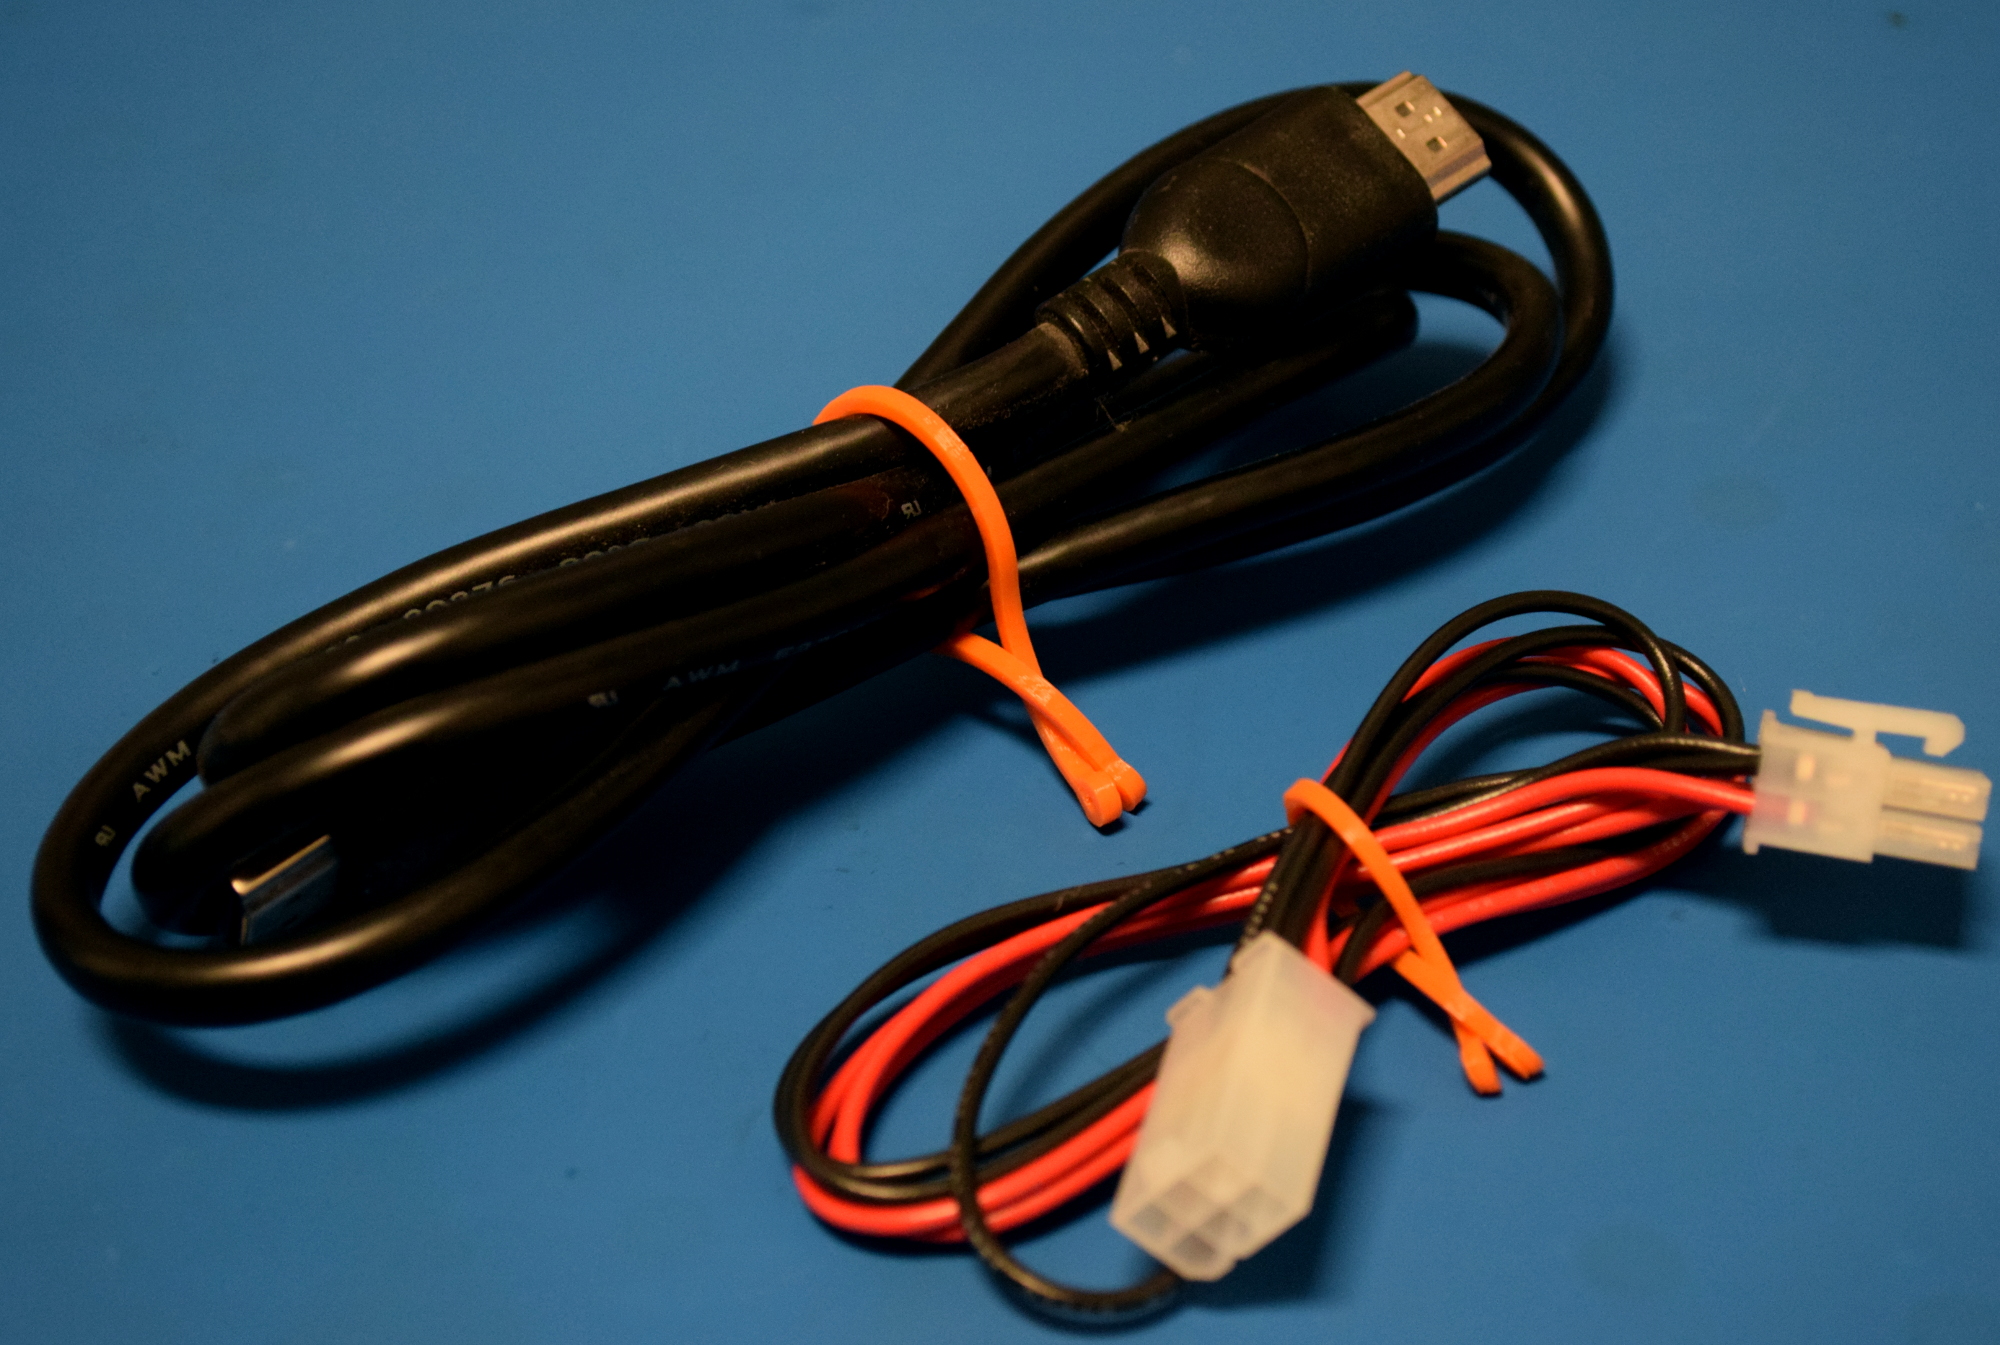 These cable clips by [Brandus Lucian] are reusable, easy to secure, and best of all fast and cheap to print. They’re available in a range of sizes and work great on everything from thin wires to thick cords. Printed in different colors, they can also be useful in keeping wires separated into easily identifiable bundles.
As with the “Cross Tweezer”, this design relies on the flexibility inherent in thin printed structures. Opening and closing the ties multiple times doesn’t seem to have any ill effects on the materials, though the jury is still out as to how they would hold up extended to humidity for long periods of time.
These are best printed in large batches; fill your whole bed up with them and start mass production. However this is another model which is especially susceptible to issues with bed adhesion, so make sure your first layer is dialed in before running a batch of these off or you might come back to a bed full of plastic spaghetti.
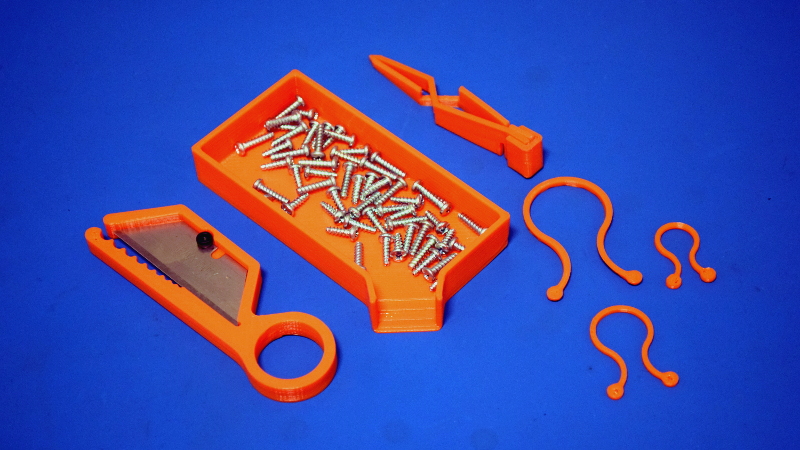
Small Parts Funnel Tray
These little part trays designed by [Sean Charlesworth] are extremely handy to have around, and I’ve already started printing more in different scales and colors to help keep small parts organized while taking things apart. The funnel side is great when you want to pour out the contents into a baggie or your screw organizer.


If you couldn’t tell just by looking at it, this is a stupendously easy print. When scaled up it can take awhile to print though, so at some point it might make more sense to go a different route. But small versions like the red one pictured here only take a few minutes to complete at 0.3 mm layer height.
Wire Stripper v2
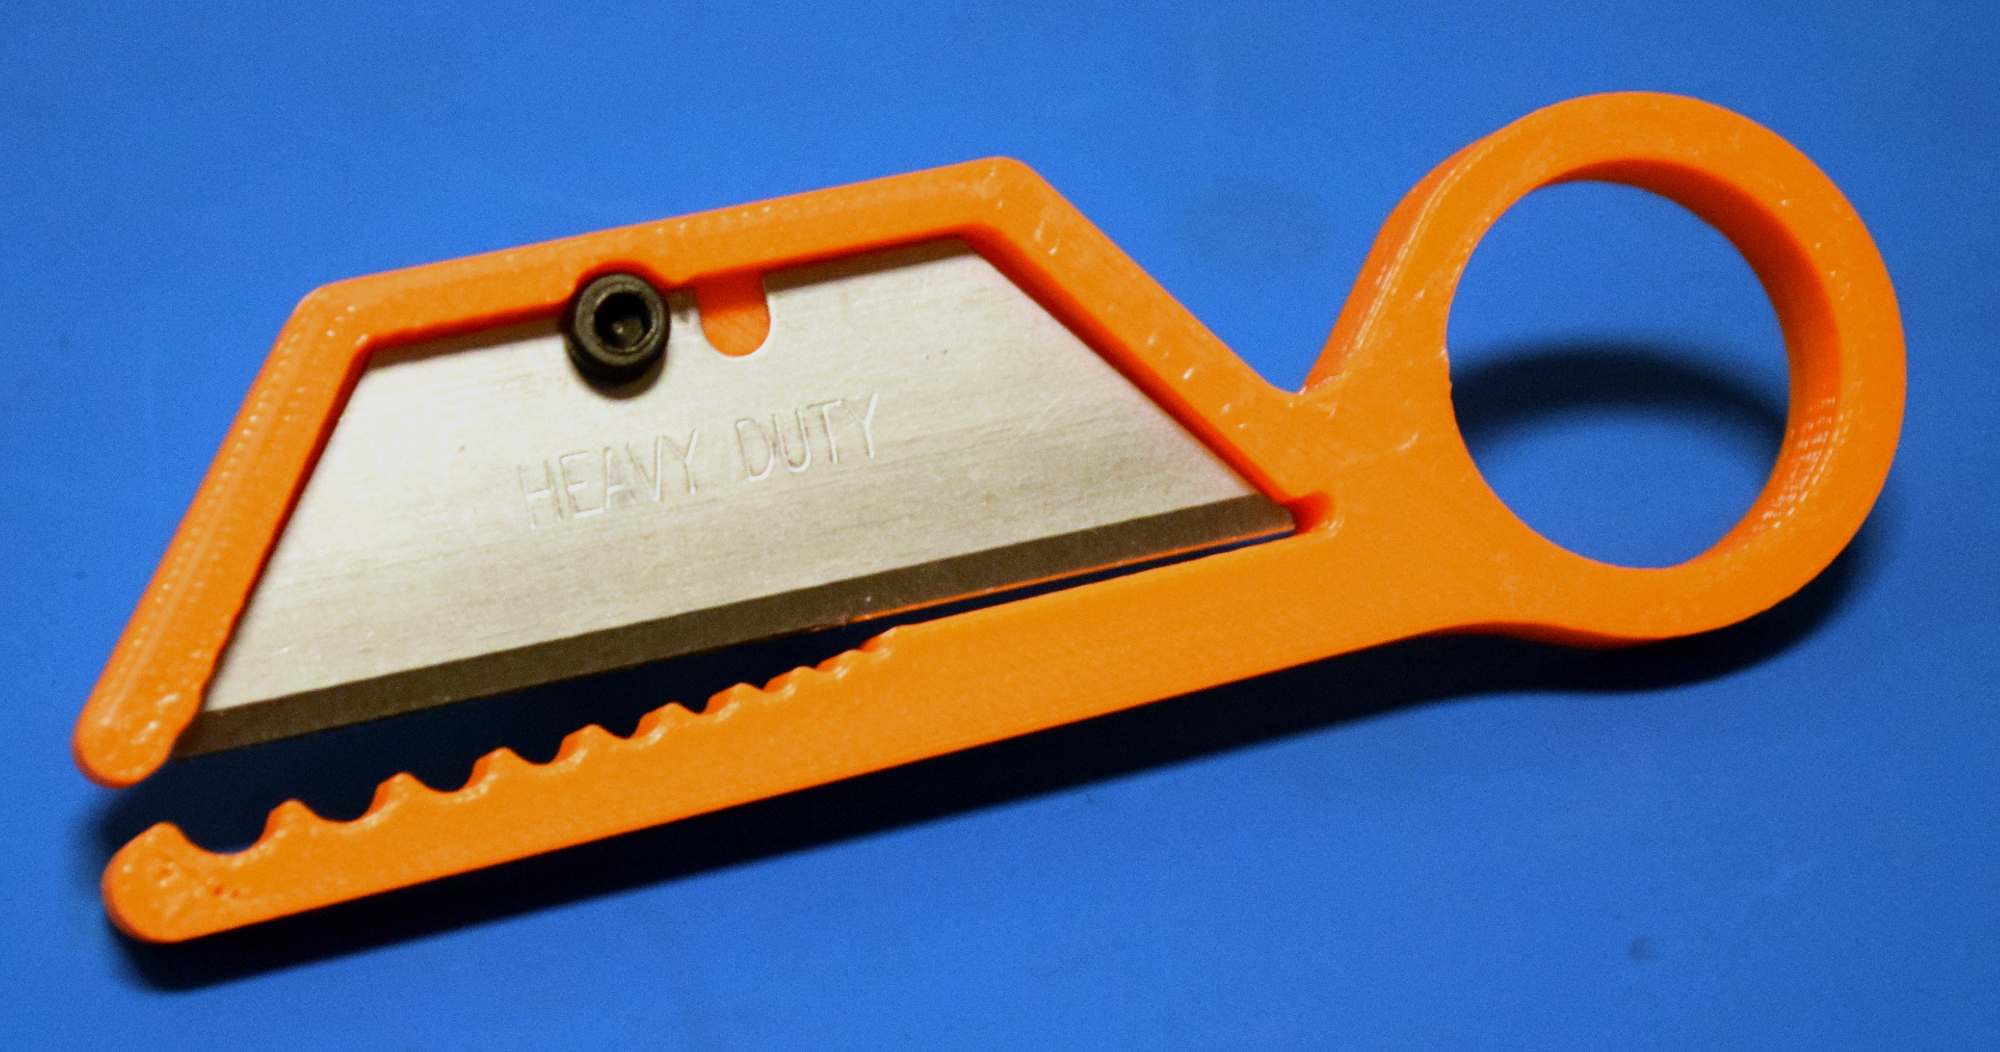 Alright, admittedly I did bend my own rules a bit with this one. You’ll obviously need a razor blade to complete this print, as well as an M3 nut and screw to secure it. But given how useful this little wire stripper by [Dragon in Moscow] is, I thought it was worth adding to the list. Granted you should probably own a decent pair of wire strippers already, but this would be perfect for your “B” set of tools, or to go in an electronics “Bugout Bag”.
The indents on the jaw support stripping a fairly wide array of wire sizes, and the simple arrangement for securing the razor blade works quite well. Officially the documentation for this model says you should print it at nearly 100% infill, but I didn’t find that necessary. In terms of functionality, the stripper was able to cut through the insulation of every wire I tried with a quick spin, and was even able to remove the outer insulation on network cable without damaging the internal wires.
A Wide World of Plastic Gadgets
In searching for the models I’d feature for this article, I was struck with just how many neat printable tools and gadgets there are out there. These select few are the ones that made the biggest impression on me during my search, but there’s surely many more useful designs out there that I didn’t see.
Do the good readers of Hackaday have a favorite printable tool? Something you picked up off the bed of your printer and have been using ever since? We’d love to hear what the community thinks is the most useful object they’ve ever printed; perhaps we’ll have to revisit this topic supported by the boundless knowledge of the Hackaday comments section.


Excellent post, nice ideas, all fitting within nicely crafted areas in
a portable tool box with lights, space for 18650’s, charger, mini
drill etc – Something I would have loved just 30 years ago on
service calls for all sorts of controllers…
As well as all the way in East Malaysia wowing the jungle natives programming
68HC705C8’s on site for a RAPS project – would have saved a heap of time &
not accrued so much in Air Freight. I was first to use the Sony Mavica with the
floppy drive camera – LoL, 3 months with buffalos & cobras !
10 to 30 photos per day witha very small selection here:-
http://www.members.ii.net/~erazmus/Power/
Thanks, food for thought, cheers
what in the hell?
Thanks Will,
Ah well I was alluding to the idea that 3D printed tools would have
saved so much when traveling weight such as being on site imagining
we could make our own as needed if we happened to have 3D printers
back then or even just prepared for the trip well in advance…
ie. We could have saved so much time, offered parts to the natives
too as well as extended commercial opportunities too and not just to
get stuff done for a project in an isolated region.
IOW: I would have loved to have 3D printed parts back then with
maybe a suitable (small) 3D printer too. Once I started working on
the system in Sipitang and Mendulong in Sabah, all sorts of people
came out of the wood work wanting me to do all sorts of things from
repairing consumer domestic goods to the occasional controller
at the pulp plant just behind the Sabah Forest Industries Motel.
About 1 to 2 times per month engineers from Sweden, Norway and
Germany would come over and we’d meet up for great meals and
inevitable Karaoke with the visiting Chinese support teams, as well
as the inevitable debates over control systems ideas etc,
All great fun…
Just an example Will of where the tools (as per post) could be used
and added a bit of solid real world example by way of illustration :-)
How would it save weight? Wouldn’t you have to carry a bunch of print material that you may or may not use?
Just being able to carry a few spools of filament is less bulky than carrying multiples of many widgets. You may still transport 2/3~ 3/4 the weight of all of the possible doo-dads, but just even cutting the physical bulk or crating volume could be a major issue when shipping things.
Once you’ve done some field installations, you find that a couple of (customer) miss-measured things or on site revisions can eat a lot of simple commodity items.
IF the 3-D printer can produce them, then you might not have to crate so much hollow space and transport it.
Regardless of its dead weight, Cargo space (volume) comes at premium if you’re working in far flung locals!
it takes a few readings, but it actually makes sense eventually. printed tools -> tool box -> author used to use tool boxes -> used to fly to Malaysia with heavy tool box -> while in Malaysia took pictures with a sony mavica
+1
Aleks Clark (@aleksclark)
Indeed, I do these types of posts now and then, not
just to see who’s awake and thinks to follow sequences but,
also allows me to mull over the weird one liners that
just_can’t_add_anything_useful_or_interesting and by
maybe such facile retort reflective for much later
whilst things “start to get” – should see what I do now ;-)
Each to his own of course in the vast diversity of
permutations offered in this industry. Should see what
i did with a pair of Cs137 sources for iron ore flow gauge
tonnage Foxboro controllers back in 1982 on a Pace-16,
ie The very first 16 bit micro by National Semi that we had
a Forth setup by Pseudo assembler, ran 16 and 24
bit fixed/floating point variable word length, weird but worked :-)
And yeah we started programming that on Paper Tape too !
It’s just bad communication. It really can’t be backed up.
That looks like a fun job. What an adventure.
Ahhhh… That VHS mavica image softness… :)
Nice selection! I’m going to have to print the soldering fingers. That one in particular looks useful.
I’m sure many of us have been guilty of setting the wires down at the right angle so that they just touch method of soldering…..
Ditto!
Or the “tweezers in one hand, soldering iron in the other” method…done properly, the burns are minor and should clear up after a few days.
How about iron held between the knees pointing upward, solder spool in one hand, component in the other, wire held with teeth?
I printed this holder, and although I’ve tried it a few times, I’m back to my old helping hands.
Once you wedge a wire in to hold, it’s no longer adjustable, and to get it wedged in, you need to move it. Frustration and multiple re-positionings ensued (with me, anyway).
So, the next iteration should have a clamping mechanism…
A clamping mechanism, and maybe some movable arms, and a heavy base of course. Maybe it could have a magnifying lens for those tiny components.
One of my colleagues once told me about an idea he’d had for a much more secure version of wifi. Really the problem with wifi security is that anyone can use it, and anyone can listen in, so he posited that a piece of hardware uniquely tying two end points together could solve that problem. Of course that’s an ethernet cable.
Still you can use that as knife stand when you do the dishes. I have pretty sharp knives and this was one of the ways to keep them in such condition. Never used that for soldering:-D
The clips on my helping hands always get melted into the insulation on the wires. Maybe I’m soldering too hot? But it seems the only time I have troubles is in this scenario.
You got a couple layers of heatshrink on the jaws of the alligator clips?
I usually leave a couple inches along the wire from the solder point to the clip and I don’t jave a problem.
I reckon I’ll give the holder a go though, looks like a cool little device.
For me, the best cure(?) for that was Pre-tinning every possible surface to be solder wetted.
Then I set up the helping hands with the pre-tinned work pieces and try to set things as to just need a slight solder flow to join them.
IF needed, We can sometimes use funny jaws or grip shapes during the pre-tinning stage, when those won’t interfere with the final solder work.
One other detail: Sometimes breaking out the big Weller soldering gun, is the thing to do.
Parts can sometimes sink away the heat of a 20 watt pen. nearly as fast as it can supply them to the parts.
The big 140 or 200 watt gun lets ya hit the solder and get a quick heat flow and then get off of things before a lot of BTUs creep into the insulation.
Get some practice bits and try this. You just may find that with a bit practice, it can be a useful technique in certain situations.
…a few kapton tape pieces around aligator clip?
I had this same problem. I wrapped the jaws on my helping hands with electrical tape so that they wouldn’t bite into the insulation.
I use a couple of large blobs of bluetack as my helpers. Holds pretty much everything at whatever angle I need. The older the better. Less sticky (or just add cornstarch).
i would love to see an article about the must-have printed science and education objects.
You know, the stuff everyone (i imagine) that just got a new 3d printer goes scavenging for on thingiverse and the likes.
like the meanwhile infamous gear bearing, planetary gears, nautilus gears, screwless cube gears, platform jack, maze/puzzle gift boxes, … etc
Do you have any examples to get us rolling?