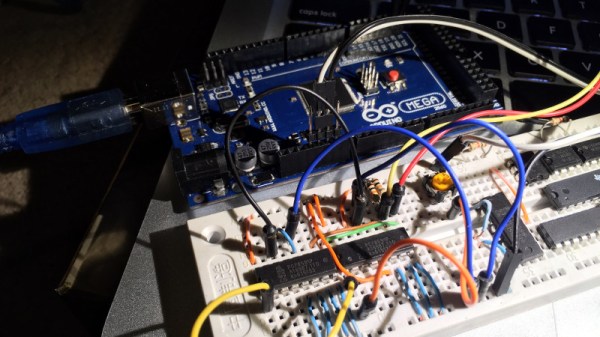
Harmony Hub Hacked And Patched

When we say “hack” here we most often mean either modifying something to do something different or building something out of parts. But as we build more Internet-connected things, it is worthwhile to think about the other kind of hack where people gain unauthorized access to a system. For example, you wouldn’t think a remote control would be a big deal for hackers. But the Logitech Harmony Hub connects to the Internet and runs Linux. What’s more is it can control smart devices like door locks and thermostats, so hacking it could cause problems. FireEye’s Mandian Red Team set out to hack the Harmony and found it had a lot of huge security problems.

The remote didn’t check Logitech’s SSL certificate for validity. It didn’t have a secure update process. There were developer tools (an SSH server) left inactive in the production firmware and — surprisingly — the root password was blank! The team shared their findings with Logitech before publishing the report and the latest patch from the company fixes these problems. But it is instructive to think about how your Raspberry Pi project would fare under the same scrutiny.

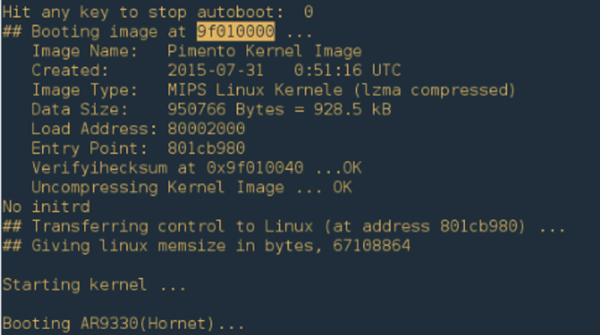
In fact, that’s the most interesting part of the story is the blow-by-blow description of the attack. We won’t spoil the details, but the approach was to feed the device a fake update package that turned on a dormant ssh server. Although they started by trying to solder wires to a serial port, that wasn’t productive and the final attack didn’t require any of that.

We’ve looked at some ways to harden Linux systems like the Raspberry Pi before, but honestly, it is an ongoing battle. We’ve seen plenty of devices with cybersecurity holes in them — some not found by good guy hackers first.

Waking Up To Classic Soundgarden Screaming

In a project that was really only slighly less creepy before the singer’s untimely death in 2017, this alarm clock built by [Rafael Mizrahi] awakens its user to a random selection of Chris Cornell’s signature screams. Not content to be limited to just the audio component of the experience, he contained all of the hardware within a styrofoam head complete with a printed out facsimile of the singer’s face.

An Arduino Uno coupled with a seven segment LED display provides the clock itself, which is located in the base. There’s no RTC module, so the Arduino is doing its best to keep time by counting milliseconds. This means the clock will drift around quite a bit, but given that there’s also no provision for setting the time or changing when the alarm goes off short of editing the source code, it seems like accurate timekeeping was not hugely important for this project.

Audio is provided by an Adafruit VS1053, which contains a microSD card full of MP3 samples of Cornell’s singing. This is connected to an X-Mini portable capsule speaker which has been installed in a hollowed out section of the foam.

Unconventional alarm clocks are something of a staple here at Hackaday. From ones which physically assault you to mimicking sunrise with OLEDs, we thought we had seen it all. We were wrong.

Continue reading “Waking Up To Classic Soundgarden Screaming”

Flash And Debug ESP8266 Boards On Android

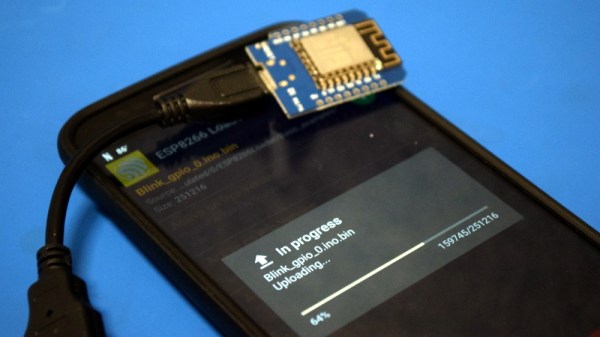
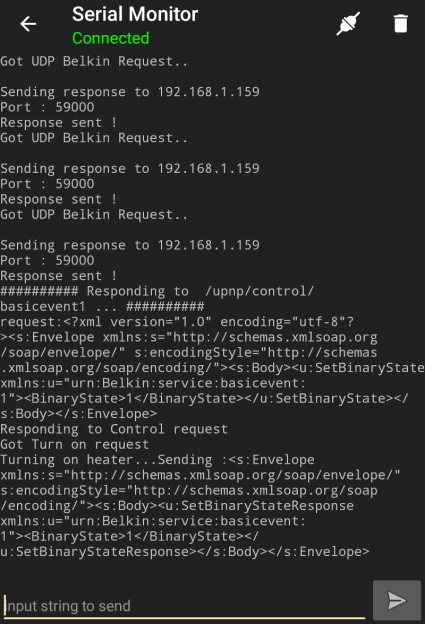
Have an ESP8266 development board such as the NodeMCU or Wemos D1? You’re currently reading Hackaday, so probably. Got an Android device kicking around? Also seems fairly likely. In that case, you should check out ESP8266 Loader by [Bluino Electronics]. This recently released application lets you not only flash new binaries to any ESP8266 board using the FTDI, PL2303, CH34X and CP210X USB chipsets, but also offers a serial monitor for debugging on the go.

You’ll need a USB OTG cable to get your ESP board jacked in to your Android device, but you don’t need root or even to fiddle with the development settings. Here at the Hackaday R&D Dungeon we had somewhat mixed success getting a random selection of Android devices to work fully; all of the ones tried could at least open the serial monitor and read what a pre-programmed ESP was saying, but not all of them could successfully program a board.

Even on the devices where programming worked, it was slow. Just a basic LED blinking Sketch took long enough to write to our test Wemos D1 Mini that we contemplated getting a snack. But still, it shows a lot of promise for managing devices in the field, especially if you don’t have over the air update enabled in your code.

We especially liked that ESP8266 Loader helpfully downloaded a bunch of example binaries, many of which could be of practical use. There are programs for toggling the different GPIO pins on the board, creating Wi-Fi access points, and even a basic web server. With these in hand, you could actually do some testing and diagnostic work right from your mobile device.

This isn’t the first time we’ve seen an ESP8266 team up with a mobile device, but generally speaking, the magic is done over WiFi or Bluetooth.

Raspberry Pi Becomes Cycle Exact Commodore Drive Emulator

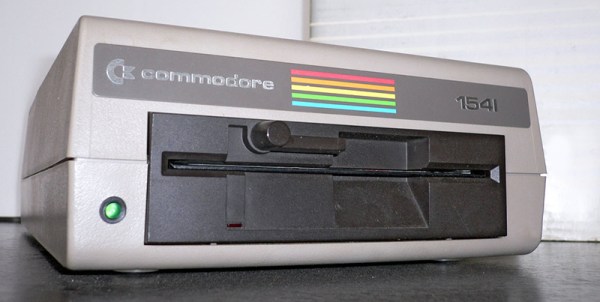
The Commodore 1541 disk drive is unlike anything you’ll ever see in modern computer hardware. At launch, the 1541 cost almost as much as the Commodore 64 it was attached to ($400, or about $1040 at today’s value). This drive had a CPU, and had its own built-in operating system. Of course, anyone using a Commodore 64 now doesn’t deal with this drive these days — you can buy an SD2IEC for twenty dollars and load all your C64 games off an SD card. If you’re cheap, there’s always the tape drive interface and a ten dollar Apple Lightning to 3.5mm headphone adapter.

But the SD2IEC isn’t compatible with everything, and hacking something together using the tape drive doesn’t have the panache required of serious Commodoring. What’s really needed is a cycle-accurate emulation of the 1541 disk drive, emulating the 6502 CPU and the two 6522 VIAs in this ancient disk drive. The Raspberry Pi comes to the rescue. [Steve White] created the Pi1541, an emulation of the Commodore 1541 disk drive that runs on the Raspberry Pi 3B.

Pi1541 is a complete emulation of the 6502 and two 6522s found inside the Commodore 1541 disk drive. It runs the same code the disk drive does, and supports all the fast loaders, demos, and copy protected original disk images that can be used with an original drive.

The only hardware required to turn a Raspberry Pi 3 into a 1541 are a few transistors in the form of a bi-directional logic level shifter, and a plug for a six-pin serial port cable. This can easily be constructed out of some Sparkfun, Adafruit, Amazon, or AliExpress parts, although we suspect anyone could whip up a Raspberry Pi hat with the same circuit in under an hour. The binaries necessary to run Pi1541 on the Raspberry Pi are available on [Steve]’s website, and he’ll be releasing the source soon.

This is a great project for the retrocomputing scene, although there is one slight drawback. Pi1541 requires a Raspberry Pi 3, and doesn’t work on the Raspberry Pi Zero. That would be an amazing bit of software, as ten dollars in parts could serve as a complete emulation of a Commodore disk drive. That said, you’re still likely to be under $50 in parts and you’re not going to find a better drive emulator around.

Continue reading “Raspberry Pi Becomes Cycle Exact Commodore Drive Emulator”

Smartwatch Fights Anxiety With Action

In our fast-paced modern world, it’s no wonder that so many suffer from anxiety and panic attacks. There are several time-worn techniques for dealing with the symptoms of these attacks. But as anyone who’s ever suffered such an attack can tell you, it can be difficult to sense one coming on until it’s too late. By then, rational thinking has been supplanted by intrusive thoughts. For this year’s Hackaday Prize, [Austin Marandos] is doing his part by using technology to help us check ourselves before we wreck ourselves with worry.

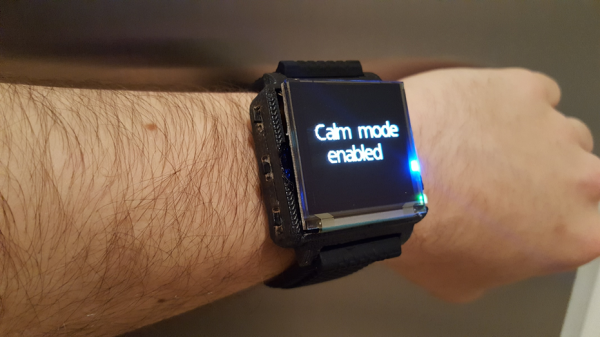
Similar smartwatches exist to detect oncoming attacks, but they don’t do anything to combat them. Minder is like having a friend strapped to your wrist that’s never absorbed in their own problems. It wants to help no matter what it takes, which is why it features multiple techniques for getting back to a state of calm.

Minder’s brain is the bite-size Qduino Mini, which is great for a crowded wearable because of its built-in charging circuit. It uses heart rate and temperature sensors to determine the onset of a panic attack, and a vibration motor to alert the user. The motor also plays a part in the relaxation techniques to keep the user focused and in control. Use the upcoming break to relax and check out the video.

If your anxiety stems from feelings of inadequacy, it might be Imposter Syndrome.

Continue reading “Smartwatch Fights Anxiety With Action”

Printed It: Toolbag Essentials

While complex devices assembled from 3D printed components are certainly impressive, it’s the simple prints that have always held the most appeal to me personally. Being able to pick an object up off the bed of your printer and immediately put it to use with little to no additional work is about as close as we can get to Star Trek style replicators. It’s a great demonstration to show off the utility of your 3D printer, but more importantly, having immediate access to some of these tools and gadgets might get you out of a jam one day.

With that in mind, I thought we’d do things a little differently for this installment of Printed It. Rather than focusing on a single 3D model, we’ll be taking a look at a handful of prints which you can put to practical work immediately. I started by selecting models based on the idea that they should be useful to the average electronic hobbyist in some way or another, and relatively quick to print. Each one was then printed and evaluated to determine its real-world utility. Not all made the grade.

Each model presented here is well designed, easy to print, and most critically, legitimately useful. I can confidently say that each one has entered into my standard “bag of tricks” in some capacity, and I’m willing to bet a few will find their way into yours as well.

Continue reading “Printed It: Toolbag Essentials”

Double The Resolution, From An Arduino ADC

Analog-to-digital converters, or ADCs, are somewhat monolithic devices for most users, a black box that you ask nicely for the value on its input, and receive a number in return. For most readers, they will be built into whatever microcontroller is their platform of choice, and their resolution will be immutable, set by whatever circuitry is included upon the die. There are a few tricks that can be employed to get a bit more from a stock ADC though, and [Neris] has taken a look at a couple of them.

The first circuit doubles the resolution of an ADC, in this case, that of the Atmel chip in an Arduino, by converting its output from an integer to a signed integer. It performs this task with a precision rectifier, rectifying around a zero-crossing point half-way through the range of the analog value to be read and supplying a sign bit to the Arduino. The Arduino measures the rectified analog value to an integer, and applies the appropriate sign from the supplied bit value.

The second circuit takes a variation on the same technique but with two ADCs instead of one. A pair of PIC chips are used with their voltage references stacked one above the other, by taking both readings in combination a result with double the resolution can be derived.

You might ask why bother with these techniques. After all, there are plenty of higher-resolution ADCs on the market. But they’re useful techniques to know, should you ever need to extract the proverbial quart from a pint pot.

If ADCs are a mystery to you, you’re in luck. [Bil Herd] gave us a comprehensive introduction to the subject.