Printed It: Hand Cranked Photography Turntable

Even a relatively low-end desktop 3D printer will have no problems running off custom enclosures or parts for your latest project, and for many, that’s more than worth the cost of admission. But if you’re willing to put in the time and effort to become proficient with necessary CAD tools, even a basic 3D printer is capable of producing complex gadgets and mechanisms which would be extremely time consuming or difficult to produce with traditional manufacturing techniques.
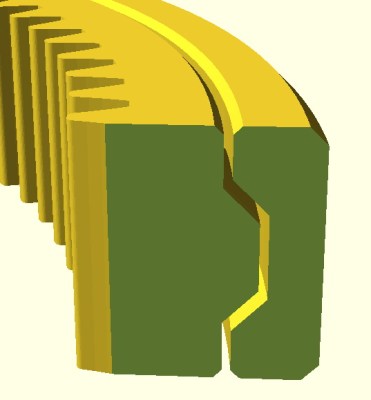
Printable bearing cross-section

Once you find yourself at this stage of your 3D printing career, there’s something of a fork in the road. The most common path is to design parts which are printed and then assembled with glue or standard fasteners. This is certainly the easiest way forward, and lets you use printed parts in a way that’s very familiar. It can also be advantageous if you’re looking to meld your own printed parts with existing hardware.

The other option is to fully embrace the unique capabilities of 3D printing. Forget about nuts and bolts, and instead design assemblies which snap-fit together. Start using more organic shapes and curves. Understand that objects are no longer limited to simple solids, and can have their own complex internal geometries. Does a hinge really need to be two separate pieces linked with a pin, or could you achieve the desired action by capturing one printed part inside of another?

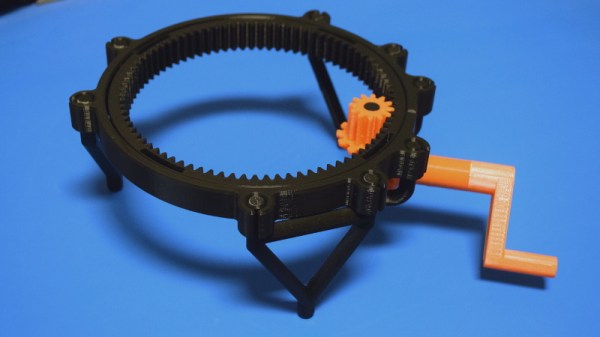
If you’re willing to take this path less traveled, you may one day find yourself creating designs such as this fully 3D printed turntable by Brian Brocken. Intended for photographing or 3D scanning small objects without breaking the bank, the design doesn’t use ball bearings, screws, or even glue. Every single component is printed and fits together with either friction or integrated locking features. This is a functional device that can be printed and put to use anywhere, at any time. You could print one of these on the International Space Station and not have to wait on an order from McMaster-Carr to finish it.

With such a clever design, I couldn’t help but take a closer look at how it works, how it prints, and perhaps even some ways it could be adapted or refined going forward.

Continue reading “Printed It: Hand Cranked Photography Turntable”

Printed It: Parametric Hex Key Holder

Desktop 3D printing is an incredible technology to be sure, but it’s not a cure-all. If you’re interested in making something in large numbers, or if production speed is a concern, 3D printing probably isn’t what you’re looking for. But on the flip side, if you want to make a few highly specialized or customized objects, desktop 3D printing represents an absolute revolution in capability for the individual hacker and maker.

In our ongoing mission to prove that desktop 3D printing isn’t just a novelty, we keep a close eye out for printable objects which play to the strengths of the technology. You won’t find any benchmarks or dust collectors here; everything featured in Printed It is a bona fide practical object. An ideal entry into this series is something that you wouldn’t need to print more than a few times, isn’t easily sourced or made via traditional means, and if possible, offers some form of customization which makes it more suitable to the individual’s needs than what’s commercially available.

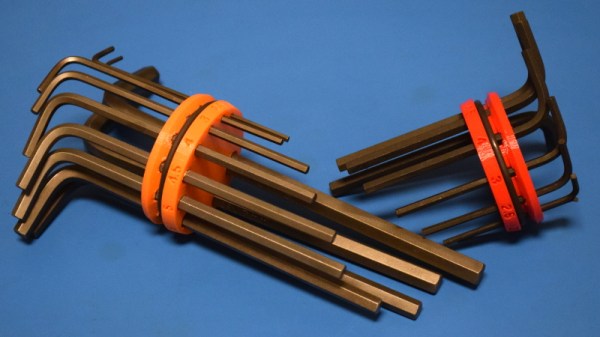
Not every object we feature hits all of these marks, but this parametric hex key holder designed by [Daniel Leitner] absolutely does. This object was created to address a problem that we imagine most Hackaday readers share: taming an ever-growing collection of hex keys. What’s more, this design is something of an open source success story. It’s an idea that passed through the hands of multiple community members, becoming more refined and functional as it went. Even if you don’t personally need to wrangle some unruly hex keys, this object is a fascinating look at how 3D printing and the community that has sprouted up around it is truly evolving the process of going from concept to execution.

Continue reading “Printed It: Parametric Hex Key Holder”

Printed It: Logitech C270 Conversion

One of the most practical applications for a home 3D printer is the ability to produce replacement parts; why wait a week for somebody to ship you a little plastic widget when you’ve got a machine that can manufacture a facsimile of it in a couple of hours? But what if your skills and passion for the smell of melting PLA push you even farther? You might move on from printing replacement parts to designing and building whole new devices and assemblies. Arguably this could be considered “peak” 3D printing: using a printer to create new devices which would otherwise be difficult or impractical for an individual to manufacture by more traditional means.

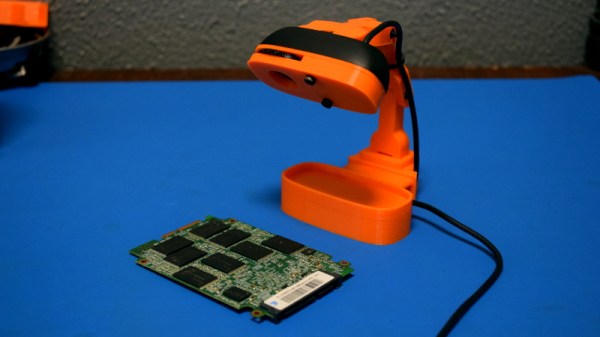
A perfect example is this fantastic total conversion for the Logitech C270 webcam designed by [Luc Eeckelaert]. Officially he calls it a “tripod”, and perhaps that’s how the design started, but the final product is clearly much more than that. It puts the normally monitor-mounted Logitech camera onto an articulated arm, greatly improving the device’s usability. The conversion even includes the ability to manually adjust the focus, a feature the original hardware doesn’t have. It turns the affordable and widely available Logitech C270 into an excellent camera to have on the workbench for documenting projects, or pointing at the bed of your 3D printer.

Continue reading “Printed It: Logitech C270 Conversion”

Printed It: Toolbag Essentials

While complex devices assembled from 3D printed components are certainly impressive, it’s the simple prints that have always held the most appeal to me personally. Being able to pick an object up off the bed of your printer and immediately put it to use with little to no additional work is about as close as we can get to Star Trek style replicators. It’s a great demonstration to show off the utility of your 3D printer, but more importantly, having immediate access to some of these tools and gadgets might get you out of a jam one day.

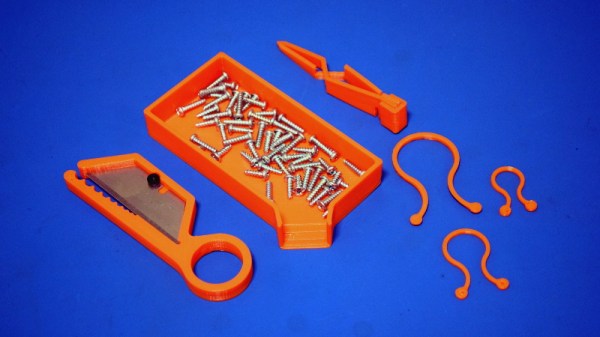
With that in mind, I thought we’d do things a little differently for this installment of Printed It. Rather than focusing on a single 3D model, we’ll be taking a look at a handful of prints which you can put to practical work immediately. I started by selecting models based on the idea that they should be useful to the average electronic hobbyist in some way or another, and relatively quick to print. Each one was then printed and evaluated to determine its real-world utility. Not all made the grade.

Each model presented here is well designed, easy to print, and most critically, legitimately useful. I can confidently say that each one has entered into my standard “bag of tricks” in some capacity, and I’m willing to bet a few will find their way into yours as well.

Continue reading “Printed It: Toolbag Essentials”

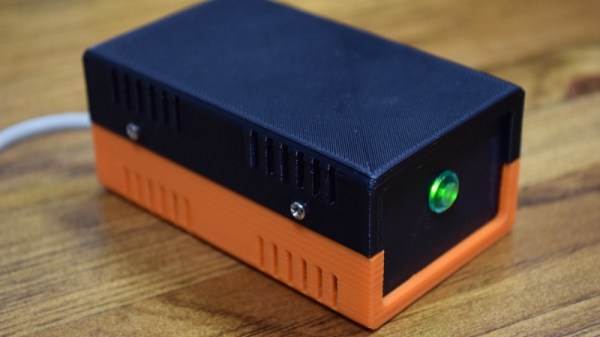
Printed It: Custom Enclosure Generator

You’ve written your firmware code, etched your own PCB, and now it’s time to put that awesome new project of yours into an enclosure. Unfortunately, all you have is a generic Radio Shack project box that you picked up when they were clearing out their inventory. If you put your project in that, it’ll have all the style and grace of a kid wearing hand-me-down clothes. Your project deserves a tailor-made enclosure, but the prices and lead time on custom plastic enclosures are prohibitive for one-off projects.

In Ye Olde Olden Days, the next step might have been to start bending some sheet metal. But it’s the 21st century, and we’ve got mechanization on our side. The “Ultimate Box Maker” by [Heartman] is a fully parametric OpenSCAD design which allows you to generate professional looking enclosures by simply providing your desired dimensions and selecting from a few optional features. In a couple of hours, you’ll have a custom one-of-a-kind enclosure for your project for a few cents worth of filament.

That’s the idea, at least. For this edition of “Printed It”, I’ll be taking a look at the “Ultimate Box Maker” by generating and printing a basic enclosure. As somebody whose Radio Shack was out of enclosures by the time I got there and who doesn’t want to slice his hand open folding sheet metal, I’m very interested in seeing how well this design works.

Continue reading “Printed It: Custom Enclosure Generator”

Ball and socket helping hands

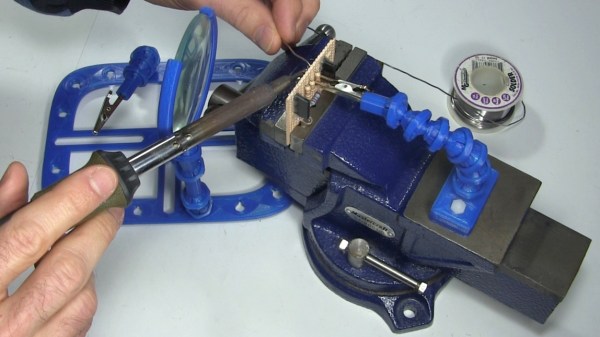
Printed It: Do More With Lockable Ball And Socket Helping Hands

In one hand you hold the soldering iron, in the other the solder, and in two more hands the parts you’re trying to solder together. Clearly this is a case where helping hands could be useful.

Magnifying glass with helping hands

Luckily helping hands are easy to make, coolant hoses will do the job at under $10. Attach alligator clips to one end, mount them on some sort of base, and you’re done. Alternatively, you can steal the legs from an “octopus” tripod normally used for cell phones. So why would you 3D print them?

One reason is to take advantage of standardized, open source creativity. Anyone can share a model of their design for all to use as is, or to modify for their needs. A case in point is the ball and socket model which I downloaded for a helping hand. I then drew up and printed a magnifying glass holder with a matching socket, made a variation of the ball and socket joint, and came up with a magnetic holder with matching ball. Let’s takea  look at what worked well and what didn’t.

Continue reading “Printed It: Do More With Lockable Ball And Socket Helping Hands”

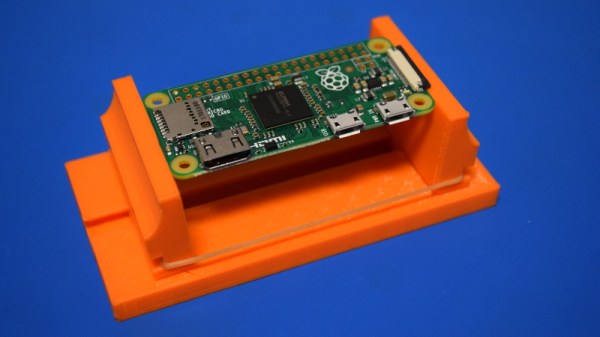
Printed It: Rubber Band PCB Vise

If you’ve ever worked on a small PCB, you know how much of a hassle it can be to hold on to the thing. It’s almost as if they weren’t designed to be held in the grubby mitts of a human. As designs have become miniaturized over time, PCBs are often so fragile and festooned with components that tossing them into the alligator clips of the classic soldering “third hand” can damage them. The proper tool for this job is a dedicated PCB vise, which is like a normal bench vise except it doesn’t crank down very hard and usually has plastic pads on the jaws to protect the board.

Only problem with a PCB vise is, like many cool tools and gadgets out there, not everybody owns one. Unless you’re doing regular PCB fabrication, you might not take the plunge and buy one either. So what’s a hacker on a budget to do when they’ve got fiddly little PCBs that need attention?

Luckily for us, we live in a world where you can press a button and have a magical robot on your desktop build things for you. Online model repositories like Thingiverse and YouMagine are full of designs for printable PCB vises, all you have to do is pick one. After looking through a number of them I eventually decided on a model designed by [Delph27] on Thingiverse, which I think has a couple of compelling features and more than deserves the few meters of filament it will take to add to your bench.

Of course the best part of all of this is that you can customize and improve the designs you download, which is what I’m about to do with this PCB vise!

Continue reading “Printed It: Rubber Band PCB Vise”