Junk Bin Spin Coater Uses Modded Case Fan

We’ve all been there: you need a specific tool or gadget to complete a project, but it’s not the kind of thing you necessarily want to fork over normal retail price for. It could be something you’re only going to use once or twice, or maybe you’re not even sure the idea is going to work and don’t want to invest too much money into it. You cast a skeptical towards the ever-growing pile of salvaged parts and wonder…

Inspiration and a dig through the junk bin is precisely how [Nixie] built this very impressive spin coater for use in his ongoing homemade semiconductor project. If you’ve never had first hand experience with a spin coater, don’t worry, not many people have. Put simply, it’s a machine that allows the user to deposit a thin layer of material on a disc by way of centrifugal force. Just place a few drops in the center of the disc, then spin it up fast enough and let physics do the rest.

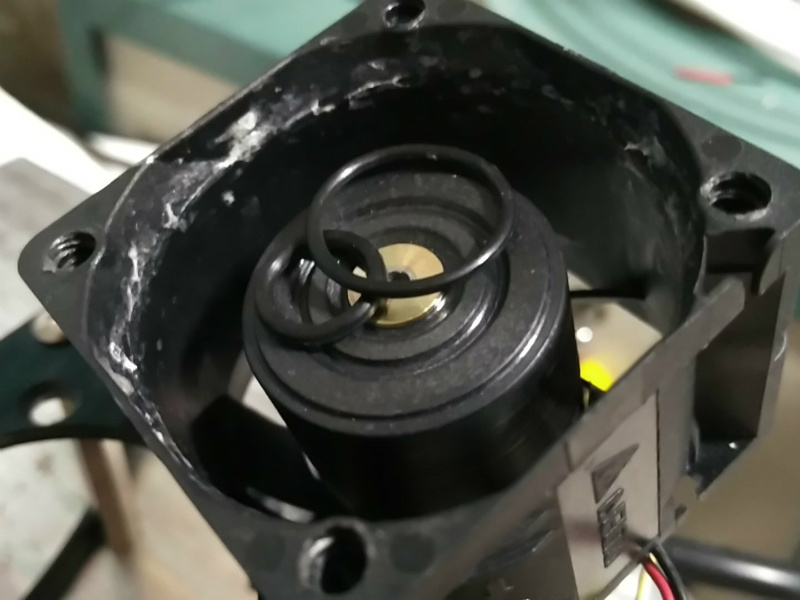
[Nixie] only needs to spin up a fairly tiny disc, and realized the hub of a 40x40mm brushless case fan was just about the perfect size. A quick pass through the lathe stripped the hub of its blades and faced off the front. Once he found a tube that was the exact same diameter of the fan’s axle, he realized he could even use a small vacuum pump to hold his disc in place. A proper seal is provided by 10 and 16 mm OD o-rings, installed into concentric grooves he machined into the face of the hub.

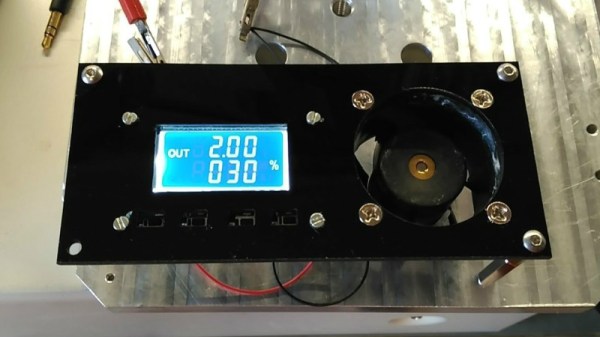
With a way to draw a vacuum through the hub of the spinner he just needed the pump. As luck would have it, he didn’t have to wait for one to make the journey from China, as he had one of those kicking around his junk bin from a previous project. The only thing he ended up having to buy was the cheap PWM fan controller which he mounted along with the modified fan to a piece of black acrylic; producing a fairly professional looking little piece of lab equipment. Check out the video after the break for a brief demonstration of it in action.

This isn’t the first specialized piece of gear [Nixie] has produced in his quest for DIY chips. We’ve previously covered his DIY tube oven as well as his vacuum chamber complete with magnetically controlled manipulator arm.

Continue reading “Junk Bin Spin Coater Uses Modded Case Fan”

When Is Wrought Iron Not Wrought Iron?

I grew up with a blacksmith for a parent, and thus almost every metalworking processes seems entirely normal to have as part of everyday life throughout my childhood. There seemed to be nothing we owned that couldn’t be either made or repaired with the application of a bit of welded steel. Children of blacksmiths grow up with a set of innate heavy hardware hacker or maker skills that few other young people acquire at that age. You know almost from birth that you should always look away from the arc when dad is welding, and you also probably have a couple of dictionary definitions ready to roll off the tongue.

The first is easy enough, farrier. A farrier makes and fits horseshoes. Some blacksmiths are farriers, many aren’t. Sorry, my dad made architectural ironwork for upmarket houses in London when he wasn’t making improvised toys for me and my sisters, he didn’t shoe horses. Next question.

The second is a bit surprising. Wrought iron. My dad didn’t make wrought iron.

But… Hang on, you say, don’t blacksmiths make wrought iron? At which point the floodgates open if you are talking to a blacksmith, and you receive the Wrought Iron Lecture.

Continue reading “When Is Wrought Iron Not Wrought Iron?”

Classy CoreXY Build Breaks Down The Design Pinchpoints

Ever since [Ilan Moyer] published the design, CoreXYs have been exploding in the homebrew 3D Printer community. Nevertheless, not all designs are created equal, and a solid design means adhering to some unspoken constraints. Fear not, though. [Mark Rehorst’s] blog post pulls the lid off these constraints and puts them up-front-and-center.  For anyone looking to succeed with their own CoreXY build, this thoughtful critique will keep us away from stray design paths.

[Mark’s] blogpost centers around the xy-stage of his UMMD printer. Here, he walks through the constraints of where belts should be located to guarantee dimensional accuracy of parts. Engineering doesn’t always result in designing the parts ourselves, but rather picking them from a list of options. This geometry-constraint breakdown gives us a more acute set of eyes the next time we pick a CoreXY frame to download and clone off of a place like Thingiverse.

What’s more, for all the antagonizing forces acting on our xy-stage like thermal expansion and frame flexing, [Mark] comes in with a countermeasure. Belts are thickened. Moving stages are constrained correctly, and pulley blocks are reinforced for a stage that is both precise and accurate. Given that it’s so easy to get another printer to start producing parts, lessons learned here will guide us on what underlying measures they need to counteract for a successful print stage.

It’s hard not to love [Mark Rehorst’s] foray into at-home printer builds. Not only do we see new ideas that constantly reinvent how we design printers, each build comes bundled with a wealth of tips and drawbacks. [Mark] gives us a tested design and a critical set of eyes on it that better helps us explore the space if we so choose. For more thoughtful additions to your next 3D printer, check out [Mark’s] CPAP-style remote cooling fan and belt-driven z axis.

Glimmies, As Logic

[Jacob Christ] writes in with a hack that’s going to be this summer’s fidget spinner. Why? The favourite toy of his youngster’s generation is a Glimmie. And while fidget spinners were useful for, well, spinning, the small animal-like Glimmie seems to have an unexpected property, they can function as logic gates.

They form an optical inverter, in their head is a phototransistor and in their belly an LED which goes on when the head is in the dark. He’s found through experimentation that they can be combined to form an AND gate, and thus a NAND gate with the addition of a further inverter.  Since all logic functions can be made from NAND gates, it should therefore be possible to go as far as to make any device based upon logic, even up to a fully functional computer. He estimates the cost of a single gate at $16.30. A computer would require in the region of 80,000 Glimmies to work, but maybe someone with deep enough pockets will be foolhardy enough to give it a try.

You can see the AND gate in action below complete with camera work from a youngster, and if unexpected logic gates are something that’s caught your attention you can take a look at the battery booster pack logic we brought you a while back.

Continue reading “Glimmies, As Logic”