[Foaly] has been hard at work making an open-source long range camera remote, and recently shared a deeply thoughtful post about how it is never too early to consider all aspects of design, lest it cost you in the end. It all started with designing an enclosure for a working prototype, and it led to redesigning the PCB from scratch. That took a lot of guts, and we recommend you make some time to click that link and read up on what he shared. You’ll either learn some valuable tips, or just enjoy nodding sagely as he confirms things you already know. It’s win-win.
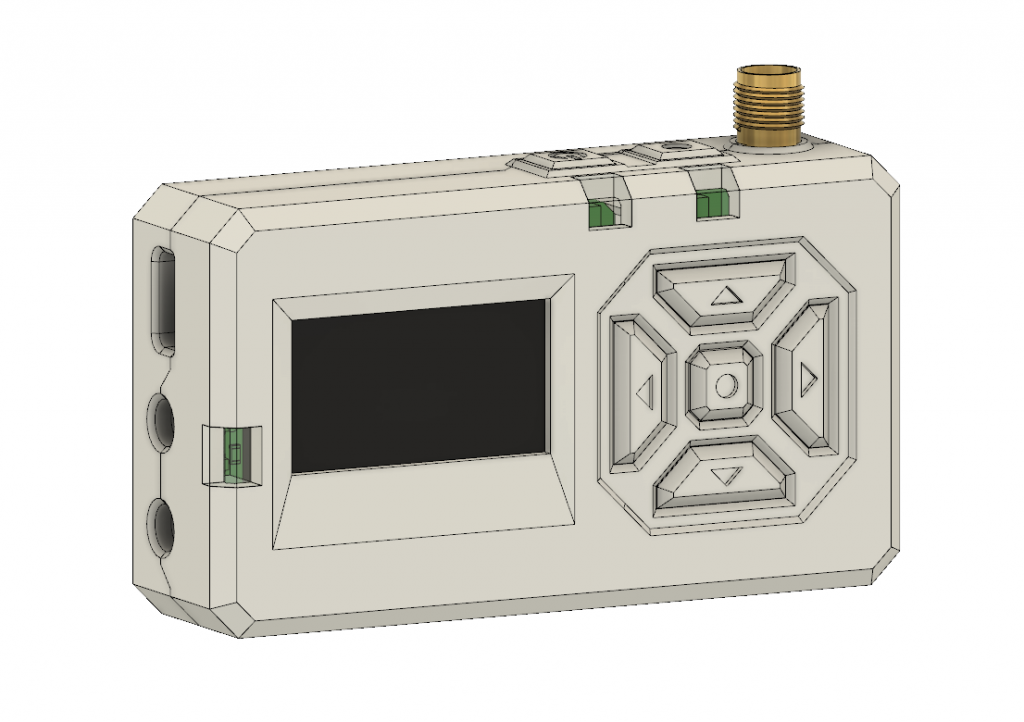
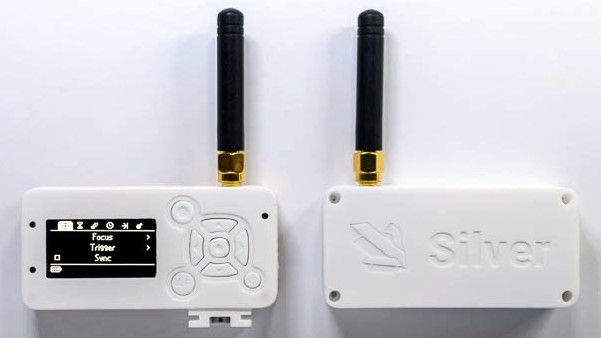
The project in question is Silver, and calling it a camera remote is selling it a bit short. In any case, [Foaly] had a perfectly serviceable set of prototypes and needed a small batch of enclosures. So far so normal, but in the process of designing possible solutions, [Foaly] ran into a sure-fire sign that a project is in trouble: problems cropping up everywhere, and in general everything just seeming harder than it should be. Holding the mounting-hole-free PCB securely never seemed quite right. Buttons were awkward to reach, ill-proportioned, and didn’t feel good to use. The OLED screen’s component was physically centered, but the display was off-center which looked wrong no matter how the lines of the bezel were sculpted. The PCB was a tidy rectangle, but the display ended up a bit small and enclosures always looked bulky by the time everything was accounted for. The best effort is shown here, and it just didn’t satisfy.
 [Foaly] says the real problem was that he designed the electronics and did the layout while giving some thought (but not much thought) to their eventual integration into a case. This isn’t necessarily a problem for a one-off, but from a product design perspective it led to so many problems that it was better to start over, this time being mindful of how everything integrates right from the start: the layout, the components, the mechanical bits, the assembly, and the ultimate user experience. The end result is wonderful, and we’re delighted [Foaly] took the time to document his findings.
Enclosure design is a big deal and there are many different ways to go about it. For a more unique spin, be sure to check out our how-to make enclosures from the PCBs themselves. For a primer on more traditional enclosure manufacture and design, take a few minutes to familiarize yourself with injection molding.


Excellent write-up and a professional-looking product
After burning my fingers once with this problem, I now starts with the enclosure after the first proof of concept. Finding the right enclosure is very tedious to say the least. Waterproof or not, sturdy, easy to make holes in, fastening ways. A lot to search out. Now I have settled on a few readily available case types an made some pcb templates in kicad to get me started.
First, the new design is really nice. Second, here’s the thing: designing for absolutely the smallest PCB you can is ALWAYS a bad idea. Why? Because if you have to change any components due to supply issues or for any other reason, you don’t have any room left. If you don’t even have room for mounting holes, you’d better at least have a solid idea of how it’s going to be supported. And then, when you have two designs you have to do – the housing and the circuit board – and one of those is expensive and involves some turnaround time, why would you NOT 3d-print at least a mock-up of the case, first, to get a feel for how it will be used? So, yeah, I’m the guy nodding sagely.
Learned from hard experience! I used to (still do, sometimes) design boards as small as possible. Because I’m
cheapthrifty? But then I end up forgetting mounting holes or whatever and hot-gluing them in place. File to fit, paint to cover…> file to fit
Hoo boy, have I been there more than once….
Tolerances are a thing, especially from Chinese PCB fabs….
” Why? Because if you have to change any components due to supply issues or for any other reason, you don’t have any room left. ”
A good example was yesterday’s article about using flexible PCBs for rework.
Great surprise to wake up to, thank you Donald!
As it happens, I just received 20 pcbs that I plan to offer to interested users (see the project log on .io : https://hackaday.io/project/167218-silver). I “just” need to stop trying to perfect the manufacturing process for the case and make the 20 cases for them. Surely this won’t take long. Probably.
As an experienced electronics/industrial designer I can asure you that doing 2-3-4 iterations of a PCB is totally normal to reach something that is up to your expectations.
Start big to test functionality and have easy testpoint access and work your way down from there whilst parallel working on the enclosure.
Don’t be afraid to grab some cardboard out of the recycling box and make simple mockups. That should let you see problems like expecting your thumb to be half an inch longer, because you have to rotate your hand funny to reach the buttons. Depends how thoroughly you mime use though. It’s an enduring problem of CAD noticed from the powerful whole room systems of the 70/80s forward, that while it might look perfect on screen and rendered model seems flawless, as soon as you turn it into hardware, something is off. In some regards, all the modern tools and methods just help you to make mistakes faster.
+1 – mock ups are essential!
Yes, 3D printing a custom enclosure for a 1-off is one thing; injection-molding a custom enclosure is at the opposite end of the spectrum for design effort and cost.
For most of us, a new product should *start* with a commercial off-the-shelf enclosure and design the PCB to fit its mounting bosses and dimensions. Serpac is one large manufacturer in this space, and they will customize enclosures in small volumes with cutouts, bezels, embossed / debossed logos, etc. for a tiny fraction of the cost of making a custom injection-molded design. They can be sourced from the usual electronic suppliers.
For physical design prototyping, I find that laser cutters are incredibly useful to mock up designs in cardboard, card stock, or even acrylic with high tolerances.
Whether you are talking software OR hardware, the User Interface & User eXperience is ALWAYS where you should be focussing once you know that the base theory will work. The success of Apple products is a prime example of this done right and proof that most people are willing to accept fewer features if a product is easier and more enjoyable to use.