May (No Longer) Contain Hackers: MCH 2021 Has Been Cancelled

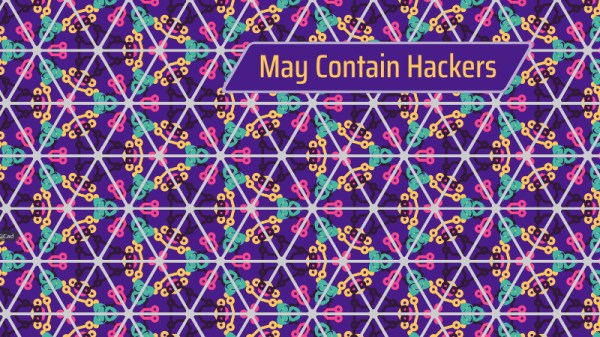
In a sad but unsurprising turn of events, MCH, this summer’s large hacker camp in the Netherlands, has been cancelled. Organising a large event in a pandemic would inevitably carry some risk, and despite optimism that the European vaccine strategy might have delivered a safe environment by the summer that risk was evidently too high for the event organisers IFCAT to take on. Our community’s events come from within the community itself rather than from commercial promoters, and the financial liability of committing to hire the site and infrastructure would have been too high to bear had the event succumbed to the pandemic. Tickets already purchased will be refunded, and they leave us with a crumb of solace by promising that alternatives will be considered. We understand their decision, and thank them for trying.

As with all such events the behind-the-scenes work for MCH has already started. The badge has been revealed in prototype form, the call for participation has been completed, and the various other event team planning will no doubt be well  under way. This work is unlikely to be wasted, and we hope that it will bear fruit at the next Dutch event whenever that may be.

It would have been nice to think that by now we could be seeing the light at the end of the pandemic tunnel, but despite the sterling work of scientists, healthcare workers, and epidemiologists, it seems we still have a a way to go before we’ll once more be hanging out together drinking Club-Mate in the company of thousands of others. If the pandemic is weighing upon you, take care of yourselves.

What If I Never Make Version Two?

When you make something, what does version one look like? What I mean is, how much thought do you put into the design? Do you try to make it look nice as you go along, or do you just build something that functions and say screw the presentation? Do you try to solve for everything upfront, or just plow through it and promise to fix your mistakes in version two? What if you never make version two?

No matter what you like to make, there’s a first time for everything. And it doesn’t seem to matter if you need the thing you’re making or just want to have it around: it’s a given that version one will probably be a bit rough around the edges. That’s just how it goes. Even if you’re well-versed in a skill, when you try a new type of project or a new pattern, it will be a new experience. For example, I’ve sewn a dozen different purses, but when I took on a new challenge I found I was only somewhat prepared to make my first backpack.

Great is the enemy of good, and perfection is the enemy of progress. Shooting for a pristine prototype on the first go steep and rocky path that never leads to finishing the build. So our goal here is to decide what makes rev1 good enough that we still love it, even if rev2 never happens.

Continue reading “What If I Never Make Version Two?”

Turn An Ender 3 Into A Belt 3D Printer Of Your Very Own

Infinite-bed 3D printers have long been an object of desire in our community, but it has taken a long time for the promise to catch up with the reality in terms of relatively affordable models that live up to expectations. They’re still a little expensive compared to their fixed-bed cousins though, so if you hanker for a Creality CR30 but only have the cash for an Ender 3, [Michael Sgroi] may have the project for you. He’s created the EnderLoop, a set of parts to perform the conversion from a stock Ender 3 to a fully-functional belt printer.

It takes the Ender 3 gantry and tilts it sideways on a pair of 3D printed supports, and replaces the stock Y azis with a belt on rollers driven by a larger motor through a timing belt drive. He has a variety of suggestions for sourcing a belt, and in his case he’s chosen one from PowerBelt3D. As well as the GitHub repository already linked, it can also be found on Thingiverse.

It’s clear that hacking apart a reliable printer in this way is not for the faint-hearted, and that a cautious hacker might prefer to wait a while for a cheaper off-the-shelf model. But we can see that the reliability of the Ender 3 will mean that its parts are still of decent quality in the new configuration, and that it looks as though the base printer can be reassembled should a belt-based build be a failure. Infinite bed printers will inevitably have a major presence in our community, and it is designs such as this one which will lead the way as they evolve into reliable machines.

DIY USB-C Touch Monitor Is All Polished Brass

We’ve known for a while that you can buy interface boards to turn old laptop screens into standalone monitors, but complete sets with 4K panels and control boards are also now becoming widely available on sites like eBay and AliExpress, and prices are dropping. These sets are also available with low-profile connectors like micro HDMI and USB-C, which allow for some very compact builds.

[Matt] from [DIY Perks] used one of these sets to build a slimline USB-C monitor with a brass enclosure. Video after the break. The enclosure consists of brass sheets and U-channel pieces soldered and screwed together. There is quite a bit of residue and discoloration after soldering, but this was removed with a bit of sanding and polishing. A pair of adjustable legs were added to allow it to stand on its own, and an additional chamber on the back holds the control board, an old smartphone battery, and a battery protection circuit. [Matt] also added a pair of removable speakers, which are sealed speaker units covered in brass mesh and plate.

We’ve covered several DIY monitor builds over the years, and they are perfect as an additional monitor for a laptop, or for pairing with the Raspberry Pi 400 with its integrated keyboard. We really [Matt]’s builds, which include a smartphone-based 4K projector, and a very effective cooling system for an expensive DSLR camera. Continue reading “DIY USB-C Touch Monitor Is All Polished Brass”