In the late 2010s, the Ender 3 printers were arguably the most popular line of 3D printers worldwide, and for good reason. They combined simplicity and reliability in a package that was much less expensive than competitors, giving a much wider range of people access to their first printers. Of course there are much better printers on the market today, leaving many of these printers sitting unused. [Irbis3D] had an idea that with so many of these obsolete, inexpensive printers on the secondhand market, he could build something better with their parts.
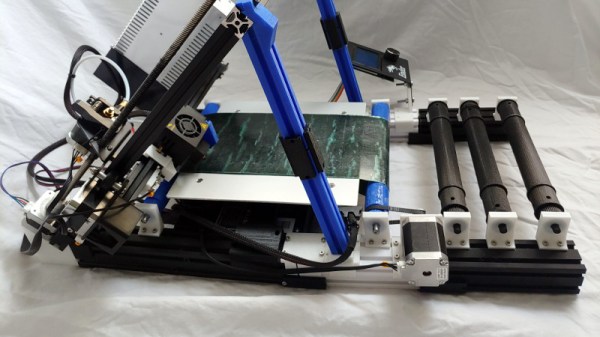
The printer he eventually pieces together takes parts from two donor Ender printers and creates a printer with a CoreXY design instead of the bedslinger (Cartesian) design of the originals. CoreXY has an advantage over other printer topologies in that the print head moves in X and Y directions, allowing for much faster print times at the expense of increased complexity. There are some challenges to the design that [Irbis3D] had to contend with, such as heating problems with the extruder head that needed some modifications, as well as a resonance problem common with many printer designs which can generally be solved by replacing parts one-by-one until satisfactory prints are achieved.
Of course, not all of the parts for the new printer come from the old Ender printers. The longer belts driving the print head needed to be ordered, as well as a few other miscellaneous bits. But almost everything else is taken from these printers, which can be found fairly cheaply on the secondhand market nowadays. In theory it’s possible to build this version for much less cost than an equivalent printer as a result. If you’re looking for something even more complicated to build, we’d recommend this delta printer with a built-in tool changer.
Thanks to [BusterCasey] for the tip!
Continue reading “Improved 3D Printer Cannibalizes Two Older Printers”