Spend enough time on the automotive classifieds and you’ll end up finding a deal that’s too good to pass up. The latest of these in one’s own case was a Mercedes-Benz sedan, just past its twentieth birthday and in surprisingly tidy condition. At less than $3,000, the 1998 E240 was too good to pass up and simply had to be seen.
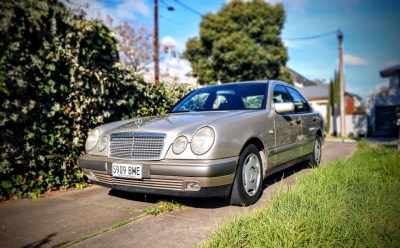
The car was clean, too clean for asking price. Of course, a test drive revealed the car had one major flaw – an annoying hum from the drivetrain that seemed to vary with speed. Overall though, mechanical problems are often cheaper and easier to fix than bodywork, so a gamble was taken on the German sedan. The first order of business was to diagnose and rectify the issue.
Characterise, Research, Investigate
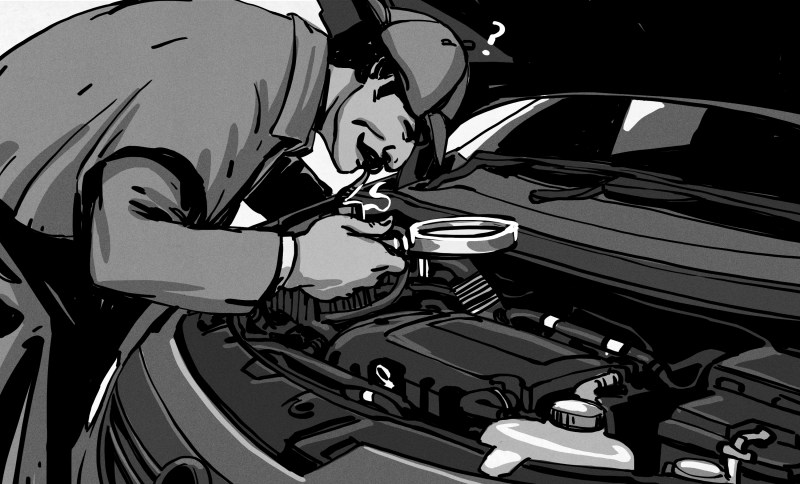
The first step to hunting down any noise is to characterise it as much as possible. In this case, the noise was most noticeable when the car was traveling at speeds from 40 km/h – 60 km/h, present as a vibrational humming noise. The location of the noise source was unclear. Importantly, the noise varied with the speed of the car, raising in pitch at higher speeds and dropping as speeds decreased. Engine speed had no effect on noise whatsoever, and the noise was present regardless of gear selected in the transmission, including neutral.
All the above tells us that the noise is not coming from the engine, and likely isn’t coming from the transmission either, barring perhaps the output bearing. The fact that the noise varies with speed tells us that it is coming from something that’s moving in relationship to wheel speed. This could thus be a wheel or tire out of balance, worn wheel bearings or brakes, a noisy differential, or an issue with the driveshaft, its associated bearings, or couplings. That’s a lot to be going on with, and far too much to simply go about replacing parts until the noise goes away. The source of the noise had to be narrowed down if it was to be fixed. This can often be difficult, as components like the suspension and driveshaft can transfer or magnify the noise, obscuring its original location.
Prior to purchase, with the noise quite obvious, due diligence meant doing enough research to ensure the problem wasn’t likely to be catastrophic. Searching forums for common sources of noise revealed the W210 series to have a relatively solid transmission and engine, with everything else downstream in the drivetrain comparatively simple and easy to fix if it was defective. Thus, the car was bought for the price of $2650 Australian dollars, with an earnest belief the problem could be rectified without excessive expenditure.
To rule out wheel bearing issues, the car was jacked up, and wheels rocked back and forth to check for play. None was found, and similarly the noise was noted not to vary regardless of steering load on the wheels, suggesting the bearings were sound. Visual inspection showed the wheels to be in good condition and tyres to be only a year old; given the inconvenience of sourcing another set to test on the car, they too were set aside at this stage of the investigation. Brakes were also ruled out, as the sound didn’t change whether they were applied or not, and the noise was not the typical grinding sound associated with such parts.
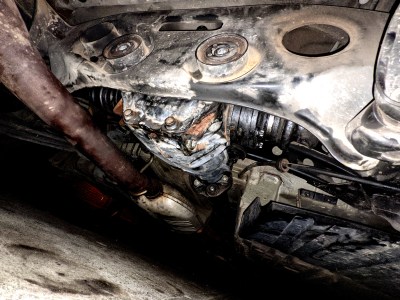
To look further into the drivetrain, the car was placed up on jackstands. This would allow inspection of the differential, driveshaft, rubber driveshaft couplings, and the driveshaft’s center supporting bearing. With some struggle, the rear driveshaft coupling was removed, indicating some age, but overall, the rubber was intact. There was seemingly nothing wrong with the driveshaft or its center bearing, either.
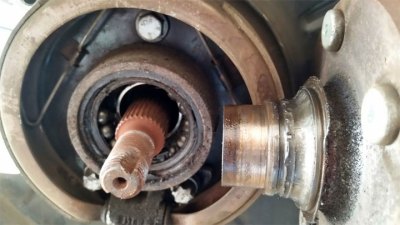
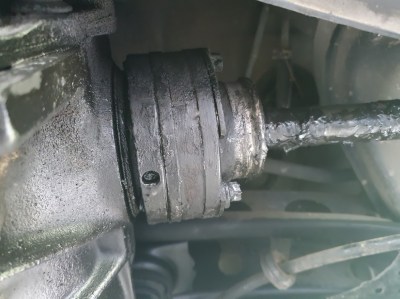
The differential, however, was another story. Rocking the input back and forth revealed significant play in the pinion. The differential would make a noticable clunk when the pinion was jiggled to and fro as it hit the teeth of the ring gear. Some play is normal, but a hunch suggested this was at excessive levels. The pinion also exhibited obvious play fore and aft, suggesting something was sorely wrong with the differential. Turning the pinion by hand also revealed a somewhat crunchy feeling, suggesting bearings in the differential may be worn – a surefire cause of a noisy driveline.
At this point, the vehicle was sent to a mechanic’s workshop for evaluation, and ideally, a new differential. The mechanics were able to readily identify the source of the noise as coming from the differential’s pinion by running the car in gear while on a lift, and localising the noise with a stethoscope. This is unsafe to try on jackstands, but is simple to do in a mechanic’s workshop. It proved useful to verify the differential was indeed the problem. The loudest noise could clearly be heard emanating from the differential itself, even if the driveshaft was acting as somewhat of a speaker to amplify the noise elsewhere on the car. It could also be achieved with a more modern tool, commonly known as “chassis ears”. These allow microphones to be placed around the car to easily diagnose problem noises at the source, even while driving around. These kits are nevertheless expensive and often out of reach of the home mechanic. (But might make a nice DIY project on their own.)
The Repair
With the source of the noise now identified, the differential needed to be replaced. With parts difficult to find locally, the job was beyond what the workshop was willing to take on, so naturally it became a DIY job to find and install another differential. Sadly, Mercedes-Benz owners have not historically spent much time working on their own vehicles, meaning DIY manuals simply don’t exist for many models. Instead, the best method for finding clear workshop instructions is to purchase access to the Mercedes-Benz WIS information system through grey-market sellers on various online marketplaces.
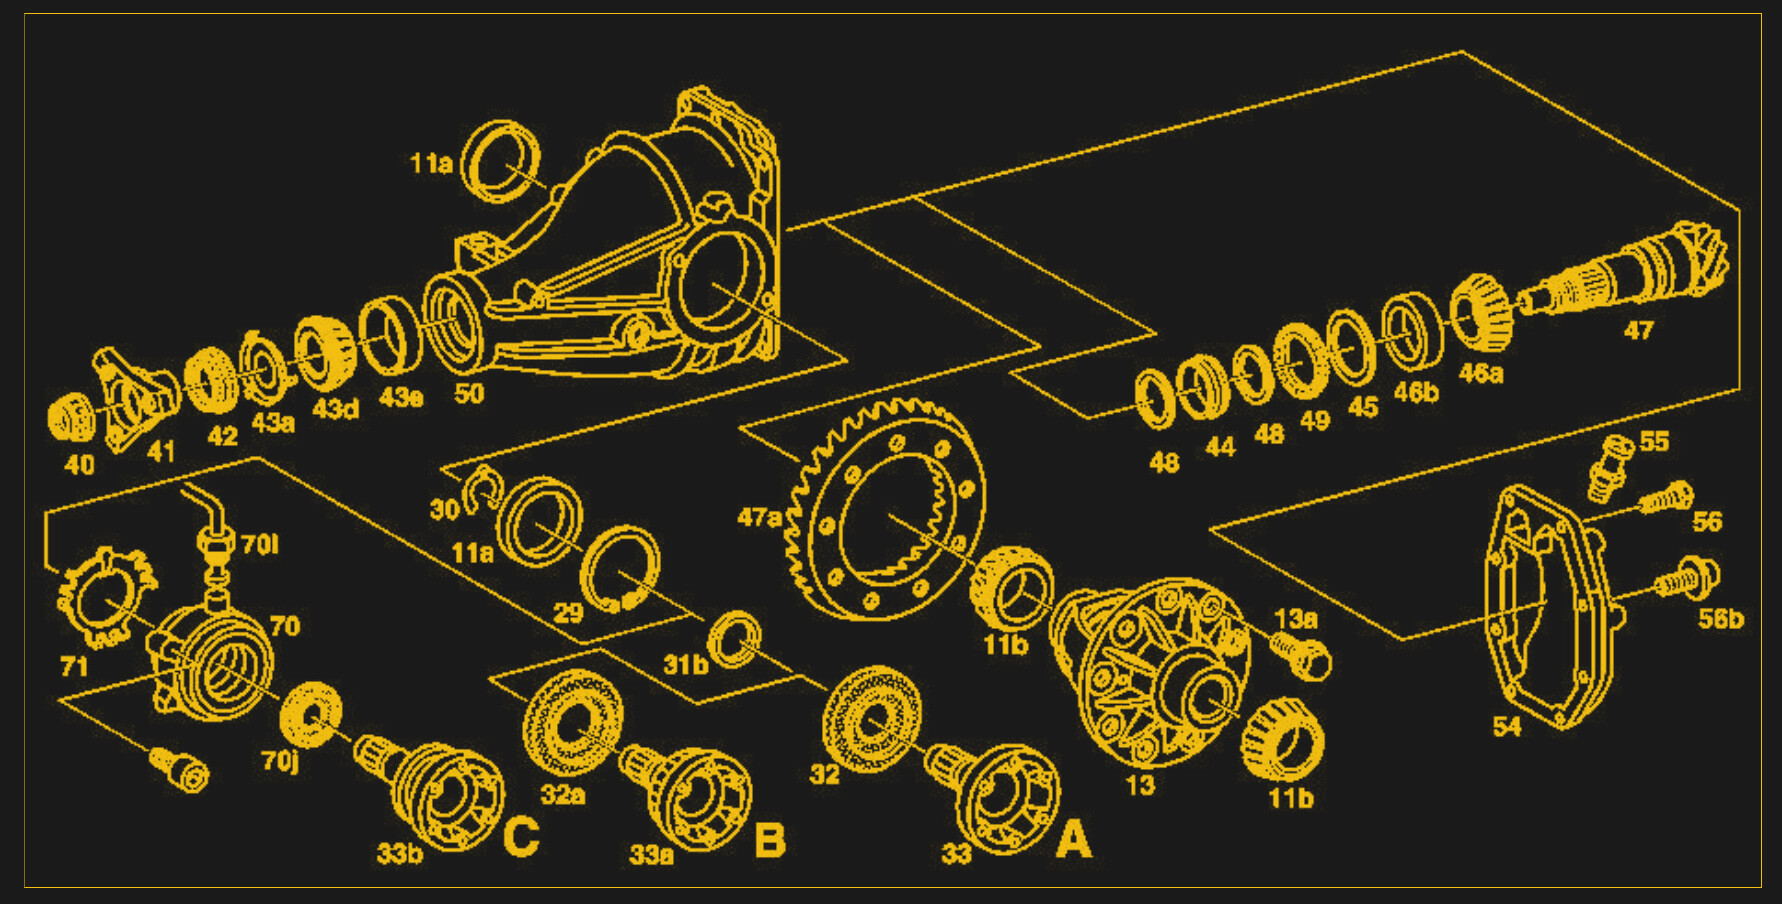
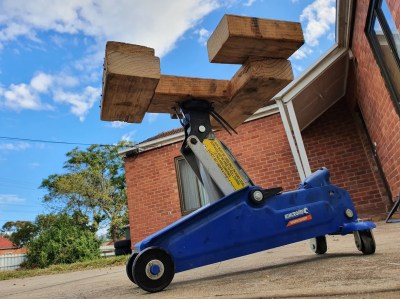
Armed with factory instructions on how to execute the fix, and a good quality used differential from another E-class Mercedes, the only thing left to do was to change over the parts. A differential swap is an intermediate-level job for the shadetree mechanic, requiring some care to avoid being crushed in the process of removal and installation. A custom tool was required to avoid this, in the form of a cradle to support the differential during removal and to help lift the new one into place. Those who can muster a serious bench press number might find it unnecessary, but by and large, it’s better to have a structure in place to hold the differential rather than risking dropping it on one’s own face. Other than that, it’s a simple job requiring the removal of just three main support bolts and a handful of smaller fasteners that hold on the half shafts.
The process naturally proved more difficult than expected. Eight hours were lost tangling with the E-Torx bolts that hold the half-shafts on to the differential output flanges, mostly in yelling, frustration, and trips back to the store for new tools. Eventually, the combination of a large breaker bar and impact wrench got the bolts free. An important thing to note is that an impact gun with a nearly-dead battery may sound like it’s working fine, but its strength is greatly diminished. Recharged batteries make all the difference for the more difficult bolts out there.
The difficulty of loosening the flange bolts lead to further complications. To get a clear shot at loosening them, the rear CV joint boots had to be moved, necessitating their reclamping during reassembly. This required the purchase of new tools solely to reclamp them in place. Removing them also lead to molybdenum grease getting absolutely everywhere. Useful techniques were learned along the way, however, such as jacking up the rear suspension in order to change the angle of the half-shaft to the differential, making access to certain bolts much easier.
Once the old differential was removed, it was comparatively easy to lift the new one in place, and get everything installed as it should be. The homebrewed jack cradle proved invaluable here, as it’s difficult to lift a 30 kg differential into place while simultaneously tightening up the bolts on one’s own. Thanks to the sealed design, the new differential could also be filled with the appropriate lubrication before installation in the car, making the whole process a much cleaner affair. It was tempting to take the opportunity to handle other maintenance jobs while the car was up on jackstands. However, any mistakes could lead to confusion if noises or other issues were present after the differential swap. Thus, the differential was completed, and other work left for a later date.
With the car put back together, it was taken out for its first drive with bated breath. Gloriously, the dreaded noise was absent, and the reward was a quiet, comfortable German sedan. Taking around 22 hours of my own unskilled time, and having spent $500 on tooling and fluids, it came out feeling like a win compared to the $1,200 a local garage quoted for the same job. Given that professional mechanics with proper equipment could likely do the same job in under six hours flat, going it alone was surely the right move. As a bonus, plenty was learned along the way.
Noises should be investigated methodically, and ideally localised to a single component prior to replacing any parts if one is to succeed. Patience is also key, to avoid costly mistakes such as rounding off bolts or stripping threads along the way. Overall though, the key is to trust in your ability to learn, and to investigate a problem until you understand what is happening at a fundamental level. Only then will you guarantee that the issue can be properly fixed.


>> Visual inspection showed the wheels to be in good condition and tyres to be only a year old; given
>> the inconvenience of sourcing another set to test on the car, they too were set aside at this stage
If you’re ever suspicious of your wheels/tires, you can often get an answer by simply swapping pairs front/rear or left/right*
If the noise changes significantly, it a clue that a wheel or tire is involved.
* If you swap left/right, put them back after you test, modern radial tires have longer lives if they only turn in one direction
I once had a MK11 escort sedan, it originally had a 1.3 litre engine but I changed it for a 1.6. It had a strange tail shaft vibration that only happened when it rained, it also did it when driven through a deep puddle for about a kilometre, then it stopped.
I fitted new universal joints etc and had it balanced, this did not change at all.
As it was a 2 piece shaft I resorted to fitting a single piece shaft from a escort panel van.
I also fitted the rear springs to lift the rear suspension as the one piece shaft would hit the floor under the tunnel.
After doing this mod there was no more vibration, wet or dry.
This had everyone who knew the car stumped. never found out why it vibrated.
Nice car, just a shame about the fuel consumption. Are LPG conversions a thing in Oz? This car’s screaming out for one… ;)
I have the W210 AMG E55 and it gets a little over 10km/l on freeway driving if you are gentle, much less if you aren’t though.
Last thing I would do is convert one of these, the amount of car he got for the price means fuel consumption is small price to pay.
I have been there done that enough times w/ used parts. It may take a little more time but I always replace the seals on used parts. Usually it is easier when the parts are not installed.
I recall a time when my beloved wife swore on a stack of bibles the front end was going to fall off the truck. A full rebuild didn’t solve the issue, but a chance oil change in the differential showed the spider gears were missing teeth.
Wonderful story! Thx for sharing.
I wonder if an app could use machine learning and crowdsourced data to identify what’s wrong with a vehicle by making and analyzing an audio recording
I’ve been talking with friends about sticking a whole bunch of accelerometers on different parts of the car and using the summed data to localize vibrations.
As a low-tech solution, I’ve crowdsourced a diagnosis by posting a video on Facebook and asking for opinions. The most common opinion from people who knew cars proved correct.
There exists real equipment that clips a single sensor to the inboard driver’s seat rail and collects vibration information (along with OBDII) during a test drive. The resulting analysis seems remarkably able to identify very specific faults.
This Youtube video (in German) shows more:
Oh for the love of bananas…
how about this: Vibration Sensing
Grrr. Vibration Analysis
Definitely second the “make or buy a diff lift” advice. I’ve two friends who have thought they could benchpress a diff or a transmission into place and ended up stuck under a car with it sitting on their chests unable to get out until someone came and helped.
(Or choose much smaller cars with lighter components to work on.)
Nice write up! Thanks.
Good tip about the power tool having less oomph with a near-dead battery.
I noted something similar when using a 1.5Ahr battery on the impact driver ran out on a tough fastener. Switching to a 5ahr from the nailer got the fastener in easily. On a hunch I retested it with a full 1.5ahr against the 5ahr, and yes the same tool with the larger battery does hit harder. I still use the 1.5ahr most of the time due to the weight, but it’s a trick to have if the fastener won’t budge
Not only that, but the larger batteries are typically rated for a higher rapid discharge rate, and provide the overhead necessary for peak load conditions during heavy-work / high-torque scenarios. For all those reasons, and more, higher capacity batteries are worth their weight for cordless power tools.
for serious mechanics work, the usual go-to is a pneumatic impact driver. mine is up to 320Nm – enough to do serious replacements like tractor wheels. while i *do* own an electric one aswell, its for rather small-ish jobs, and it’s even got a big warning on it to not to trust it for fastening tires. let alone drivetrains.
use the right tool for the right job, else – there are enough examples on youtube what can happen if something goes “footloose”. especially at highway speeds.
stay safe!
Remember there’s nothing so expensive as a cheap Mercedes, BMW, or Porsche. Lucky break on this one with the problem only being the differential and relatively easy to swap out.
While Mercedes is not HK, they still have a tendency to hate the customer. And transmission jacks (even DIY ones) are usually not optional.
Since this is hackaday I’m bound to point out that 9.6-18v power tools with expired batteries can be powered very nicely from the nearest car battery with a bit of wire and a pair of clips, and often gain a huge amount of oomph compared to their original cells.
I often get very expensive 12v gear for free because the battery is the major cost of purchase (and point of failure) for power tools these days.
…and that that reply was meant for @bootstrap but HaD’s commenting system borks itself when adblock is enabled and fails to reply to the right thing.
I’m curious why you’d send the car to a mechanic “for evaulation” after identifying a clunky crunchy diff as the fault, unless you plan to rebuild it with new internals there’s nothing further to be usefully diagnosed there – and really questioning the abilities of any workshop who can’t work out how to unbolt a diff and throw a new one in.
I ran an auto shop for a few years; we didn’t work on Euro cars. At all. For any price.
There’s too much difference between working on Japanese cars and European cars; it’s /never/ the “easy parts” that are the problem — it’s the different fasteners and oddly shaped wrenches and such, like, say, E-Torx bits, which we did own, but not of the same robustness as our more typical tools.
For a pro shop, there’s probably 10-12k of additional stuff that European cars require vs Japanese/Domestics.
And for the love of dog, DON’T try to do a differential or transmission with your arm strength. That’s an easy way to get severely injured. Make a jig or something, it’s worth it even if you use it once for safety; it’ll pay for itself the second time you use it.
I had a similar problem on my wife’s Honda CRV AWD. I wound up buying a GoPro and zip-tying it to the front strut, driving it up the street a way and then back, removing it, watching (listening, really) the video inside the house, then repeating the procedure with the camera in a different place until I was able to pinpoint the aggravating noise. Haven’t used that GoPro since, but I had solved a problem that two trips to the dealership had not solved.
Gathering quality data is an irreplaceable step in diagnosis. :-)
apart from the fiat doblo, those 1998 mercedes e’s are the most hideous thing you can drive in
Could’ve just asked on any Mercedes forum. Driveline hums on a RWD car are 99% differential or rear wheel bearings. 1% center support bearing.
I went through a similar mysterious driveline issue with my 240sx this spring. After spending last summer struggling with changing out the clutch on my own I finally got a new clutch in and got it all bolted together, dropped it off the quickjack, and went for a drive, only to be treated to a horrible grindy/clicky noise in the rear. The clutch felt fine, gears engaged fine, and moving a gopro around localized it to definitely the rear by the diff. Threw it back on the quickjack and started wiggling things. I had new bearings on the shelf already, so I went ahead and replaced those. One axle had some excessive motion on the outboard end, so I replaced both of those, I was planning on doing it eventually anyway because my power goal exceeds what they’re commonly known to handle. The driveshaft had some rotational play, but no excessive lateral play.
After the new axles and bearings I dropped it and test drove it again, still making the same noise. A mechanic friend, who is knowledgeable and I trust, looked it over, wiggled things, and said it’s almost definitely the diff, but wouldn’t know for sure unless we opened it. I wanted to put in a helical diff anyway, so now seemed as good a time as any. I always fall for the “while I’m in there”. Procured a helical, dropped the diff, tore it all apart. Pinion, ring, bearings, caps, spacers…. all looked fine. I replaced all the bearings and spacers, meticulously followed the procedure for setting the pinion/ring spacing, verified several times with ring paint that everything was riding nicely and spinning smooth. Put it all back together with a new gasket and top shelf fluid, verified again that everything rotated nice and there was no excessive play. Dropped it down, went for a drive.
Still noise. At this point I’m nearly $2k into getting the car back on the road and WHERE TEH F!CK IS THE NOISE COMING FROM? At this point I put it back on the quickjack and decided to run it in gear and get under it to look around. Fire it up, put it in gear, start the wheels rolling…. no noise. Dafuq? Drop it down, drive it, noise. Back up in the air.
Poking around everything I came across a retaining clip that held the ebrake cable up out of the way near the U-joint where the driveshaft couples to the input shaft on the diff. It had some fresh abrasion on it, and matching abrasion on the U-joint. Found the source of the noise, now what’s the root cause? Sticking my gopro under the car and dropping it down let me see that when the weight of the car was put on the ground the 25 year old OEM subframe bushings were squishing enough to lower the body by about 1/8″, which put the body-mounted clip in contact with the U-joint. Time to tear it all apart and replace the subframe bushings. Might swap out the 15 year old coilovers too, while I’m in there.
Moving the wheel will not tell you if your wheel bearing is bad. They will tend to get sticky and noisy before getting loose.
If you are in Perth there are a couple of excellent indie repairers that really know their stuff, eg factory trained originally, and literally one tenth the cost of Merc stealership at times.
Cheapest parts by far come out of autohauz in Arizona, even factoring in shipping. Set of 16 spark plug leads for mine was quoted $1600 by Merc, I got them delivered to my house for $120 from autohauz.
” Given that professional mechanics with proper equipment could likely do the same job in under six hours flat, going it alone was surely the right move.”
Never was an incorrect conclusion more clearly stated. 22 hours versus 6 hours, and that’s a win, the friends you made along the way?