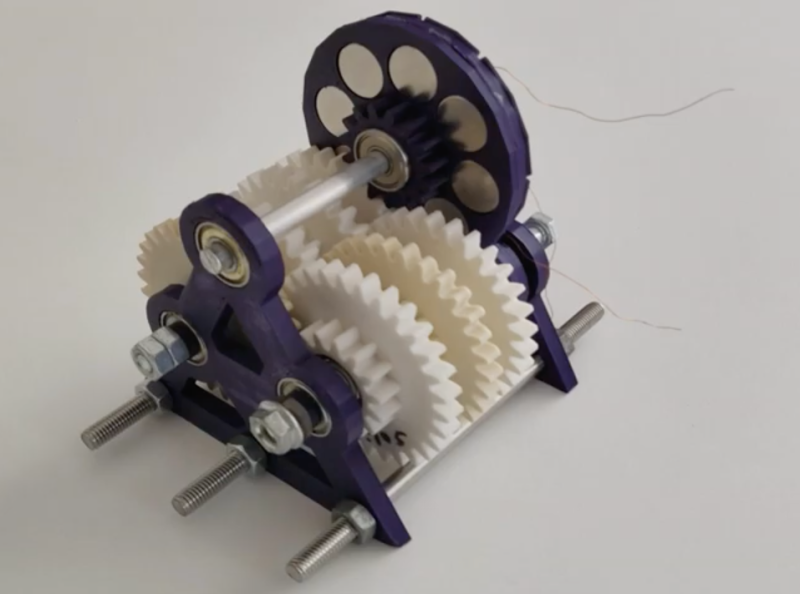
While desktop 3D printing is an incredible technology, it’s got some pretty clear limitations. Plastic parts can be produced quickly in a 3D printer but can be more expensive or take longer to make than parts from materials like wood. Plastic parts can also be weaker than materials like metal. If a 3D printer is all you have on hand, though, you can often make some design choices that improve the performance of a plastic part over other materials. That’s what [1970sWizard] did to make this axial hand-cranked generator.
Besides a few pieces of off-the-shelf hardware and the wire and magnets, the entire generator is printed. The actual generator is made from coils of wire with exposed leads which snap into a plastic disc which acts as the generator’s stator. The magnets also snap into a separate disc which is the rotor of the generator and is attached to the drivetrain, with no glue or fasteners required. A series of gears on two other axes convert the torque from the hand crank into the high speed necessary to get usable electricity out of the generator.
The separate gear shafts were necessary to keep from needing a drillpress, which would have allowed fewer axes to be used. This entire machine can be built almost entirely with a desktop 3D printer, though, which was one of the design goals. While it’s largely a proof-of-concept, the machine does generate about 100 mW of power which is enough to slowly charge USB devices, power lights, or provide other sources of very small amounts of energy. If you do have access to some metalworking tools, though, take a look at this hand-cranked emergency generator.


Not the entire thing is printed, I see shafts, nuts and bearings.
and magnets
“Besides a few pieces of off-the-shelf hardware and the wire and magnets, the entire generator is printed.”
They note that. I’ve just come to assume those that specifically say entirely 3d printed are lying though.
I also see wire and magnets.
I see a little silhouette-oh of a man,
Scaramoosh, Scaramoosh, can you do the Fandango?
… but trust me on the sunscreen ! … 🤣
I had exactly the same association, but i really like this style of narration with the undercooled humor on sparse moments.
Glad I’m not the only one 😂
I agree… It was really in depth and clear with subtle humour… Really well done
Thanks, real glad to hear – it took me much longer to put together (video and generator alike) than I had thought it would.
@craig I’m not native to English, so I’m not getting the sunscreen reference. Could you enlighten me? Thanks in advance.
Sunscreen https://youtu.be/pVQeP5vRP5E
Would benefit from some steel on the back of the pole pairs, so that half the field isn’t just going out into space. Same for the Stator. Might even be able to get away with smaller magnets for the same output. (unless this thing is spinning so fast that hysteresis in the steel is an issue, and there was a reason it was omitted).
Watch the video and you’ll see right at the start that there are big nuts or washers on the other side of the coils.
There is still a visible air gap with those individual washers. It could be improved upon if the magnetic reluctance of the air gap wasn’t in the magnetic circuit. Same goes for the rotor.
If you split the mechanical load, making both the magnets and coils spin in opposite directions rather than having one fixed and the other having to spin twice as fast.
the wires would twist with the rotation if you did that, unless you mount the leds to the stator.
That would require slip rings and carbon brushes for the coils.
I nearly cried when you said you didn’t have access to a laser cutter.
I hope life gets better for you soon.
nice job, good presentation
Changing the ratio to be 3:1 or greater in each stage could increase the speed with less stages and therefore less losses.
As others have mentioned closing the magnetic path for each coil/magnet should also improve efficiency.