Just about any 3D printer can be satisfying to watch as it works, but delta-style printers are especially hypnotic. There’s just something about the way that three linear motions add up to all kinds of complex shapes; it’s mesmerizing. Deltas aren’t without their problems, though, which led [Bruno Schwander] to undertake a trio of interesting mods on his Anycubic Kossel.
First up was an effort to reduce the mass of the business end of the printer, which can help positional accuracy and repeatability. This started with replacing the stock hot-end with a smaller, lighter MQ Mozzie, but that led to cooling problems that [Bruno] addressed with a ridiculously overpowered brushless hairdryer fan. The fan expects a 0 to 5-VDC signal for the BLDC controller, which meant he had to build an adapter to allow Marlin’s 12-volt PWM signal to control the fan.
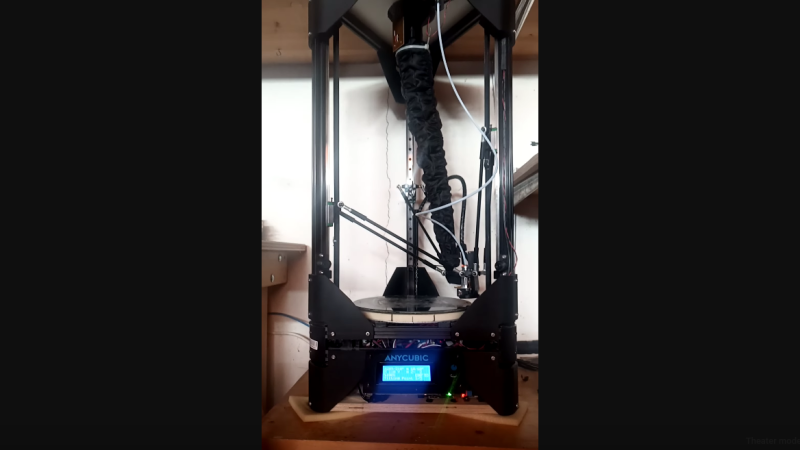
Once the beast of a fan was tamed, [Bruno] came up with a clever remote mount for it. A 3D-printed shroud allowed him to mount the fan and adapter to the frame of the printer, with a flexible duct connecting it to the hot-end. The duct is made from lightweight nylon fabric with elastic material sewn into it to keep it from taut as the printhead moves around, looking a bit like an elephant’s trunk.
Finally, to solve his pet peeve of setting up and using the stock Z-probe, [Bruno] turned the entire print bed into a strain-gauge sensor. This took some doing, which the blog post details nicely, but it required building a composite spacer ring for the glass print bed to mount twelve strain gauges that are read by the venerable HX711 amplifier and an Arduino, which sends a signal to Marlin when the head touches the bed. The video below shows it and the remote fan in action.


I just built a remote fan as well, only I used the plastic sleeve a 3/4″ x 36″ aluminum tube came packaged in. I used a fabric covered wire management tube inside it so it keeps its shape, but am thinking about wrapping some PLA around one of the tubes tightly, applying some heat to keep it that way, and stretching out the resulting spring to the length of the plastic sleeve that I need for the printer. I think that would make it as light and flexible as possible.
I spot welded together the orifice out of stainless flashing with one of those little battery tab welders.
Yes, I did something similar initially, but the spring is not ideal, it twists as it stretches and moves inside so the fabric gets bunched up in places. The elephant trunk is not pretty but it’s as light as it can possibly be.
Mine doesn’t stretch, it follows a curve that would get tighter on tall prints, I could mount the fan higher if it’s too tight, but I rarely print really tall stuff.
What if you added another stepper that’s pulling strings or something to shorten/lengthen the tube in sync with the heads up/down movement.
In fact I think it may be an interesting idea to putt all the heads “connections” (cable, bowden-tube, cooling air, etc) into one combined flexible conduit that gets pulled up / let down in sync with the heads movement.
It would remove as much unnecessary weight / inertia as possible from the heads movement. (wouldn’t it?)
The tube could be kept in shape with rings from the outside.
Three holes in every ring and the puller strings go through those (with stoppers on the strings so the rings get pulled in the right distance?)
Cables and bowden tube affixed to the rings?
Neat idea but seems overly complicated as the actuator movement would need to be calculated according to the current position. An elastic is both simpler and passive.
As for putting everything in one conduit, I think the issue would then be the cables that are not stretchy and will bunch up/cause obstructions, but there could be a way if they can be neatly formed into a spiral. Maybe with a guide or weak spring.
Having the main extruder motor force as well as all the cooling within one conduit is something I think is worthwhile and I designed such system already but have not yet implemented it. I need some gearing geometries that do not currently exist (I mean it is not readily available commercially and the CAD I use (FreeCAD) does not have a generator for those). So I am thinking of implementing a FreeCAD workbench to generate the proper gear profiles.
Stay tuned for more :-)
I did use a fabric tube on a spring initially, but as the Z coord varies quite a bit and I do print tall stuff sometimes, the conduit would bend and kink, restricting airflow. So I went with the elephant trunk, which is still just an intermediary step to be able to print reliably until I completely overhaul the printhead.
Are you still using the Axxx steppers in the Trigorilla? I’m guessing yes from the tunes it’s humming (Same printer here, well slightly older revision 2016/17, no heatbed,looking at the rods).
A change the, TMCxxxx soften’s that tune quite a lot. (You can also gain UART control if you really wanted.)
I do miss the tunes sometimes.
For the hotend (stock) was never a problem and still going strong, still fast enough and quicker than the Ender3 v2’s
For me it’s the rods are rattling around now :-)
What sort of speed are you running it at now?
yes, I am still using the original Allegro stepper drivers. I don’t really care about the noise anymore (obviously, given the hotend fan…) but the TMC might improve performance a bit, that is true.
I just did not like the original hotend, I thought it was too bulky and heavy, also I melted the heating block once due to sensor failure (and Marlin getting stuck.. old version) so I figured I might as well change it all.
I don’t run it that fast now actually, around 150 mm/s. I have run it faster but print quality suffers so I stepped it back. But I still want to see how fast it can be once I optimize the whole print head for maximum lightness. I will probably switch to Klipper at some point and tune it with the accelerometer. My current hardware config would support it, as I run octoprint on an OrangePi one embedded in the printer.
That long bowden tube is why I switched to remote-direct-drive extruders (dual head). But then I designed and built my delta from scratch so I had more freedom than modifiying an existing model. My extruder feed path is about .8″ so I can print the softest of materials even though my print envelope is about 400mm.
Also, I have tiny custom water-cooled hot ends, with piezo sensors sandwiched between them and the effecter platform so my nozzle tip is the sensor, not the bed. I went through a number of bed-sensing designs but none of them were accurate enough.