Origami has become known as a miracle technique for designers. Elegant compliant mechanisms can leverage the material properties of a single geometry in ways that are sometimes stronger than those of more complicated designs. However, we don’t generally see origami used directly in 3D printed parts. [matthew lim] decided to explore this uncharted realm with various clever designs. You can check out the video below.
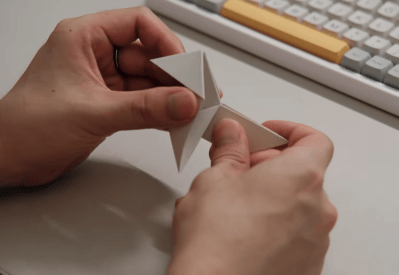
First, [matthew] converts some basic folds into thin 3D printed sheets with thinner portions on crease lines. This allows the plastic to be stiff along flat portions and flexible in bends. Unfortunately, this becomes more difficult with more complicated designs. Crease lines become weak and overstrained to the point of failure, requiring an adjusted method.
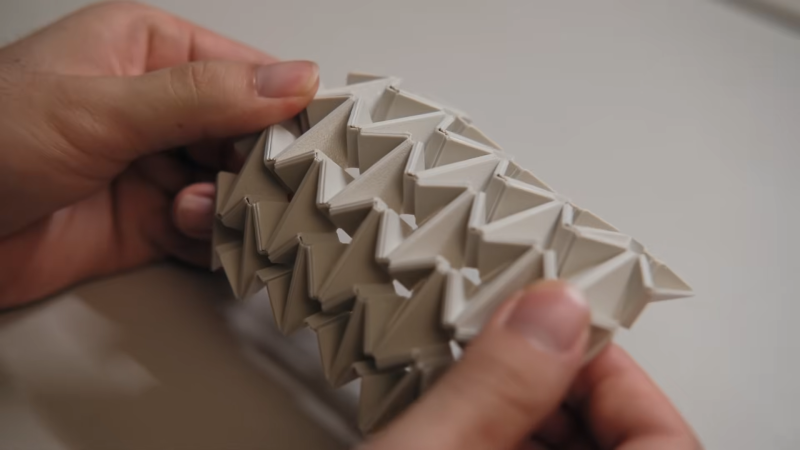
With a bit of digging, [matthew] finds some prior work mentioning folds on alternative sides of the panels. Using offset panels allows for complex folds with improved traits, allowing for even thicker panels. [matthew] also experimented with more compliant mechanism-focused prints, twisting cylinders that contract.
This type of 3D printing is always fascinating, as it pushes the limits of what you think is possible with 3D printing alone. If you want more mind-bending 3D printing goodness, check out this mechanism that contracts when you try pulling it apart!


However long origami has been around, there’s still more to find.
The beauty of 3D-printed rigid Origami undoubtedly lies in its approachability while also delivering results that are visually and functionally beautiful. But it doesn’t have to end at FDM and a selection of polymers.
I personally feel that it’s a set of techniques waiting for connections to be made with sheet metal design and prototyping (looking at you, FreeCAD). But the bottleneck there is that the printed sheets need compliant hinges as obligatory weak points.
So what about metal?
Currently a desktop Jet-ECM machine project is approaching the Kickstarter deadline:
https://www.kickstarter.com/projects/athenatech/liquid-blade-3d-cut-and-etch-metal-with-your-3d-printer
The page shows two sheet metal Origami objects to tease such a use.
Jet-ECM is an electrochemical etching method that localizes the material removal through the laminar flow geometry of a narrow electrolyte jet, unlocking maskless half-etching of regular sheet metal. It can further be improved by adding a wire electrode into the jet (https://doi.org/10.1016/j.procir.2020.02.274 (open access)).
While probably not something for every home, it’s nothing an ordinary hackerspace couldn’t afford to have around – plus it’s low-noise and reasonably safe until you start working with stainless steel that requires handling Cr(VI) solutions.
I wish people would stop posting chatgpt outputs as comments.
I agree, but in this case, it looks like original thought was just filtered thru chatGPT for ease of reading. A disclaimer at the end of the post stating this would make me happy.
You can cut thin steel in reasonably fine patterns without altering it’s temper with etching primer, a sharp scribe, some salt water and a 12V battery charger.
It’s the recommended way to home make reed valves for pulsejets.
Thin spring steel is a bitch.
Maker spaces should start there.
By which I mean, teaching all newcomers how to make pulsejets.
It’s a great beginner project and will serve to drive away the GD law abiders.
Those are very different approaches, workflows and results, and not a substitute. Having done my share of double-sided PCB etching in my time, I’m not sure going back to that is worthwhile for one-off prototyping. Well, only if you enjoy the process, but that’s best reserved for hand developing of photographs / cyanotypes.
Also forget manual layout of scribe lines. Those days are over… when anyone can mount a laser to a cartesian plotter or FDM printer. But even then, anyone who has used POSITIV 20 resist knows what a hassle it is to get an even coat. Maybe laminating with dry film resist is better, but it’s flimsy and has limited shelf life. It’s meh all around.
What you get with ECM that you don’t with masked etching is rounded edges as opposed to the crisp edge left by masked etching undercuts. I imagine these can already be annoying when handling, and doubly so when creating the bends.
Add some ascorbic acid to the solution to break down the Cr(VI)
Usually FeSO4 is just fine, but that’ll end up being a regeneration step happening in a separate canister where the precipitate can also settle over 1-2 days.
There’s actually three basic folds to an origami: the mountain, the valley, and the weird fold where you kinda need to smush it in to tuck the other folds in their places.
Although you need a new name, origami means folded paper
Literally we should name it OriPurasuchikku. So, from the language perspective it will be harder to spell it than make it 😁
“Deployable Structures” then.
Speaking of which:
https://techxplore.com/news/2025-12-deploy-complex.html