
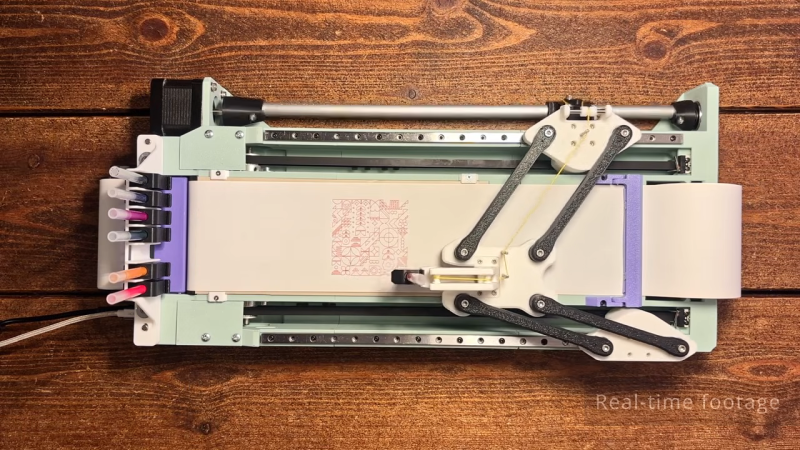
If you’re building your first plotter, or you just like thinking in right angles, you’d probably consider a Cartesian design for your build. [András Vujovits] went another route with his project, building an impressive delta pen plotter with a useful tool changer, to boot.
The build relies on a unique motion system, wherein two NEMA 17 stepper motors drive either side of the linkage to control the position of the end effector—in this case, a pen carriage. By controlling the position of each side of the mechanism, it’s possible to move the pen through XY space. Running the show is an Arduino Nano, fitted with a GRBL shield and appropriate stepper motor drivers.
The magnetic tool changer is particularly nifty, too. It allows the plotter to grab a different ink at will to add more color to the drawing. It’s well-designed, with the plotter able to change inks without losing accuracy or otherwise fumbling the switchover. The plotter uses Muji ball point pens, which are available in a range of colors and draw with slick, clean lines. It’s also quite a fast plotter, thanks in part to [András]’s efforts to keep the pen carriage light by using a smart mechanism to offload the pen lifting actuator to the main body.
[András] has plans available, but you’re going to have to pay for them. Still, it’s always nice to see a new machine in the wild. Video after the break.












If I saw this for sale, I’d probably buy it, even knowing it would probably just become a desk toy after a few months. Great accuracy for such a compact plotter, but my favourite thing has to be the number of possible colours. I wonder about using this to paint watercolours, giving it brushes instead of pens, getting it to periodically refill or soak up some water.
Yeah, I don’t know what I would use such a small plotter for. I would want something A2 or larger for plotting CAD drawings and schematics.
Beautiful! That’s a really nice plotter concept!
I like the out of the box thinking here, pretty awesome project.
That’s the first decent multicolour one I’ve seen since the Roland and HP plotters in the 80’s
I really like the multicolor system. I love the usage of strings instead of gears (I have no idea why)
I wouldn’t mind owning/building a plotter at all, probably I would enjoy to use it a lot more than a 3D printer.
Wow that’s really well done. I skimmed the video but how is the z axis being handled? All I see is a yellow string and two slats of metal which act as hinges?
Watch (the correct) parts of the video. All parts are very well explained.
I skipped though most of the video, saw around 5 minutes of it, but that is enough.
A third rail that moves down, lifting the pen holder via string.
That’s super cool. Reminds me of the first thing I did with my first delta 3d printer. Gave it a pen and had it draw the first layer of a print (Octopussy). This is way cooler though.
Funny they didn’t show any single multicolor plot.
look at 14:30
Correct, they showed multiple multicolor plots in the latter half of the video.
electromagnetic counter-magnetism for tool change instead of wire?
Hey there 👋
I’m super grateful to Hackaday for featuring my DIY project! I regularly read this blog so it means a lot.
I’ve gotten a lot of nice input both here and also on YouTube which I really appreciate. One small thing I would mention: I’m still working on compiling everything into a nice documentation package which is not ready yet but I plan to make available soon.
Thanks to all of you engaging and watching!