

When I got back into SLA resin printing recently, I knew that I’d inevitably have to deal with the agony of failed prints and of course resin spills. This moment eventually came, and I felt motivated to treat mistakes as teaching moments on aspects like how to properly prepare an SLA build plate in terms of angles and supports or how to deal with failed print aftermaths.
Before moving on to the disaster, I’d like to first start with a look at the resin print of the previous article, which contained a number of fairly small parts. These I had oriented and supported almost fully using the automatic methods provided by the ChituBox slicer software, and worked about 90% as I had hoped, while leaving plenty of room for improvement as well.
Overall, preparing an SLA build plate in the slicer isn’t quite the same as for an FDM printer, mostly due to one phrase that strikes fear in the heart of anyone who has ever done resin printing: “peeling forces”.
Not Bad, Not Great
For last article’s resin print, I had to put a number of models onto the build plate in the slicer, after which I mashed ‘auto arrange’, ‘auto orient’ and then ‘auto support’ in their respective tabs. I did change the orientation of the beam so that it wasn’t pointing straight upward any more, as I wasn’t going to wait a few extra hours for it to print just for that single object.
This then got me the following overview including a veritable forest of supporting structures:
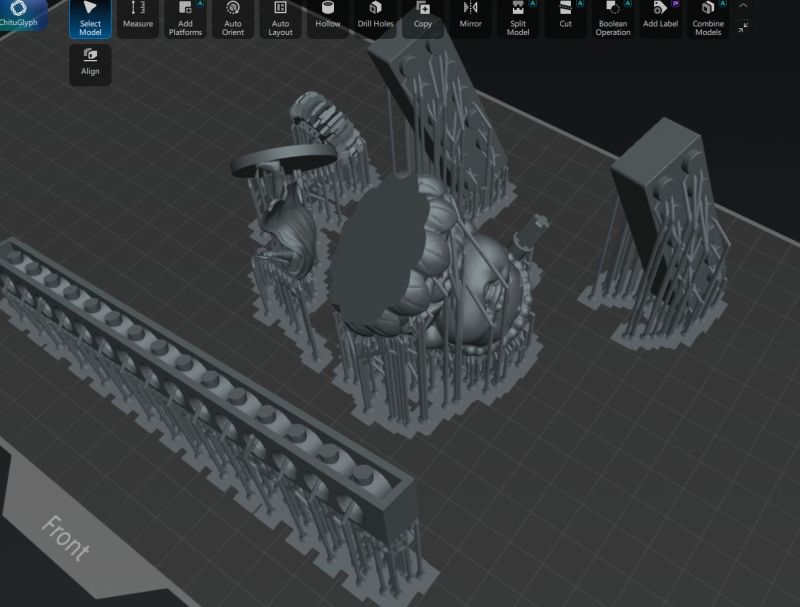
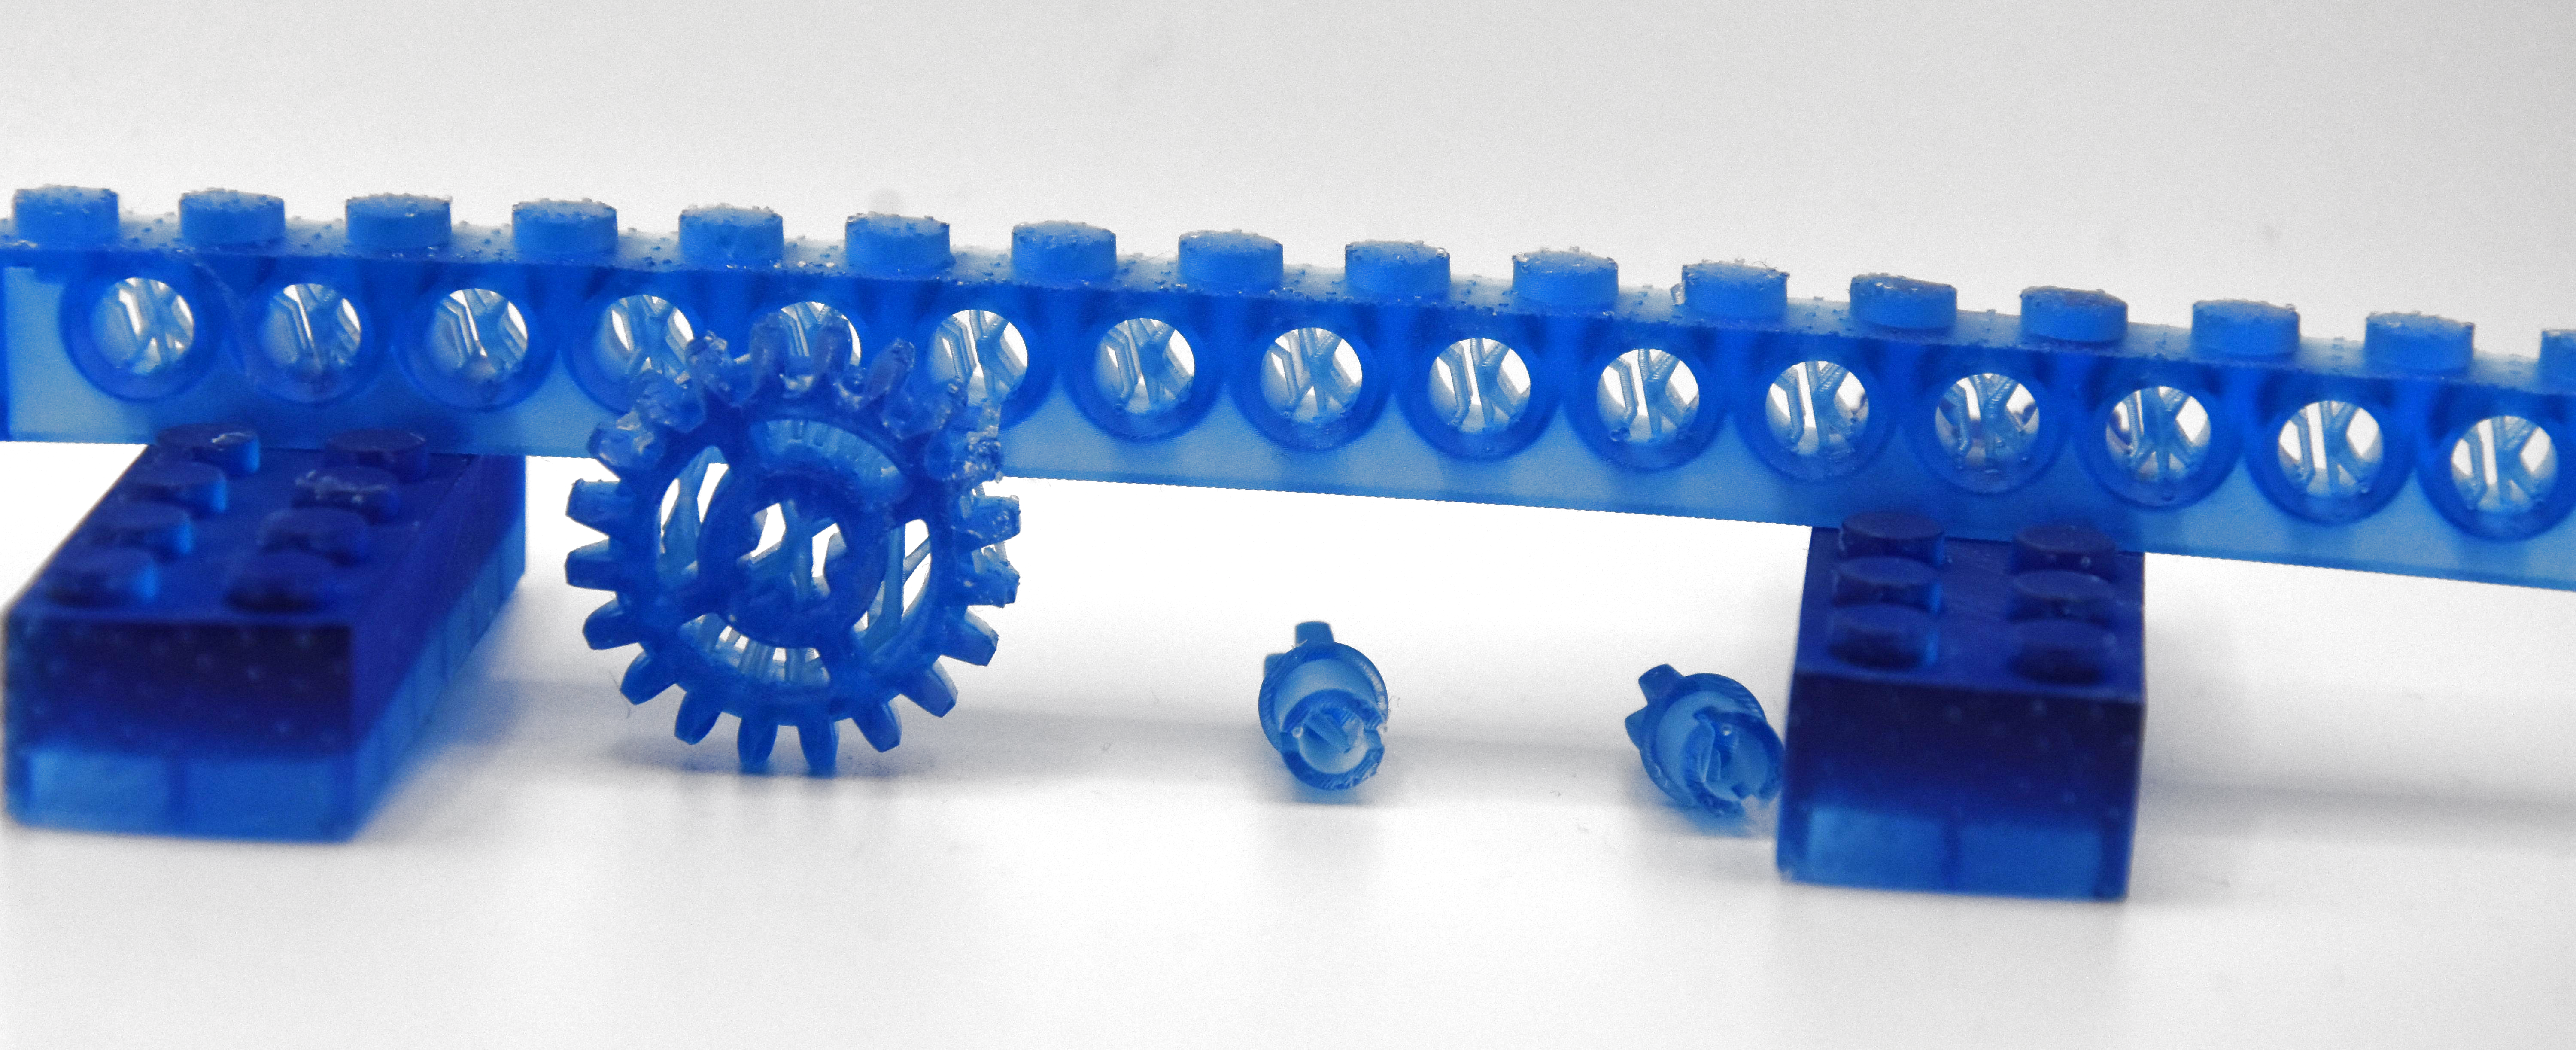
By playing it safe, I managed to get everything printed without any glitches other than my previously mentioned fight with the resin auto-feed system of the printer. Of course, by leaning heavily on defaults, I also got backstabbed by the slicer’s overzealous use of supports, especially where it was highly undesirable, such as inside parts of the LEGO Technic-compatible parts:
By rotating the figurines to be printed upside-down relative to the build plate this also meant having lots of ugly marks left by the supports, both on the happy buddha and the female knight figurine.
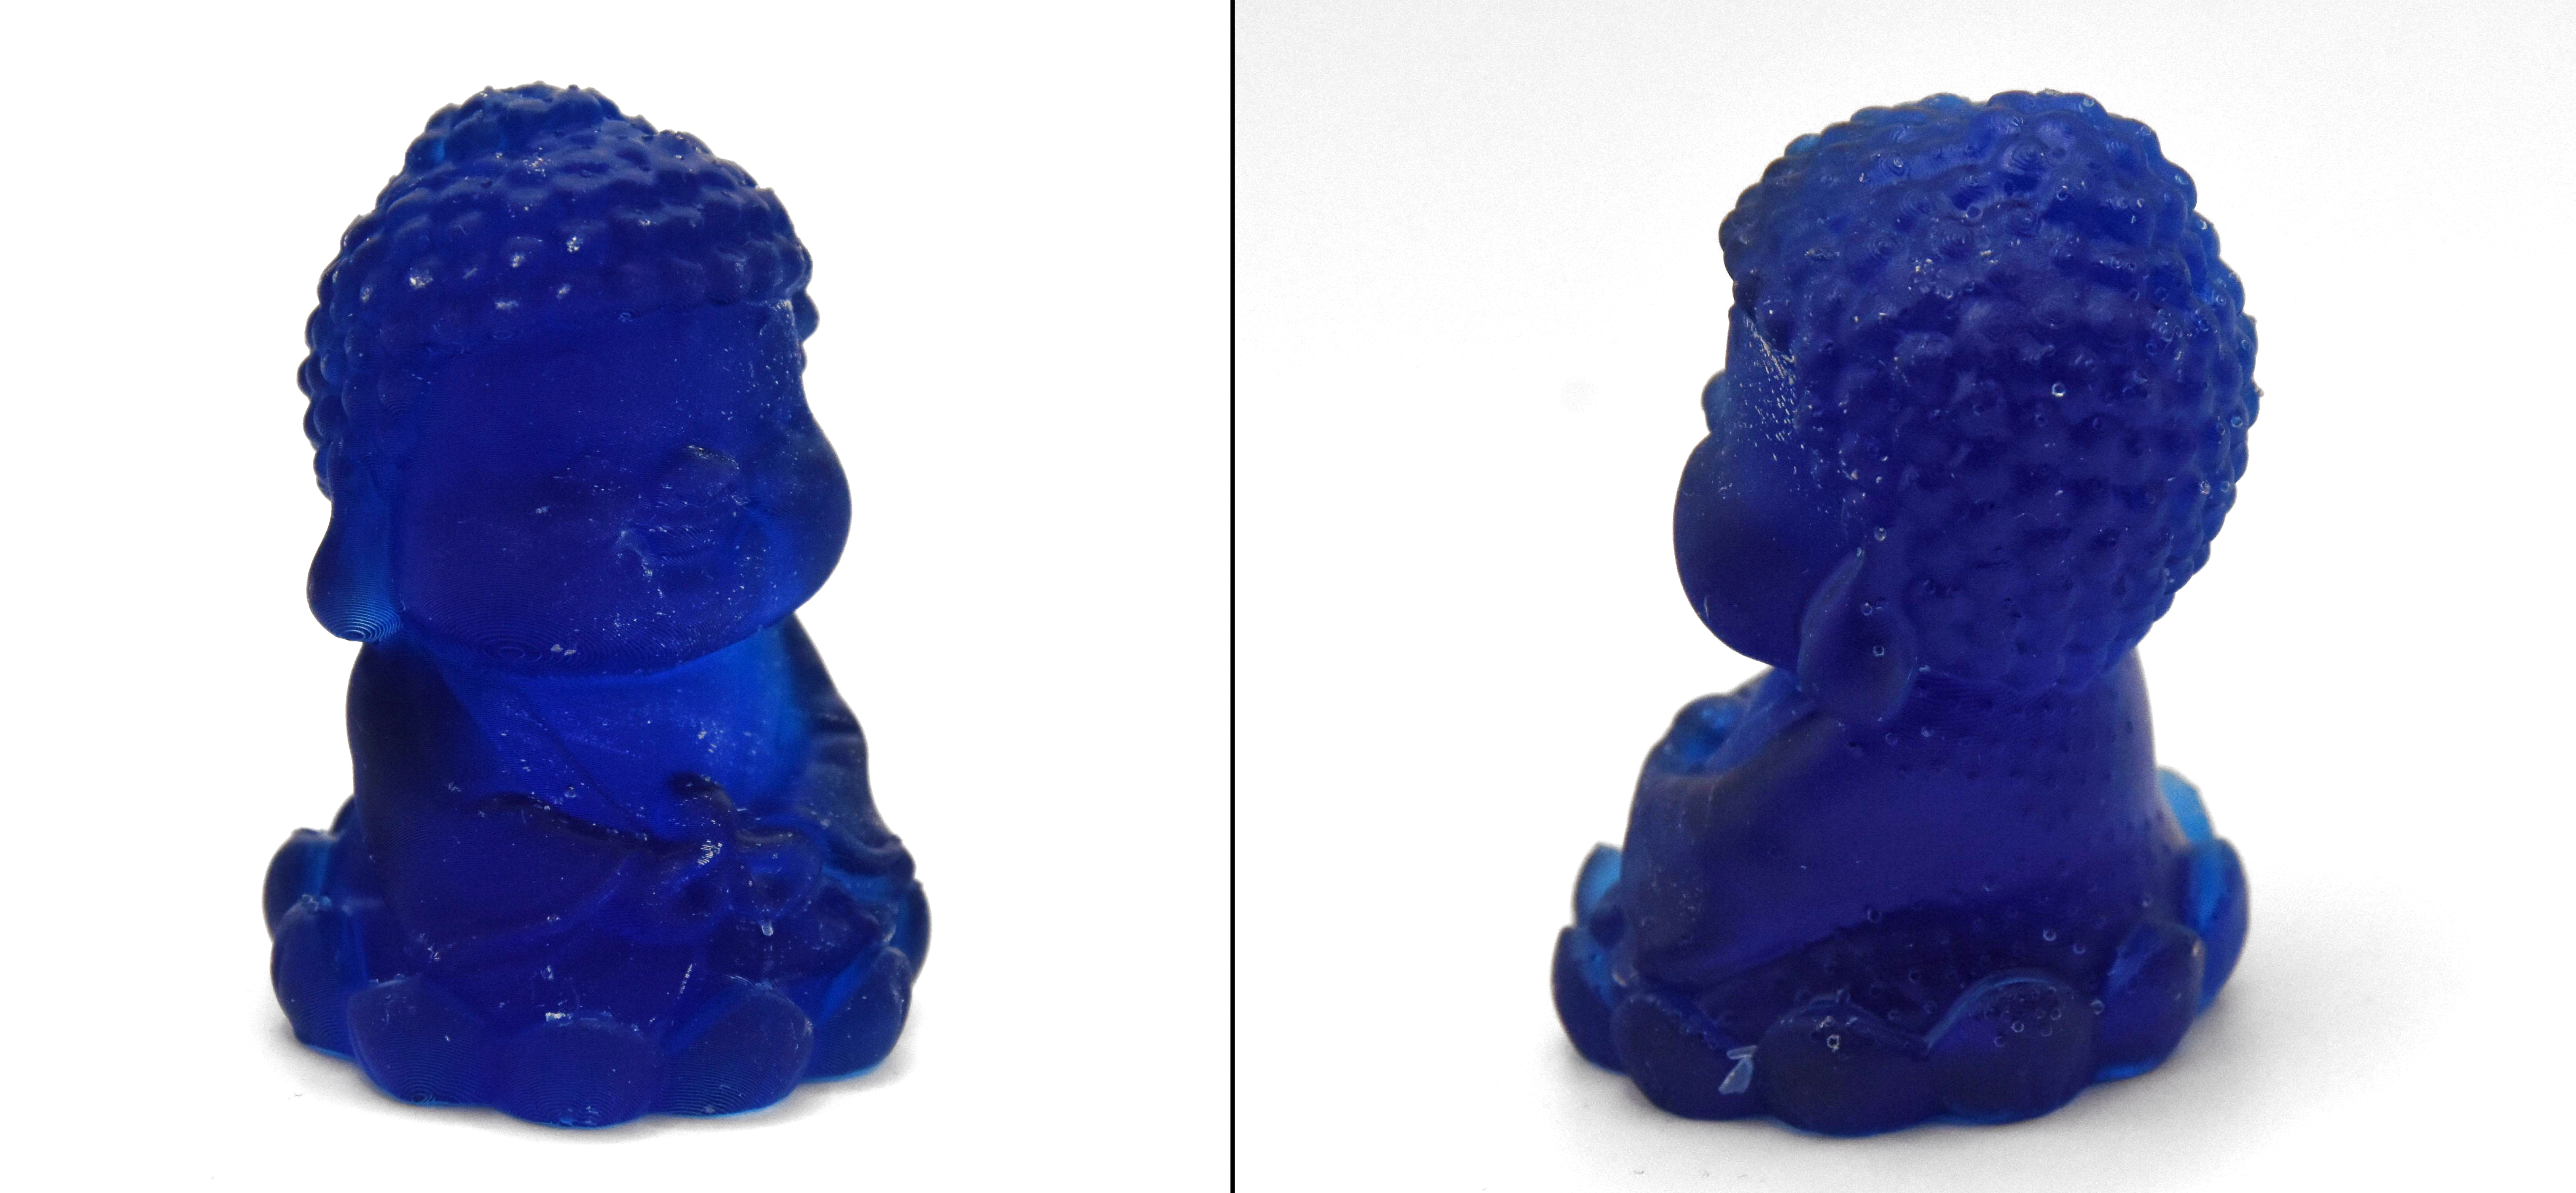
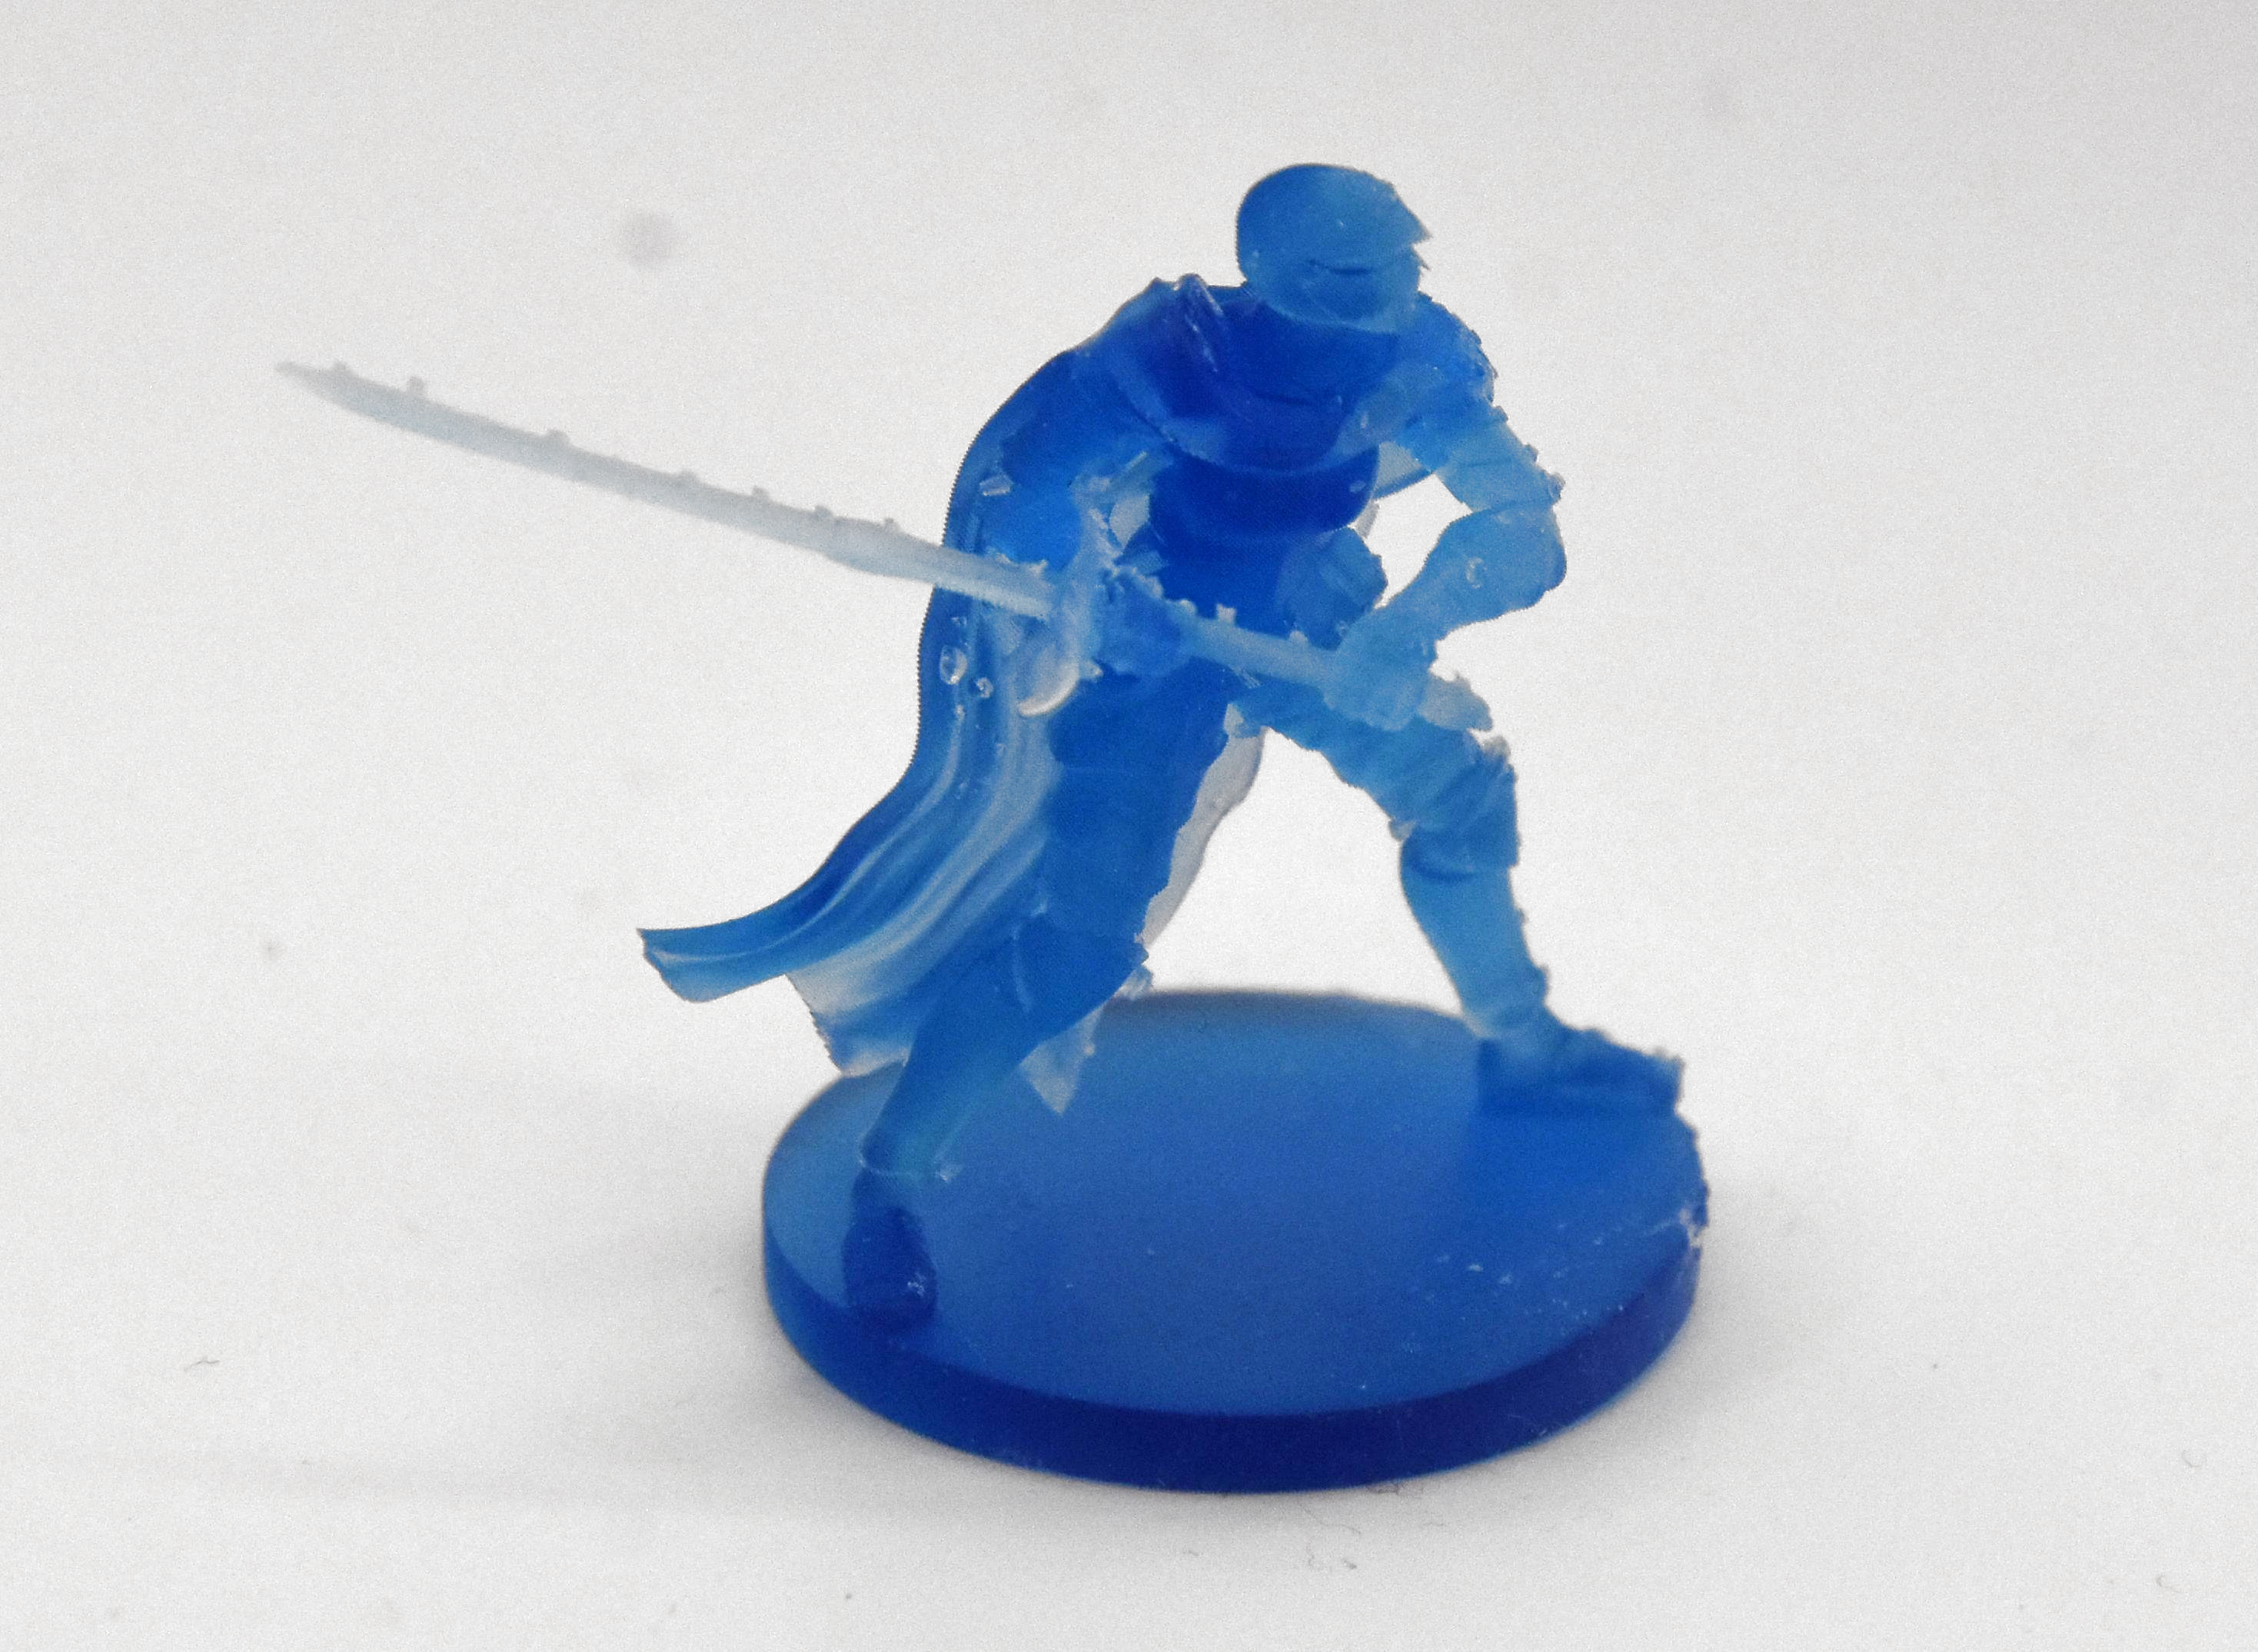
Here the fix seems rather straightforward: angle figurines so that supports contact things like the bottom of a surface where it won’t be as noticeable. Also inspect the auto-generated supports to remove any that are in naughty places and perhaps do some manual supporting if you feel particularly confident.
I did look at a few “how to do supports right” videos and written tutorials, and the general advice seems to be to simply forget about auto-generated supports.
For me an amazing aspect was that both figurines were angled upside-down by the slicer, when everyone prints them with the base towards to the build plate. Exactly how ChituBox’s algorithm here works is a complete mystery to me, but I reckon that this slightly confusing experience may have contributed to the subsequent disaster that occurred with another print.
Simply Bad
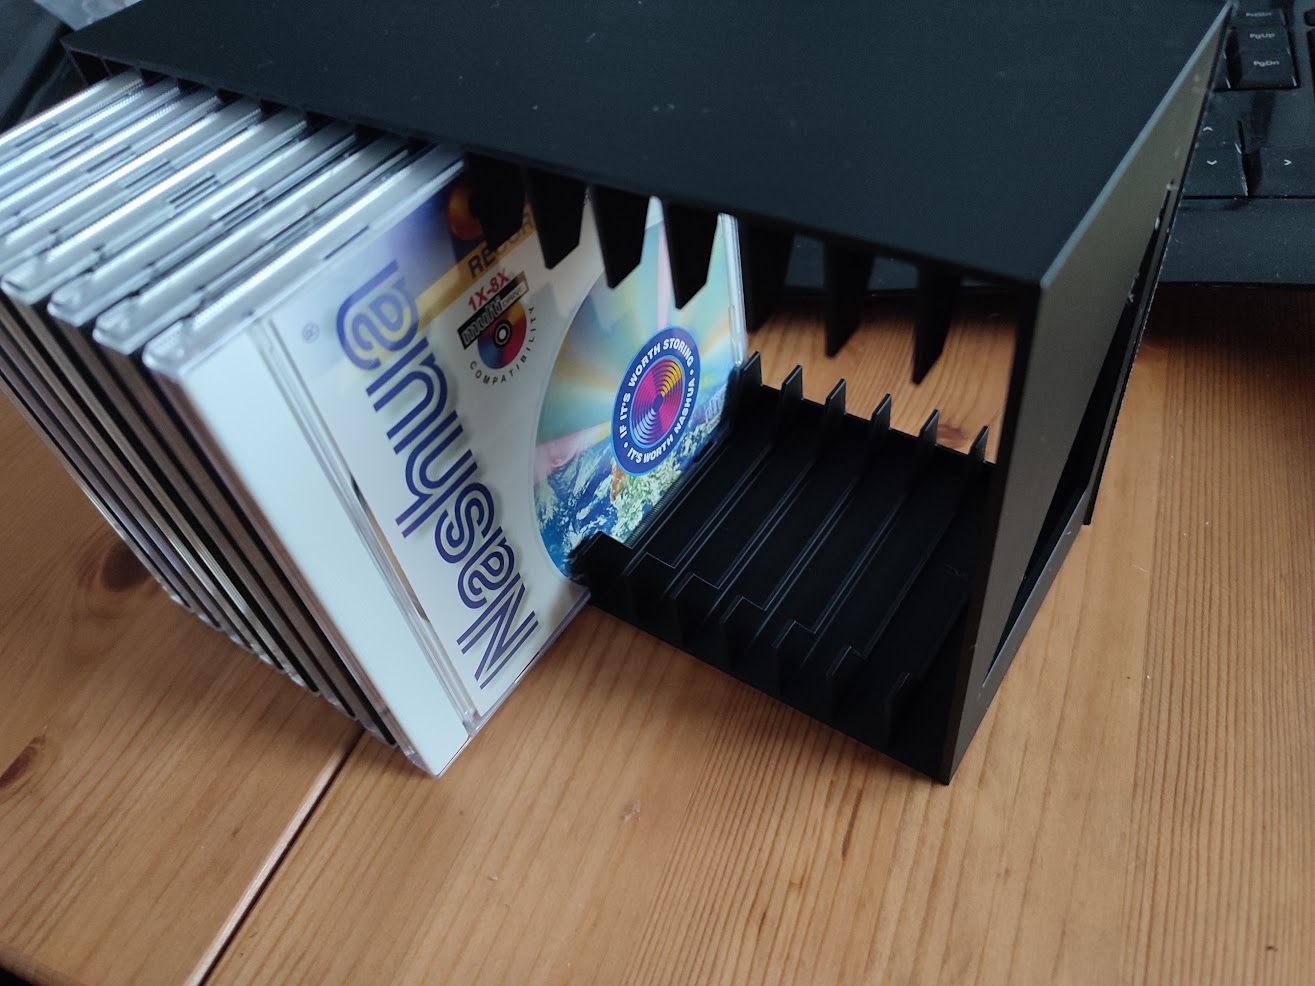
Where things slid sideways and wrapped themselves at high velocity around a phone pole was when trying to print a 16-slot CD rack, specifically this rather nice model by [zenitar3d] from Thingiverse. On an FDM printer this is braindead simple to print: you slap it on the build plate in the slicer, do a sanity check that it physically fits, slice it and let ‘er rip. My only issue here was that OrcaSlicer deemed it necessary to add a brim, so that took some sanding to clean up a razor sharp edge.
On the resin side of things, you enter a torment nexus: you can slap the part on the build plate, but then you risk elephant foot — a thickening at the base where exposure time is longer than for subsequent layers. Even if that’s of no concern, you still need to violently remove the part from the solid metal build plate, which is highly likely to cause damage.
If I still had the LD-002R printer with its flex plate, an aftermarket modification that I had fitted. This would be of no concern with a mere flex-and-pop, but here I’d have to violently wield a metal scraper to convince the build plate and cured layers to part ways. Clearly I need to look into flexible build plates for current SLA printers.
I did try to use the same auto-angle and auto-rotate approach in the slicer, but ChituBox would just always put part of the model outside of the printing area. After a while I grew tired of this and just printed it with the part slightly lifted off the build plate with medium supports like this:
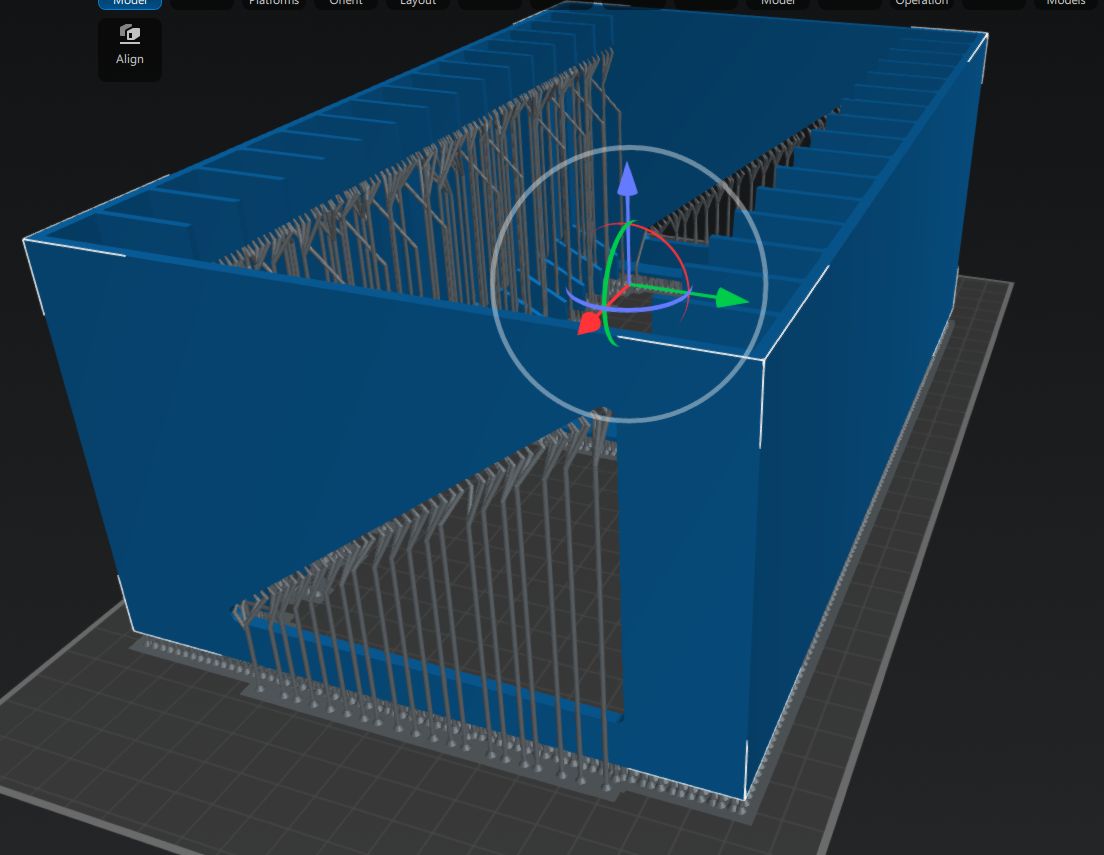
In my defense, I did this in the midst of yet another European heatwave with zero air conditioning, so maybe that had sufficiently fried my remaining brain cells. Regardless, the results were rather predictable.
Carnage
A little while later I had the good news in the sense that the supports were printing beautifully, but also bad news in that the actual model had been ripped off the supports by the aforementioned peeling forces.
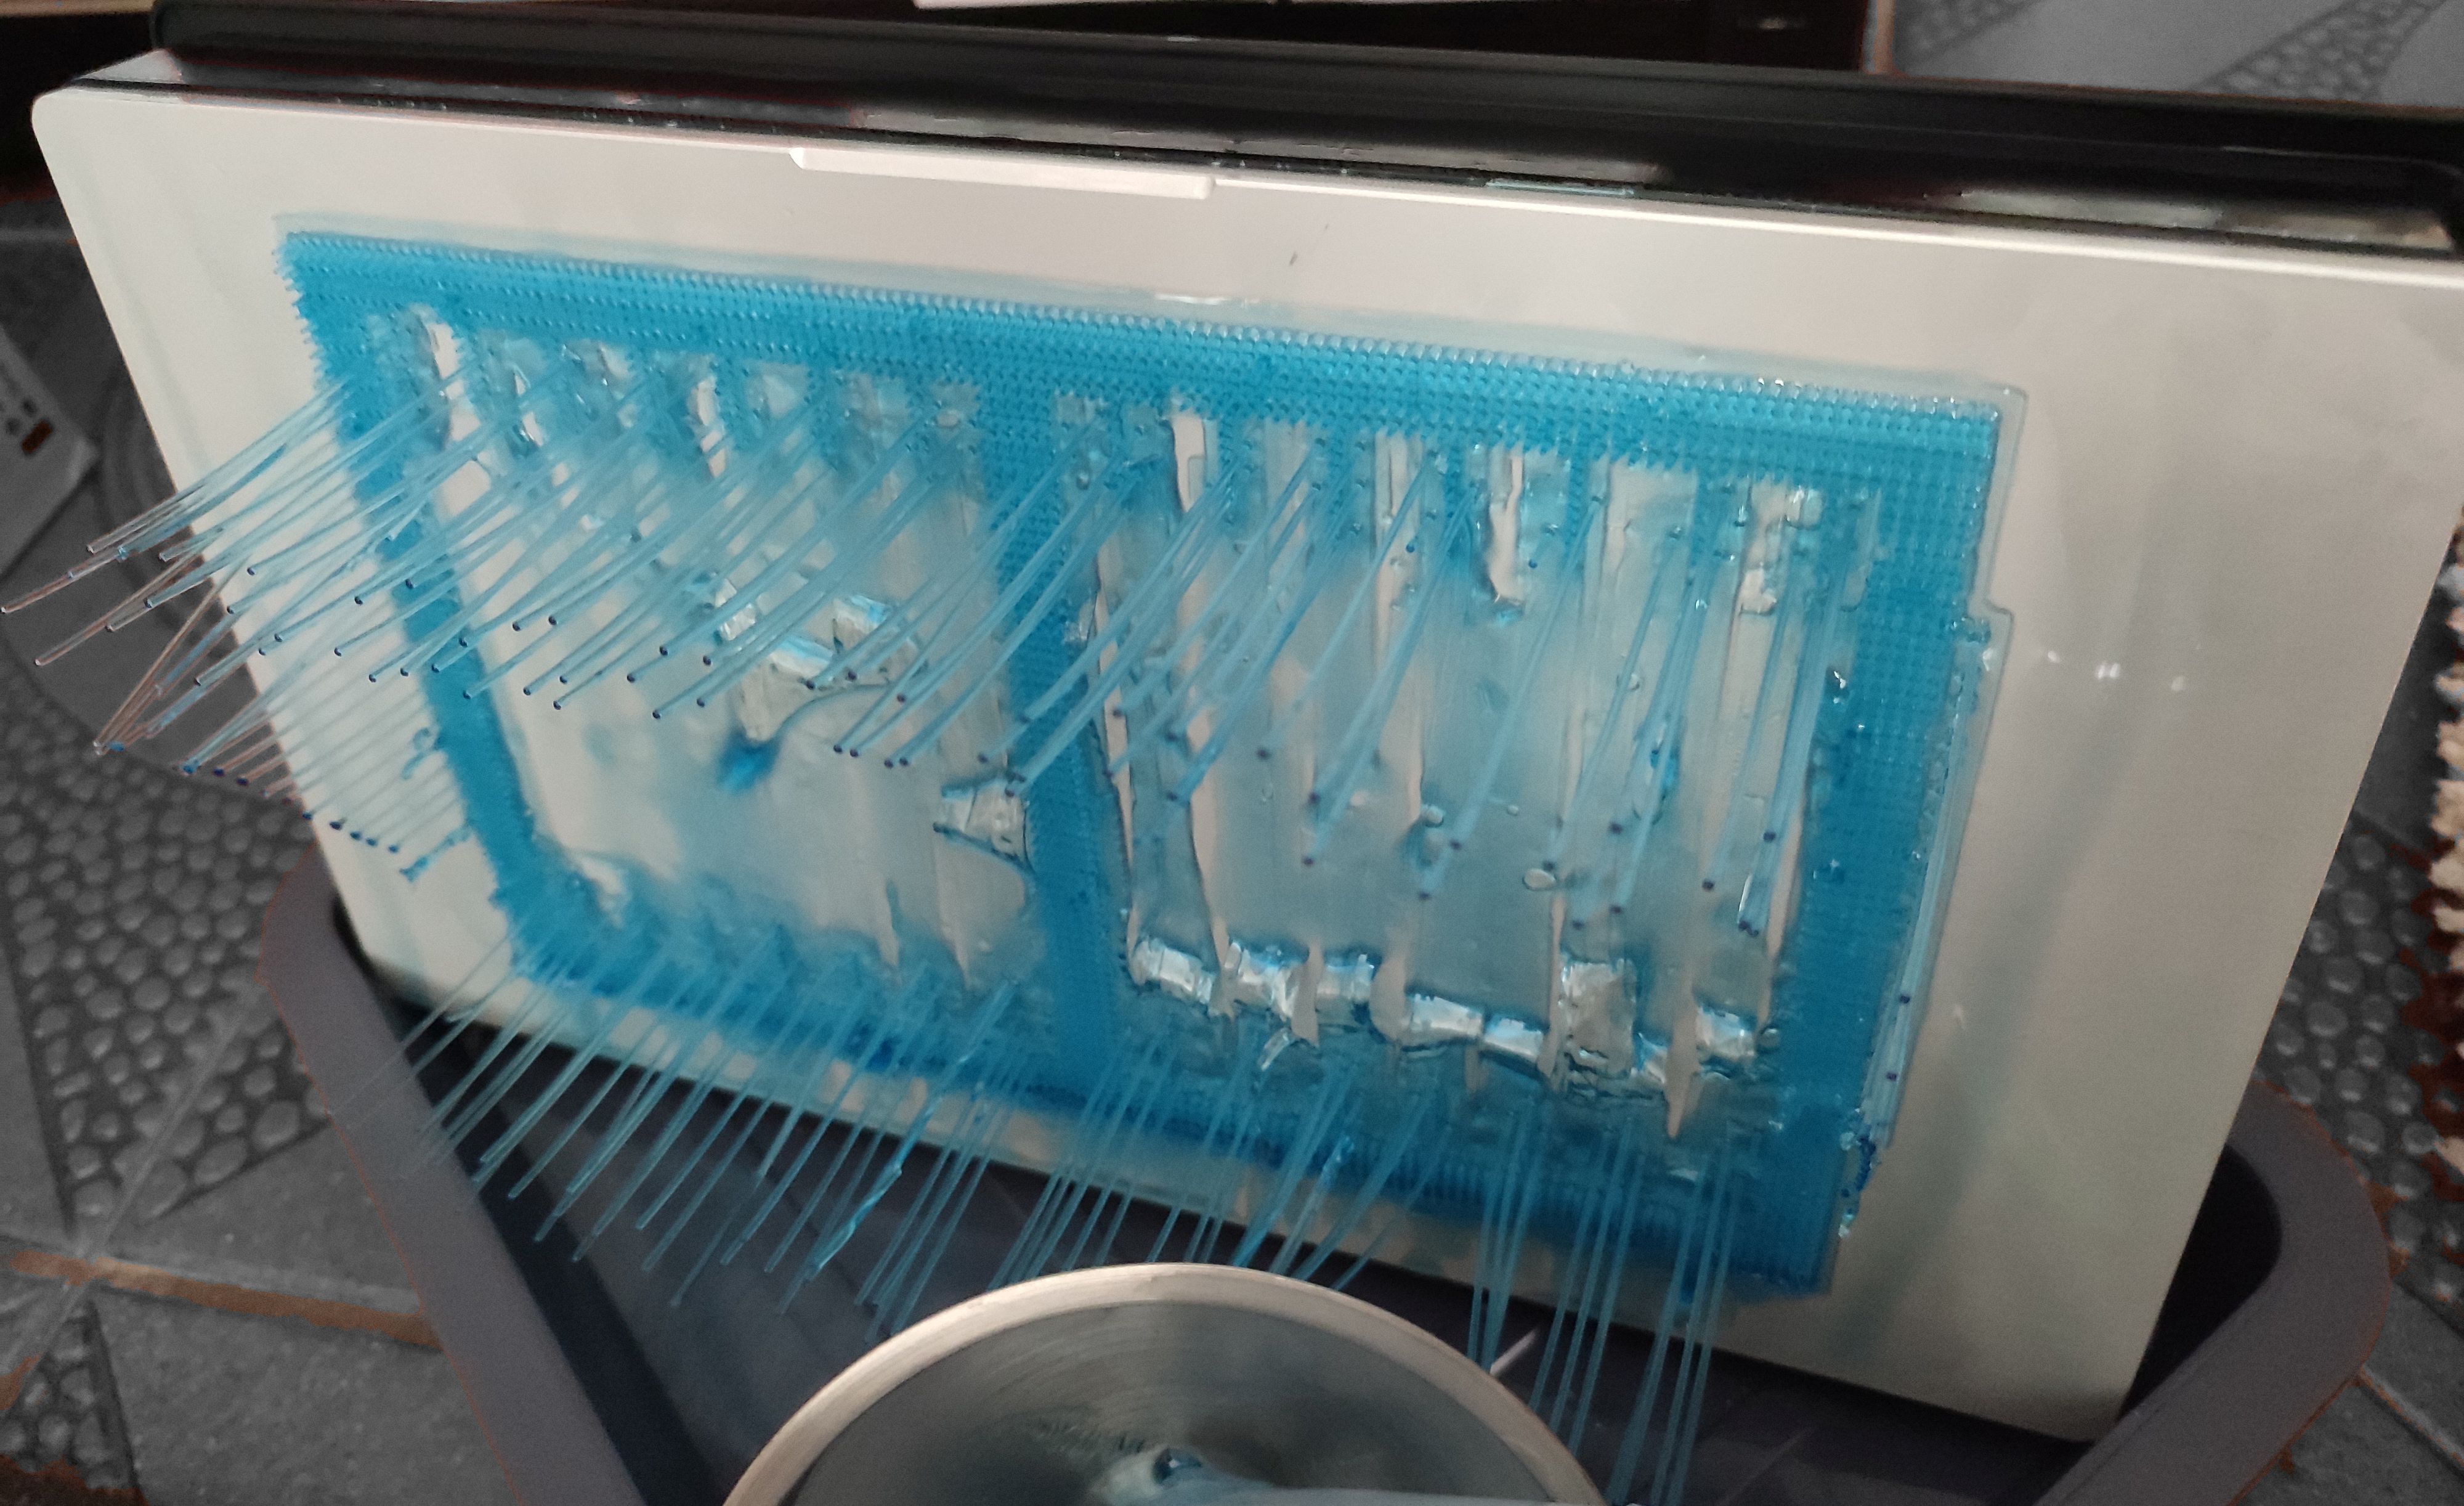
In hindsight this was obvious: the quite solid surface of the model has significantly more surface area than the area contacted by the supports. At the first attempt to peel the newly cured model layer off the nFEP (PFA) film, the tug of war resulted in the supports winning out and the print being a total failure.
You could call this the ‘FDM spaghetti’ equivalent with resin printing, where the FDM’s extruder is printing in empty air, but unlike with FDM printing the subsequent clean-up is less of a sighing, brushing away bits of thermoplastic and trying again with the glue stick, and more of a chemical hazard situation.
Dealing with an SLA resin printing failure sees you draining and filtering the resin from the vat, carefully removing any solid resin from the vat’s film and curing the failed parts so that they can be safely disposed of. All while suited up with gloves, eye protection, and at least a half-face mask with A1P2 filters that still leave you plenty of opportunity to consider whether SLA resin or IPA smells worse when the copious amounts involved of both try to overwhelm the filters.
Clean-Up Detail
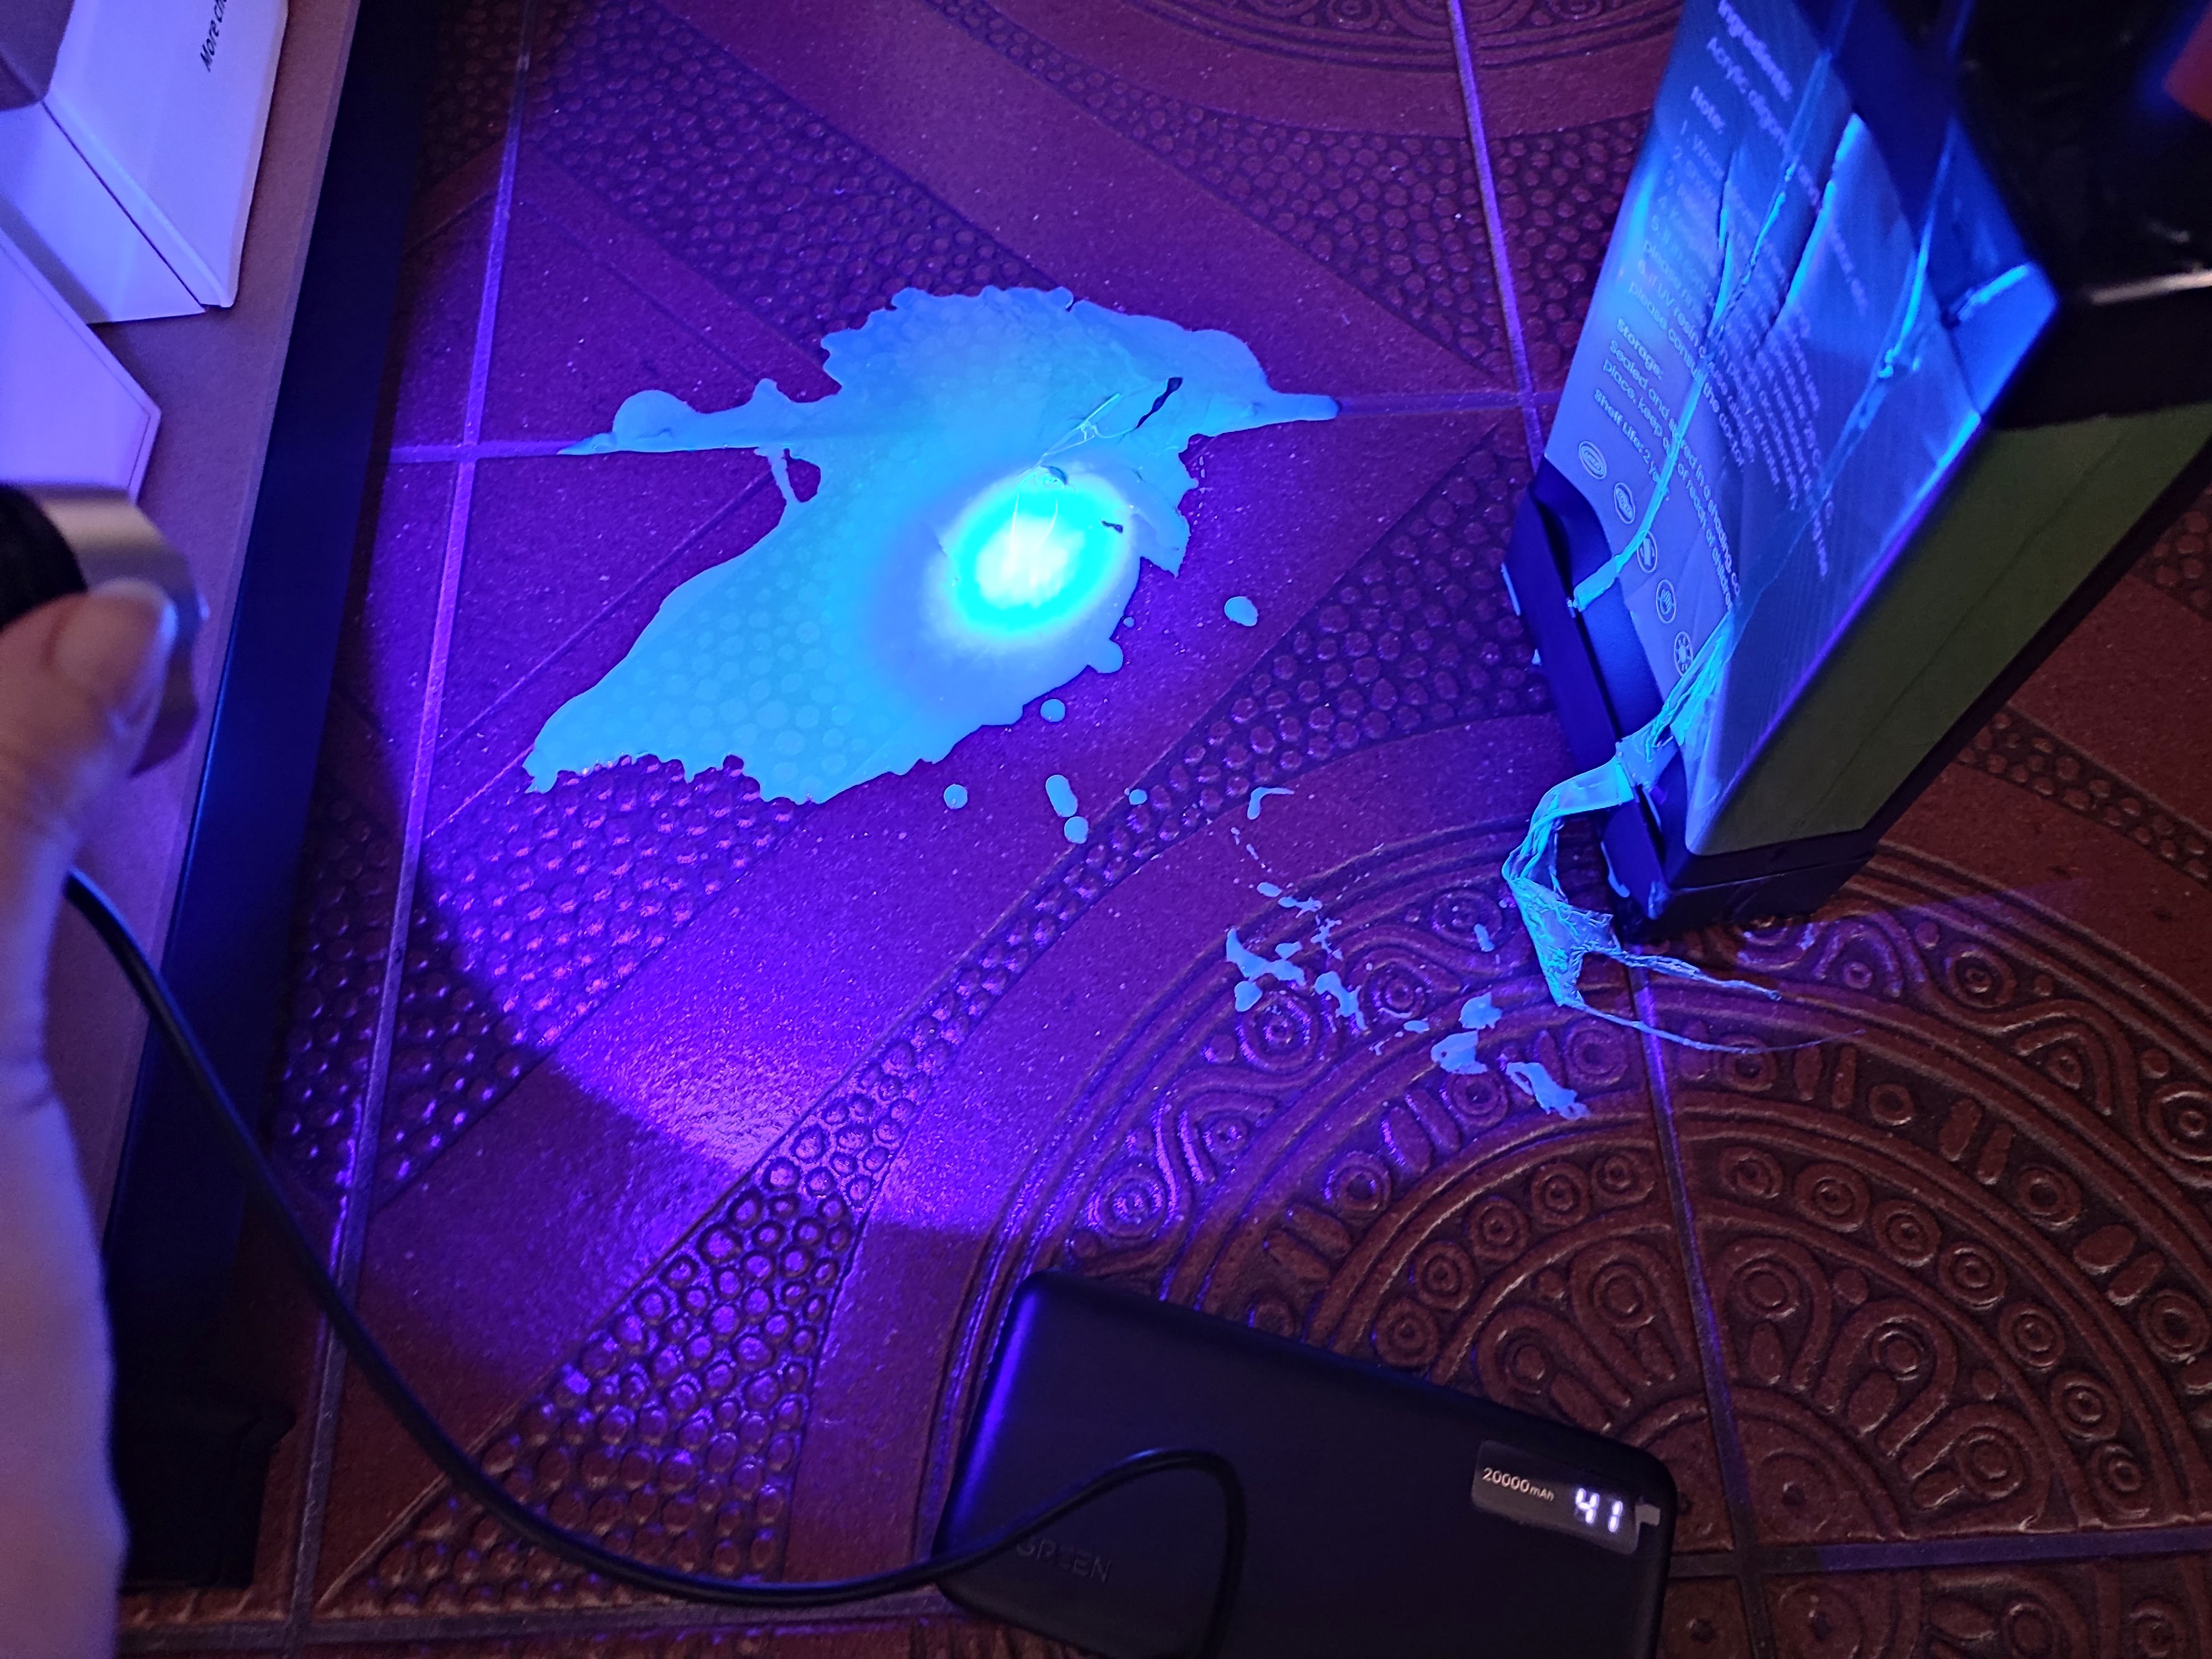
Where the whole kerfuffle got even worse was when the whole auto-feeding of the resin caught up with me. After ripping the bottle out of the machine I had noticed that the GK3 Ultra had for some reason pulled a vacuum inside the bottle, which could explain some of the issues that I had experienced. This did however also mean that its internal volume had decreased due to the bottle’s deformation.
This was a detail that didn’t quite register with me until resin that I was pouring through the filter into the bottle was overflowing onto the floor. Cue copious amounts of colorful cursing and a dash for the paper kitchen towels, followed by a rather illuminating UV exposure session using a handheld UV lamp. Fortunately cured resin doesn’t bond well to tile flooring, so it can be peeled off after curing and tossed into the regular household waste. The pro-tip here is to always use silicone underneath potential resin spills. If only I had done so.
With the floor clean once more, the next challenge was to get the vat cleaned up again. The provided silicone scraper was useful here, but you absolutely need that spray bottle with IPA to soften up the connection between the PFA film and the cured resin.
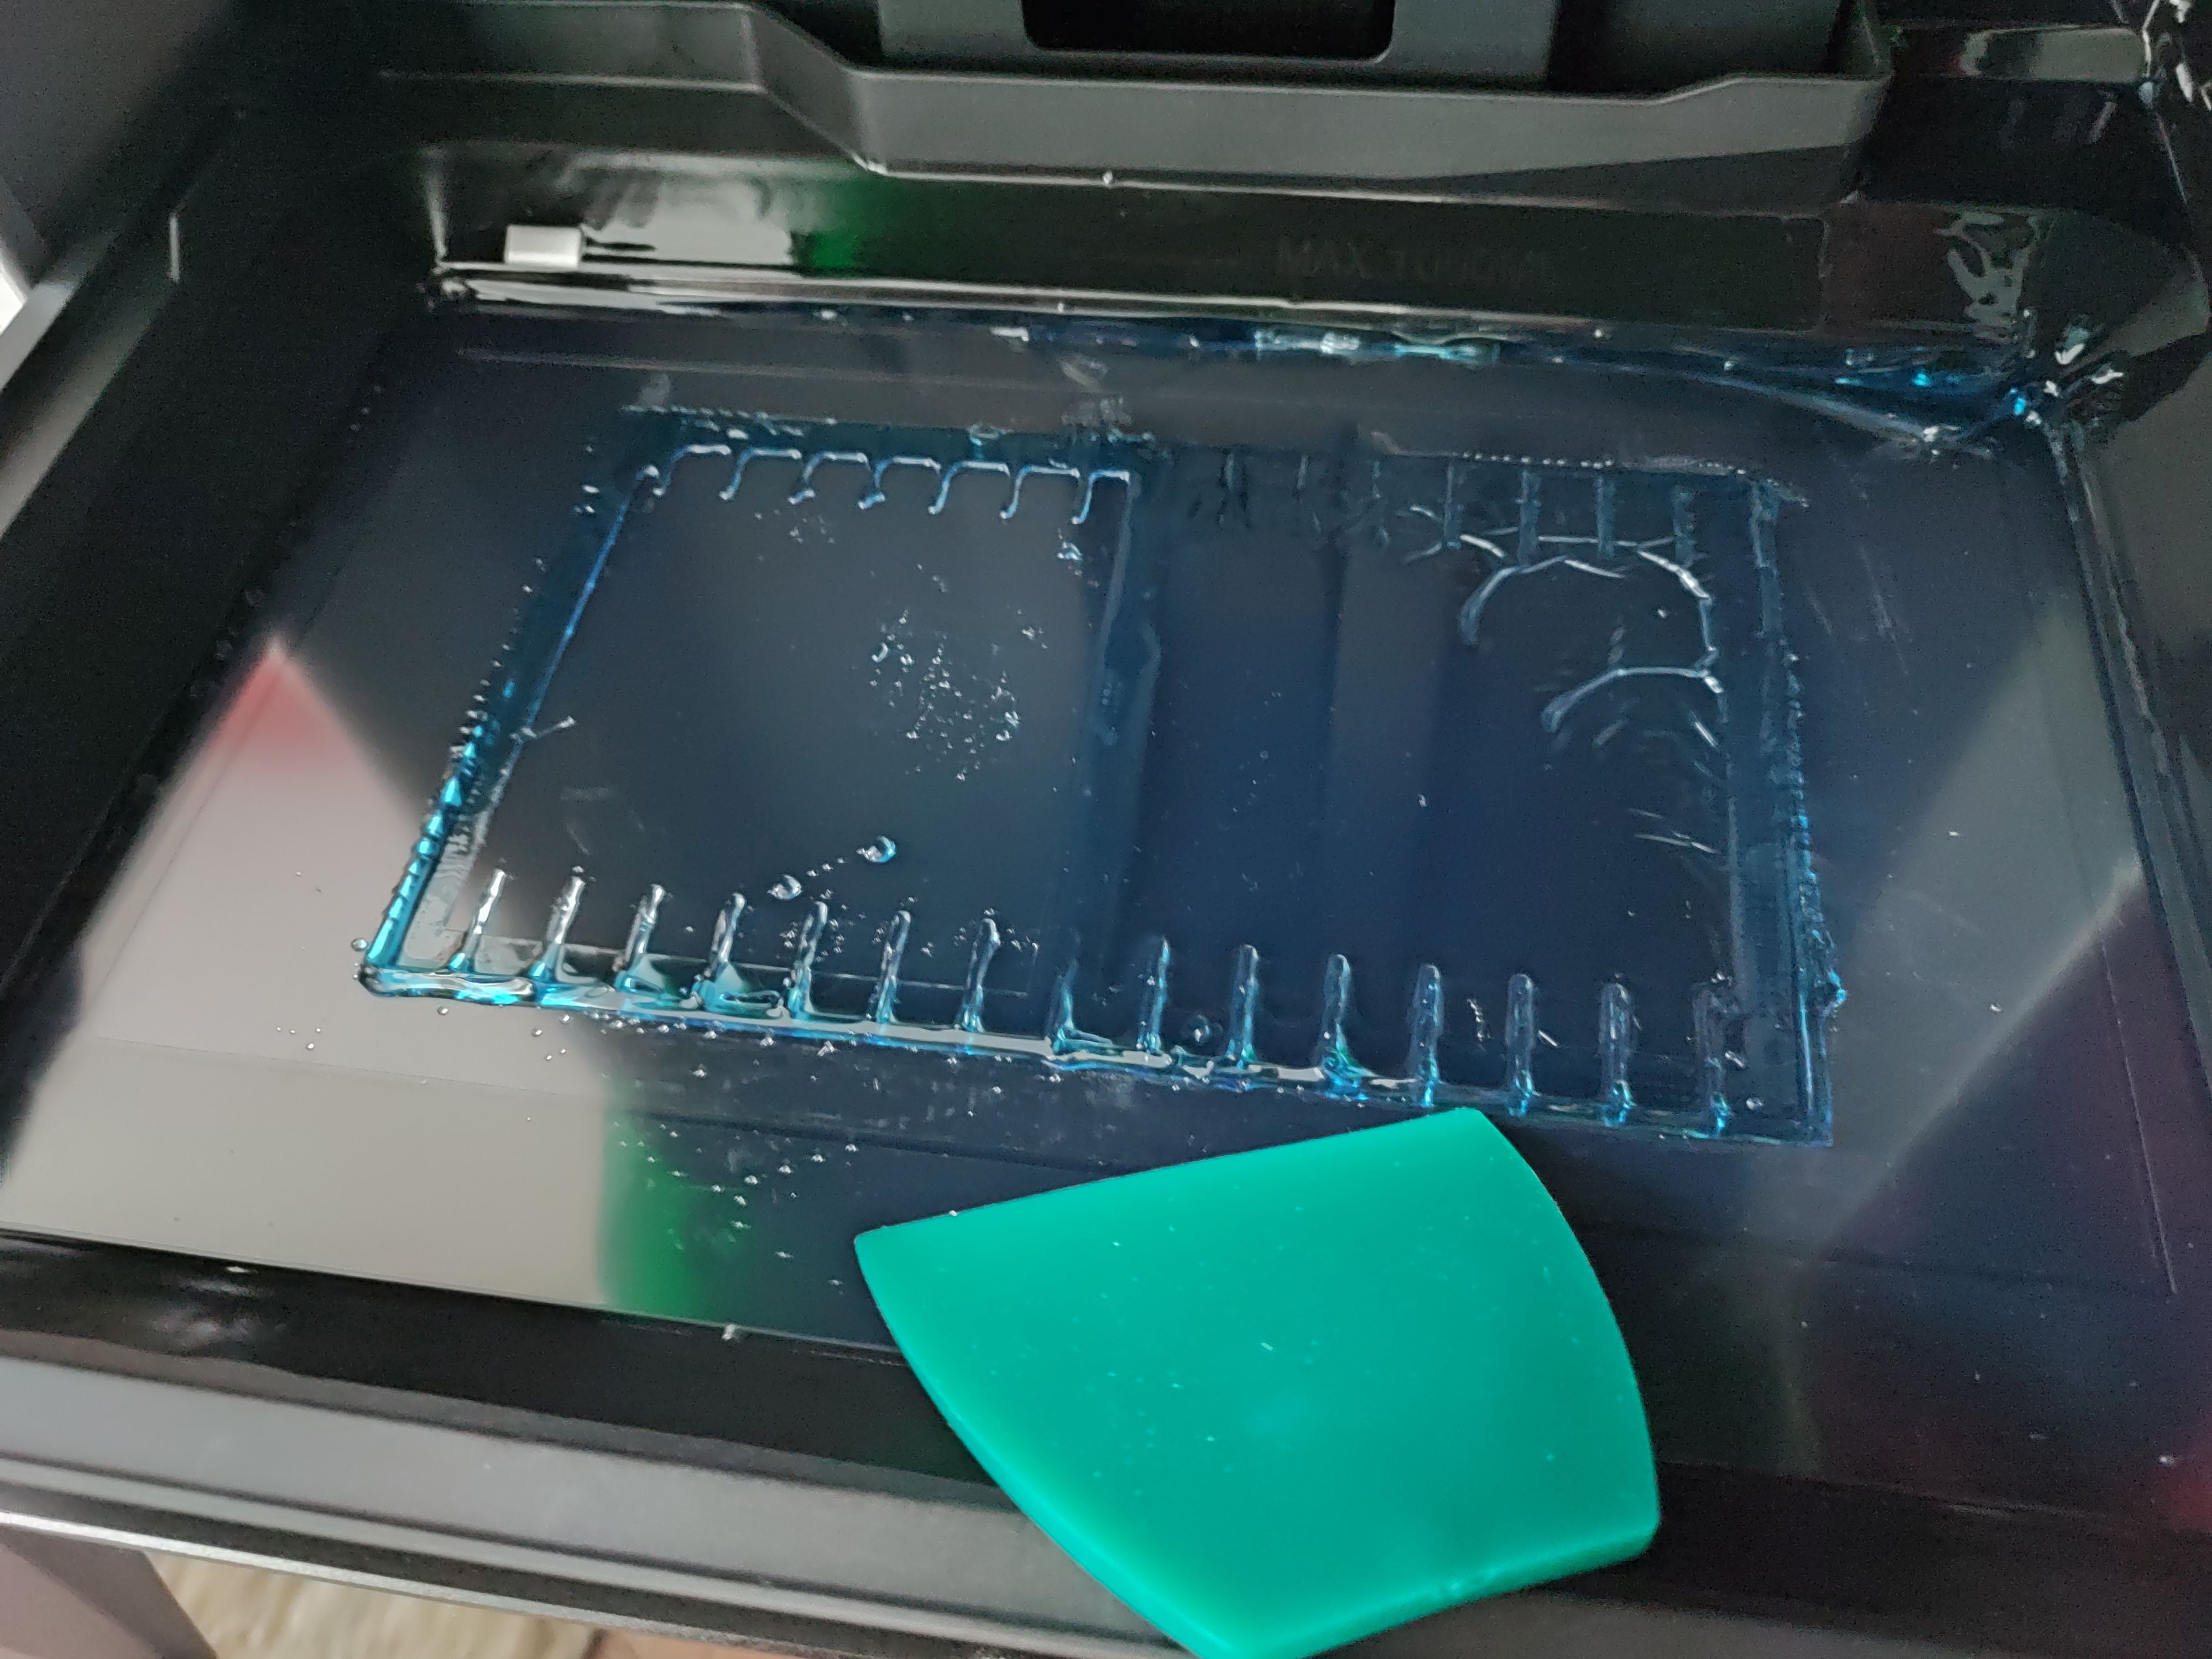
Using the built-in vat curing feature I could cure most of the remaining resin in the vat, but still had to use the handheld lamp to get to corners where it didn’t reach. This is the part that I’m still working on, making sure everything is clean and the PFA film undamaged before I throw myself again at another printing session.
Lessons Learned
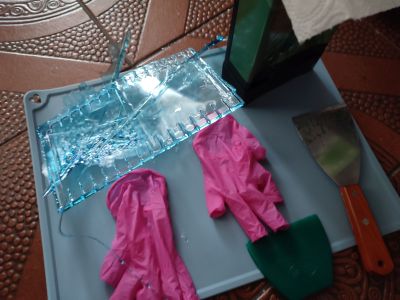
I think the primary lesson that I have learned here is that I still do not comprehend why consumer resin printers insist on having that solid lump of metal that they dare to call a ‘build plate’ — an immovable surface that you have to violently assault with a scraper after printing to make it release printed parts.
After mostly printing with the magnetically attached flex plate on the LD-002R – of course after adjusting its Z-height correspondingly – it still feels like time hasn’t moved at all here.
As a friend of mine remarked when I reported the print failure described in this article, it’s also rather astounding that there’s no simulation of peel forces in slicers to get some idea of whether your supports game is overkill or weak sauce. There are some resin printers that even try to reduce the peel forces by tilting the vat – such as the Prusa SL1S and Form 3 – and there are various ‘tricks’ to reduce the peeling forces, such as lubricating with silicone and PTFE oil, many of which I too have tried with the LD-002R with unclear results, but ultimately you just want to ‘science’ it, as the kids say.
Overall, a resin printing failure isn’t the end of the world, as long as you are mindful of a potential mismatch between the air volume in the target bottle and the resin volume in the vat you’re pouring from. Resin is only nasty until you blast it with UV, when it turns into relatively harmless plastic.
All of that said, I’m still torn on that CD rack model. Theoretically the GK3 Ultra has the build volume for it, surpassing the Neptune 4 in two directions, but it’s not easy to prepare a plate in such a way that the model isn’t ripped off its supports, is not disgraced by a massive elephant’s foot, or worst case the build plate wins and the FEP/PFA film loses the tug of war and rips.
Did I mention rips in the vat’s film? That’s another thing I experienced with the LD-002R back in the day. I was lucky that the resin spill was fairly contained, but I was puzzled for a while why the prints kept failing until I actually drained the vat.
Anyway, after all this learning, it’s time to reorganize and see what I can improve when I next hurl myself at this whole SLA resin printing topic.












I’ve heard there is patent encumbrance keeping SLA printer makers from including flex plates as stock, but if that’s true they should just cough up the dough, absolutely needs to be a standard feature. Anyway, I’m just glad to see more SLA content on here.
I can’t speak to how well it works (just learning myself) but I believe Chitubox has a setting to mitigate elephant foot.
The general pattern: flex/magnetic plates trade positional certainty for removal convenience. Manufacturers include them by default only where (a) positional certainty isn’t safety/quality-critical at the sub-layer level, and (b) the release-convenience win is large enough to be worth the QC variability — which is why they’ve become standard on consumer FDM (post-print convenience, forgiving tolerances) but stayed rare on both high-reliability FDM lines and virtually all resin printers.
sauce? Flex plate is a universally recommended upgrade in the SLA space from what I’ve seen, never heard anything about accuracy issues. If the magnet is strong enough to resist the peeling forces I see no reason why it would be shifting around. And could easily have it engage with some registration features if that were a concern.
silicone is your friend.
My machine sits on a silicone mat made for under the sink use that has a perimeter wall. The table it sits on has a large thin silicone mat that is used like a table cloth. And beneath a 40×60 silicone grill mat.
Any drips or spills, dont get wiped up. They get blasted with a handheld curing lamp and easily peel away from the silicone.
This struck me as overcomplicating cleanup, too. Just run the vat clean cycle, peel up the cured layer, any loose cured bits that have settled to the bottom will now be attached to it.
You could do that, yes, but as I noticed with the LD-002R before, sometimes debris doesn’t get caught and ends up ripping the FEP/PFA film. Saved some time only to end up with an even bigger mess.
There are indeed elephant-foot settings available in Lychee and Chitu. For prints that are better-suited to flat-on-plate printing vs. supported, it’s a much better option.
I’d recommend dialling it in for your machine/resin combo using small test prints, then commit them for the bigger ones.
Re: autosupports getting jank: they’re terrible. I’d counsel getting comfy with manual supports. Once in a Six Side has some useful tutorials (and advanced stuff) on YouTube to get prints consistent. I’d take his brand recommendations with a hefty grain of salt (particularly the purchased sponsorships by companies such as HeyGears), but the workflow content is solid
Thanks for the tips :)
Honestly I’d only use it for the extra detailed stuff…
it’s just so much work and if all you’re doing is printing basic geometric shapes then there isn’t much benefit to resin.
+1 for the flexible build plate. Works a treat.
Mine is stainless steel, I give it a good sanding with 220 grit before I put it back on the magnet. I did have to move my home sensor up a few mm to compensate on my Mars 2 Pro
Yeah, I’ll have to see what options exist for the GK3 Ultra here. For the LD-002R it was a fairly standard retrofit from a third-party and easy tweaking of the Z-offset. The GK3 Ultra prides itself on being auto-calibrated from the factory, so I’m slightly hesitant to crack open that can of calibration worms.
Plastic scrapers are tremendously helpful for freeing prints from both resin and fdm printer beds. They’re shaped like double-sided razor blades, but made of a rigid plastic. They don’t mar the resin print plate the way a metal scraper does!
I’ll have to give them a shake. Getting between the metal and the plastic is key, once you’re in there it tends to peel off quite easily, but doing it without gauging out chunks of build plate is always nice :)
I’d think flexible build plates come with a few risks it isn’t worth it without some really cunning engineering – the solid build plate is just simpler and reliable while putting the failures on your user ineptitude, as it is not the machines fault you printed the worlds greatest suction cup flat to the build plate with no features you can pry it off with!
As those peel forces are no joke when a large proportion of the surface area was cured this layer. So a plate that is deliberately designed to flex might well flex and release your parts early printing something like CD case rack with one of the more solid faces on the build plate. Then even if you get away with that well enough the user will never complain the prints are failing because the bed is rubbish the big selling point is precision printing, but heavy mass hanging off a flexible plate towards the end of a print could well cause it to bend creating layer shifts or distortion in the part!!
Then you have the layered nature of flex plates likely capturing and potentially cross-contaminating the next resin – so you have to figure out how to make drain and be cleanable.
Not saying even poorly engineered they are not a perfectly good solution for many folks that don’t print much surface area with each layer, rarely print much mass at once etc, but as the manufacturer would you want to fit a more complex and expensive (even if you make it shoddy) point of failure that will be getting your machine and company bad PR!
“OrcaSlicer deemed it necessary to add a brim, so that took some sanding to clean up a razor sharp edge.”
I see so many people leaving brims on EVERYTHING. 95% of the time you don’t need it. I never use one unless it’s a small part.
Long and rather thin parts with lots of layers like this probably do need them – the peeling forces from shrinking FDM layers that cause warped parts can’t be prevented entirely even with heated bed, chamber and filament loaded with fibres that tends to limit the warping as the layers cool. So a brim sticking it down to the bed better is valuable here for this part. Quite possible it is more valuable than on the small parts, as the majority of those already have enough surface area for their geometry so the brim is only really helpful if the print surface isn’t mapped with the probe or simply flat enough with a well calibrated printer to get universally great adhesion everywhere on the bed.
Ultimately given the length of time the prints take and the waste if it fails many layers in putting a brim on everything is the smarter option really – Not that I dissagree with you they are used more than required, but why take the risk you 2 day print will develop problems a brim could fix long enough after that first layer or two is down so you are not likely to notice (as who checks more than just the print started OK?!?!?).