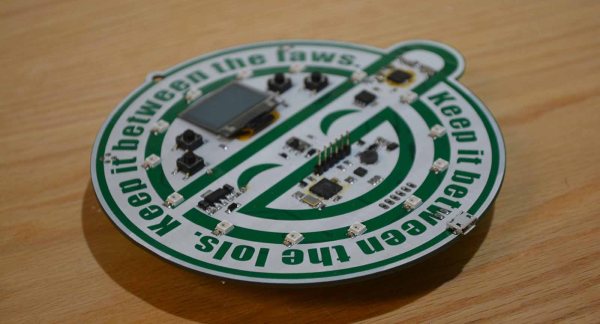
We were lucky enough to get our hands on a hand-soldered prototype of the new Hacker Warehouse badge, and boy is this one a treat. It’s fashionable, it’s blinky, and most impressively, it’s a very useful tool. This badge can replace the Google Authenticator two factor authentication app on your phone, and it’s a USB Rubber Ducky. It’s also a badge. Is this the year badges become useful? Check out the video below to find out more.
This is the time of year when hardware hackers from all across North America are busy working on the demoscene of hardware and manufacturing. This is badgelife, the celebration of manufacturing custom wearable electronics for one special weekend in Las Vegas. In just about a month from now, there will be thousands of independent badges flooding Caesar’s Palace in Vegas, complete with blinkies, custom chips, innovative manufacturing processes, and so many memes rendered in fiberglass and soldermask.
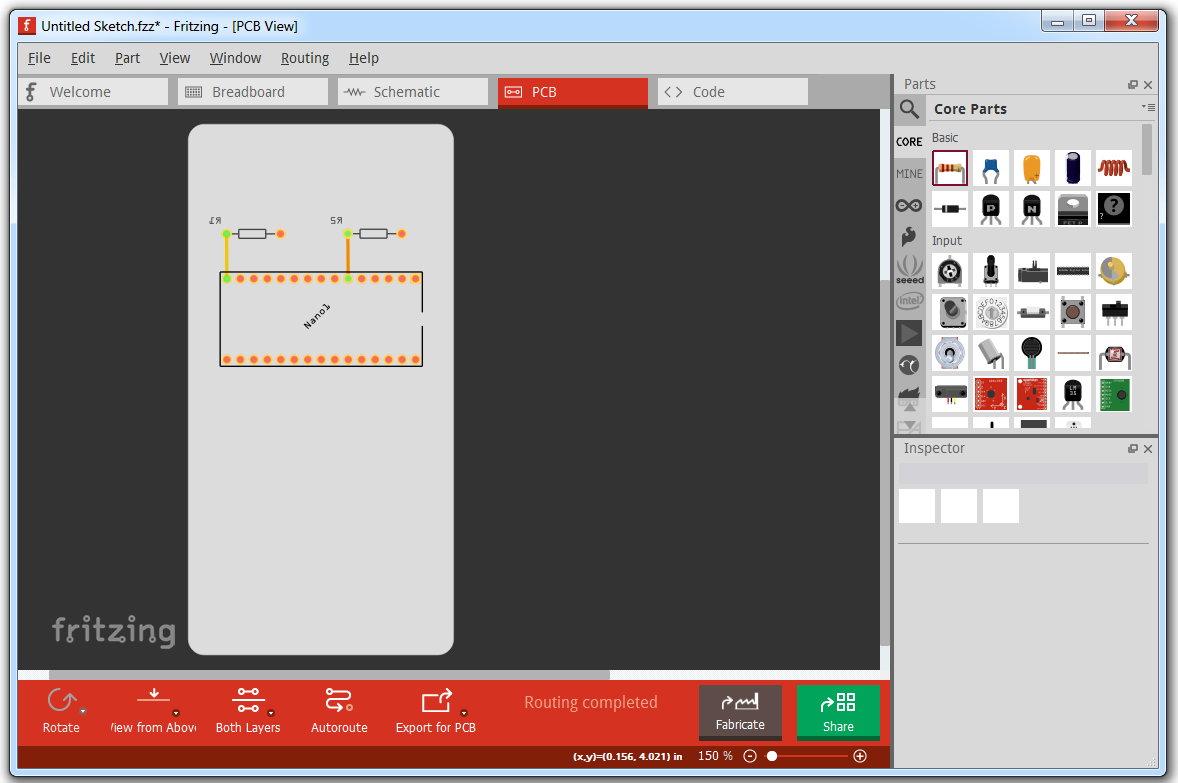
If you’re looking to get started in designing a few PCBs, you could use one of the many software packages that allow you to create a PCB quickly, easily, and with a minimum amount of fuss. You could also use Fritzing.
Fritzing is terribad and you shouldn’t use it, but that doesn’t mean you still can’t abuse Fritzing to make it do what you want. [Arduino Enigma] recently posted a tutorial on how to design custom PCB shapes for Fritzing. Yes, Fritzing is no longer limited to rectangular PCBs with sharp corners. You can make PCBs in any shape with Fritzing, provided you spend a few hours futzing about with Inkscape.
The goal for this project was to create a rectangular board without any sharp corners for [Arduino Enigma]’s Sinclair Scientific Calculator Emulator. Fritzing can make a board in the shape of a rectangle, in fact, that’s all it can do, but [Arduino Enigma] wanted a rectangle with radiused corners. After hours of work, we have the writeup on how to do it.
The imported board, with 3mm radiused corners.
The process to create a custom-shaped board, in this case, a rectangle with a 3mm radius on the corners, is simple. First, draw a rectangle of the desired shape, then draw even more rectangles as a sublayer of the current layer. Fritzing requires the layer ID to be named ‘board’, ‘silkscreen’ and ‘silkscreen0’, but this cannot be changed in Inkscape itself — you’ll need to edit the file with a text editor. After creating three layers, each containing the shape you want, simply trim the size of the page to the size of the board. Save the file, edit the file in a text editor, and click save. Launch Fritzing, load an image file, and select the SVG you’ve been working on. In just twenty or thirty quick steps, you too can import any shape you can imagine into Fritzing.
There is one pain point to this process. Editing the layer name manually with a text editor pushes this Fritzing hack from a baroque workaround into something that makes us all question the state of Open Source standards. Unfortunately, this is required because Inkscape does not use layer names as the ID in an SVG file. No, it doesn’t make sense, but that’s just the way it is.
For any other PCB design tool, creating a custom-shaped board is simply a matter of drawing a few lines. Fritzing is different, though. The top copper layer is represented as orange, and the bottom copper layer is yellow, a UI decision that doesn’t make sense, even if you aren’t colorblind. Putting more than two layers of copper on a Fritzing board is impossible. Fritzing is a tool you should avoid for PCB layout. That said, [Arduino Enigma] figured out how to do something in Fritzing that you’re not supposed to be able to do and that’s pretty cool.
Summer is here, and it’s time for the question on everyone’s mind: how are they going to get the fuselage of a 747 from the California desert to Burning Man? You can’t put it on a train, and it’s much wider than any truck.
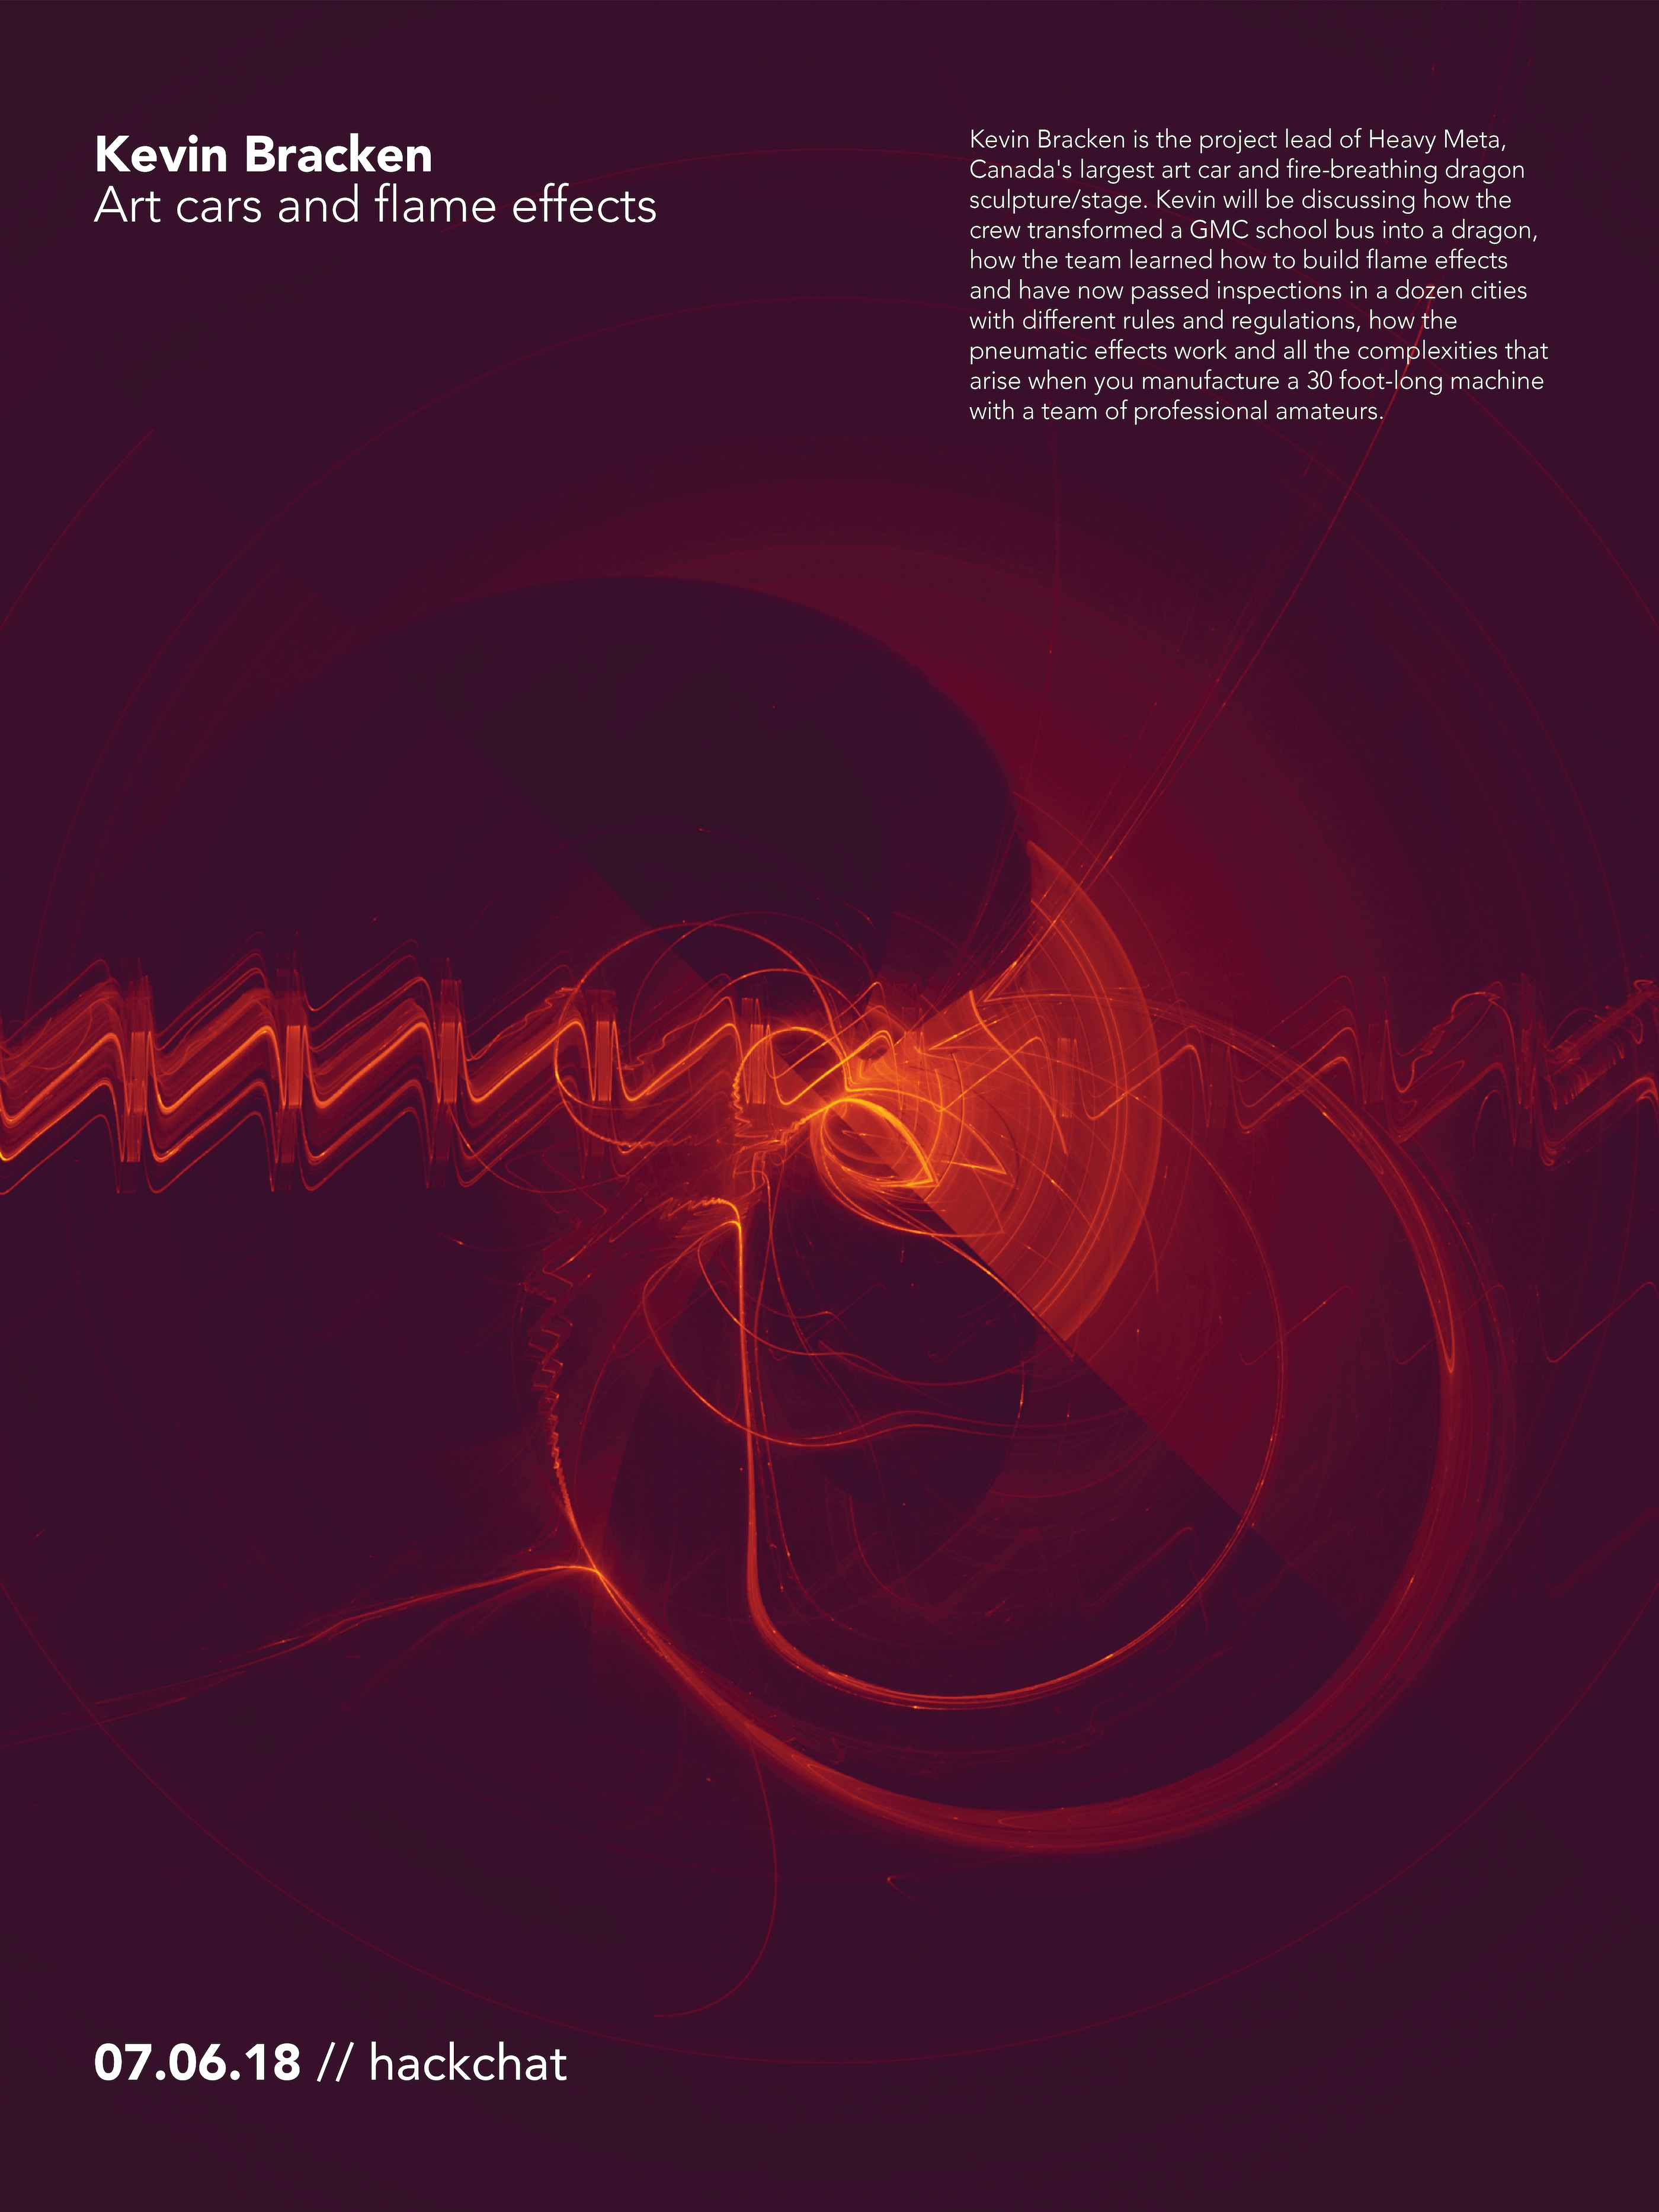
Our guest for this Hack Chat will be [Kevin Bracken], best known as the founder of International Pillow Fight Day, but now he’s the project lead fo Heavy Meta, Canada’s largest art car and fire-breathing dragon sculpture/stage. Heavy Meta is a 30-foot long mutant vehicle with flame effects and a 15,000 watt sound system. It’s also the 3tress, a 2,000 square foot workshop founded with the purpose of building this gigantic art car, and it’s the Toronto Art Car Community, a group of people tasked with manufacturing gigantic lumbering behemoths.
Kevin will be discussing how the Heavy Meta crew transformed a GMC school bus into a dragon, how the team learned to build flame effects, how the pneumatics work, and what it’s like to be on tour with half a dozen Maker Faires.
During this Hack Chat, we’ll be talking about:
What an art car is
How do you make the electronics
What precautions do you take to keep it working on the road
How do you control flame effects
What are the legal and regulatory considerations of art cars
You are, of course, encouraged to add your own questions to the discussion. You can do that by leaving a comment on the Hack Chat Event Page and we’ll put that in the queue for the Hack Chat discussion.
Mere weeks ago, the United States announced it was set to impose a 25% tariff on over 800 categories of Chinese goods. These tariffs include nearly every component that goes into the manufacture of any piece of electronic hardware, from resistors to capacitors, semiconductors to microcontrollers, and even the raw components that are turned into printed circuit boards. These tariffs will increase the cost of materials for electronics, even if those electronics are ultimately manufactured in the United States because suppliers and subcontractors must source their materials from somewhere, and more often than not, that place is China.
In the world of musical synthesizers, there is no bigger name than Moog. The company was founded in the 1950s manufacturing theremins, and in the 1960s, production moved to synthesizers. The famous Minimoog, launched in 1970, has been featured on tens of thousands of albums. Modern music simply wouldn’t exist without Moog synthesizers. After a buyout, mismanagement, and bankruptcy in the 1980s, the company was reborn in the early 2000s, moved into a beautiful factory in Asheville, North Carolina, and has gone on to produce some of the most popular synthesizers ever made.
The company’s statement says these new tariffs will, ‘immediately and drastically increase the cost of building our instruments, and have the very real potential of forcing us to lay off workers and could.. require us to move some, if not all, of our manufacturing overseas’. In a statement on Twitter, Moog says they source half their PCBs and a majority of other materials domestically, already paying up to 30% more than if the PCBs were sourced from China. However, because the raw materials for PCB manufacture are also sourced from China, board manufacturers for Moog’s synths will be forced to pass along the 25% tariff to their customers.
The threat of Moog being forced to move production of their instruments to China is real. Like cell phones, laptops, and other finished goods, synthesizers are not covered by the new tariff. As noted by Bunnie Huang, these tariffs have the perverse incentive of shifting US manufacturing jobs to China.
These tariffs have been a point of contention for the electronics and engineering communities. Anyone can easily pull up the distributor information from a Mouser or Digikey order and find the country of origin for an entire Bill of Materials. It has already been confirmed that most of the FR4 and other raw components that go into manufacturing PCBs in the United States come from Chinese suppliers. These items can be cross-referenced with the list of items that will be subject to a 25% tariff next week. Manufacturing electronics in the United States, even if you get your PCBs from US manufacturers and parts from US suppliers, will cost more in just a few short days.
Remember when computer mice didn’t have scroll wheels? The greatest mouse of all time, the Microsoft Intellimouse Explorer 3.0, is back in production. This mouse was released in 2003, before the popularity of ‘gaming’ mice from the likes of Razer, and at the time it was the standard mouse for RTS and FPS professional gamers. After producing a few million of these mice, the molds died or the sensors were out of stock, Microsoft stopped shipping the Intellimouse Explorer 3.0, and the ones that were out in the wild slowly died. Now this fantastic mouse is back, and it’s only going to set you back $40. Believe me when I say this is one of the greatest user interface devices ever created, right up there with the Model M keyboard.
The Pebble was one of the most successful crowdfunding campaigns ever, and now it’s dead. Pebble was bought by Fitbit for $40M, and now the Pebble servers are off, as of June 30th. Of course there are community-based projects to keep the Pebble working, notably the rebble project.
It’s time for Steam’s summer sale, and your wallet is crying. The standout deal is the Steam Link, a sort of ‘thin client for Steam’ that plugs into your TV, looks on the network for your battlestation, and allows you to play Fortnite or whatever on the big screen. The Steam Link normally sells for $50, but with the summer sale it’s two dollars and fifty cents.
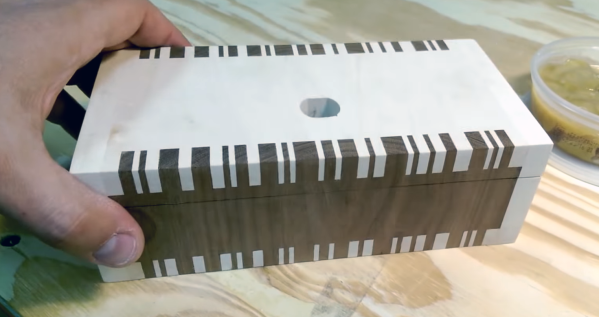
Here are a few experiments in CNC joinery. [Mirock] has a CNC machine and a few pieces of wood, and explored what is possible when you want to join two boards at ninety degrees to each other. Why is this interesting? One of the joints on this simple box project consists of a circle with a hole on one board, and a pin on the other. This is basically a Knapp joint, a ‘dovetail’ of sorts that was developed in the 1860s. This was the first popular machine-made joint in woodworking, and if you ever see it on an antique, it solidly dates that piece to any time between 1870-1900. Of course, now that you can just buy a CNC router, an infinite variety of joints are possible, and [Mirock] can experiment with all sorts of combinations of pins and tails and mortises and tenons.
Woodworking is the fine art of turning dead tree carcasses into precision instruments. That means breaking out the saws and chisels and making many, many precise cuts over and over. If you have a table saw, every problem becomes a piece of wood, or something like that, and we’ve seen some fantastic jigs that make these precision cuts even easier. We’ve never seen something like this, though. It’s a box joint jig for a table saw, it’s automated, and it puts barcodes on boxes.
[Ben] built this box joint jig a few years ago as a computer-controlled device that slowly advances a piece of wood on a sled, allowing him to create precise, programmable box joints. The design is heavily influenced from [Matthias Wandel]’s screw advance box joint jig, but instead of wood gears (heh), [Ben] is using the Internet of Things. Or a Raspberry Pi, stepper motor, and a few LEDs. Same difference.
Although [Ben]’s previous box joints were all the same size, a programmable box joint jig can do some weird-looking joints. That’s where [Ben] got the idea to encode a barcode in walnut. After using a web app to create a barcode that encodes the number 255 — this is important for later — [Ben] programmed his jig to cut a few slots.
The box was finished as you would expect, but there’s a neat addition to the top. It’s a combination lock that opens when the combination is set to 255. It’s brilliant, and something that could be done with some handsaws and chisels, but this jig makes it so easy it’s hard to think the jig wasn’t explicitly designed for this project.
This year’s hottest new advance in electronics comes through wearable badges. You can’t have failed to notice another technology that’s getting really hot. It’s the blockchain. What is a blockchain? It’s a linked list where every item in the list contains a cryptographic hash of the previous item in the list. What is a blockchain in English? It’s the most revolutionary technology that’s going to solve every problem on the planet, somehow. It’s the basis for crypto (no not that one, the other one). The blockchain is how you add more Lamborghinis to your Lamborghini account. Even though we’re still trying to figure out how it solves a single problem, one thing is certain: blockchains solve every problem. We were born too late to explore the Earth, born too early to explore the Universe, but just in time for blockchain.
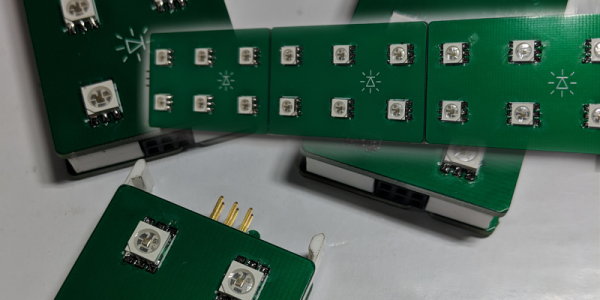
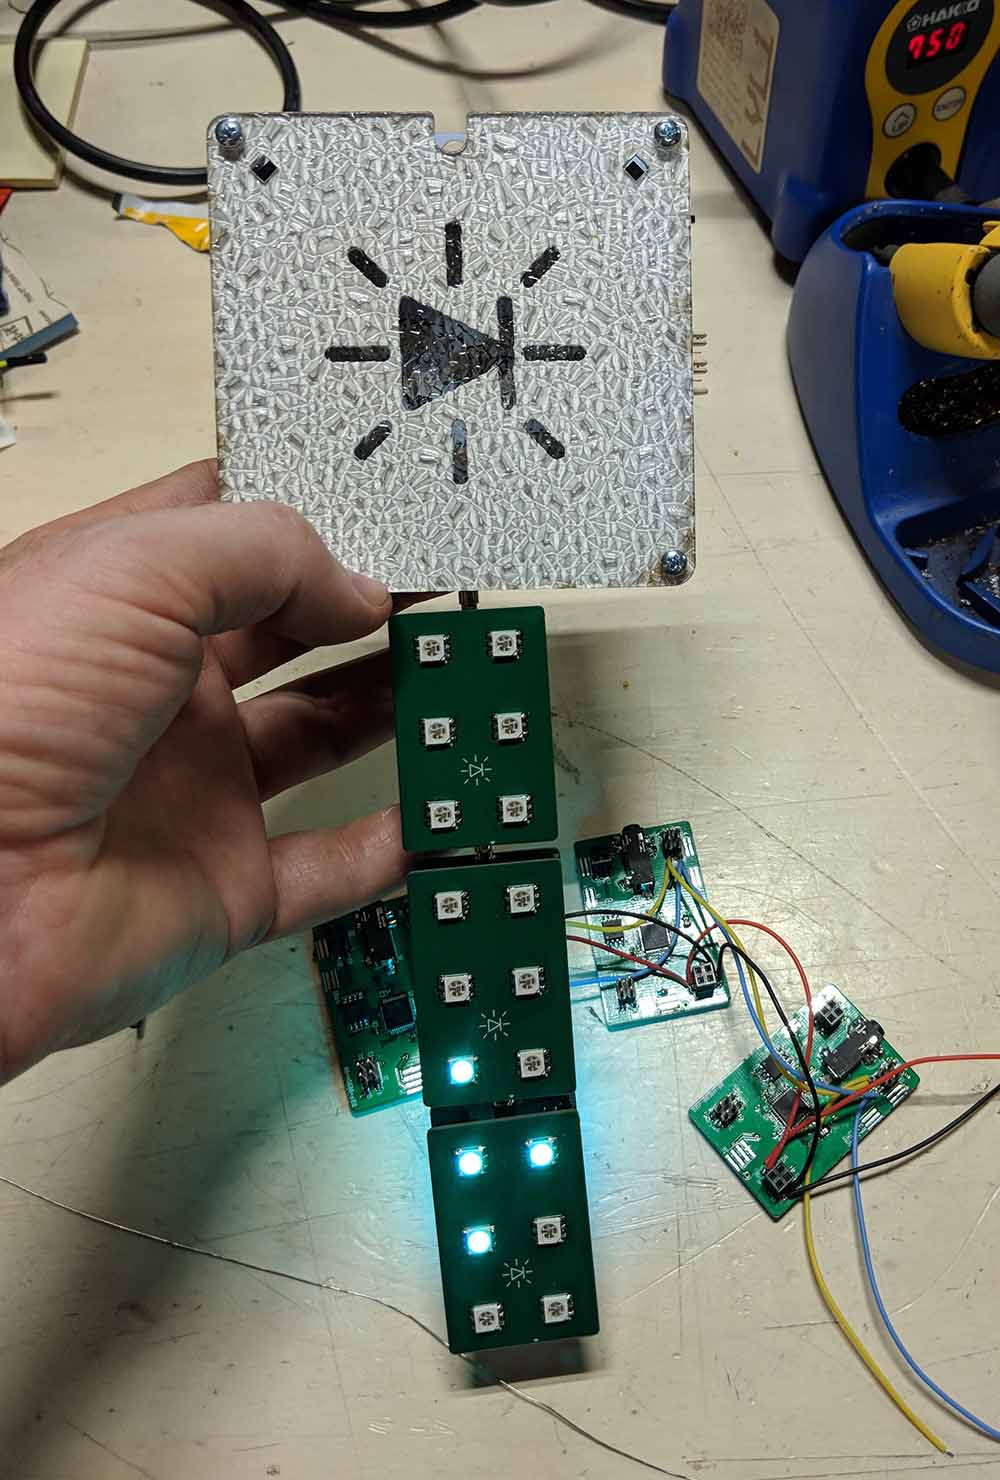
Independent badges are always looking at the latest technology, and perhaps this was inevitable. It’s a badge built on the blockchain. It’s a wearable sneakernet of mining. It’s a game with collaborative proof of work.
The blockchain badge from [Mr Blinky Bling] is an independent badge for this year’s Defcon, and like most independent badges it’s loaded up with RGB LEDs, microcontrollers, and exquisitely crafted FR4. What makes this badge different is the add-ons, or ‘blocks’ that attach to the main badge through 1/8″ phono jacks. These blocks form the basis of the social game, where two badge holders trade blocks for a while, allow their badges to perform a proof of work on each block, and finally, each block is hashed and the score increased. Yes, this is a blockchain, but it’s more of a block-tree, and it runs on sneakernet instead of the Internet.
Yes, this does indeed all sound like a joke. Make no mistake, though: this is real. This is a hardware game built on blockchain technology, that some lucky badge holders will be playing at this year’s Defcon. It’s filled with blinky and blockchain. It’s awesome.
[Mr. Blinky Bling] has already started a project for this badge over on hackaday.io, and right now they’re running a Kickstarter campaign for this badge with delivery at Defcon. This is one of the more interesting badges that will be floating around the con this year, and it has blockchain. This really isn’t one to miss.