Open Compute Project Hosts Hackathon

OCP Summit

The folks at Open Compute Project are running their annual summit in January, but this year they’ll be adding a hardware hackathon to the program. The hackathon’s goal is to build open source hardware that can be applied to data centers to increase efficiency and reduce costs.

The Open Compute Project (OCP) is a foundation that develops open hardware for data centers. This includes power supplies, motherboards, and storage disk arrays. The project started up at Facebook, but it’s now an independent foundation.

The hackathon will take place over the two day summit on January 16th and 17th, 2013 in Santa Clara. The registration is now open, and it’s free but limited to the first 100 people.

The hackathon is being put on with collaboration from Upverter, Github, and GrabCAD, who will be providing tools for the event. If you’re in the Santa Clara area and looking to do some hacking early in the new year, you might want to check this out.

Morse Code Transceiver Based On Gameboy Color Camera

Morse Code IR Transceivers

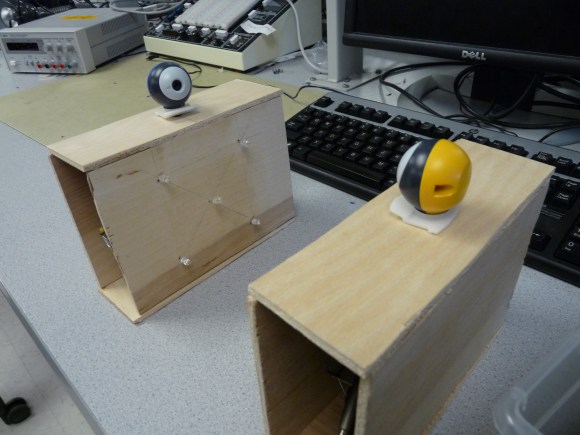
For their final project in a microcontrollers course, [Trudy] and [Josh] designed a pair of morse code transceivers. To send the message, they used an array of IR LEDs. The message is received using a Gameboy Color Camera, which takes care of basic image processing. This allows a 8-bit ATMega1284p microcontroller to handle transmitting and receiving messages.

The transmission LEDs form a square pattern with one LED in the center. The four outside LEDs are used to help the receiver locate the center LED, and the center LED is used for transmitting the message.

The Gameboy Color Camera is based on a M64282FP image sensor. This sensor uses an SPI-like protocol, which they implemented on the ATMega. It allows them to grab frames from the camera, and get the value of specific pixels. From this data they find the center LED and process the message.

The result can transmit messages of 200 letters at a time, but the speed is limited by the frame rate of the camera. If you have a Gameboy Color Camera lying around, their detailed write up might provide some inspiration and information on how to use it in a hack.

The Burrito Bomber

Burrito Bomber

The Burrito Bomber, created by the folks at Darwin Aerospace, claims to be “the world’s first Mexican food delivery system.” The delivery process starts with the customer placing an order through the Flask based Burrito Bomber webapp. The customer’s location is grabbed from their smartphone using the HTML5 Geolocation API and used to generate a waypoint file for the drone. Next, the order is placed into a delivery tube, loaded onto the drone, and the waypoint file is uploaded to the drone. Finally, the drone flies to your location and drops the delivery tube. A parachute deploys to safely deliver the tasty payload.

The drone is based on a Skywalker X-8 airframe and the Quantum RTR Bomb System. The bomb system provides the basic mechanism to hold and drop a payload, but Darwin Airspace designed their own 3D printed parts for the delivery tube. These parts are available on Thingiverse. The drone is controlled autonomously by ArduPilot, which uses the webapp’s waypoint output to guide the drone to the target and release the payload.

Unfortunately, this can’t be a commercial product yet due to FAA regulations, but the FAA is required to figure out commercial drone regulations by 2015. Hopefully in 2015 we’ll all be able to order burritos by air.

For all the source and models, check out the group’s Github. There’s also a video of the bomber in action after the break.

Continue reading “The Burrito Bomber”

USB NeXT Keyboard

USB NeXT Keyboard

[Ladyada] and [pt] had an old keyboard from NeXT, but since it used a custom protocol it wasn’t usable with modern hardware. So they built a custom device to convert the NeXT protocol to USB.

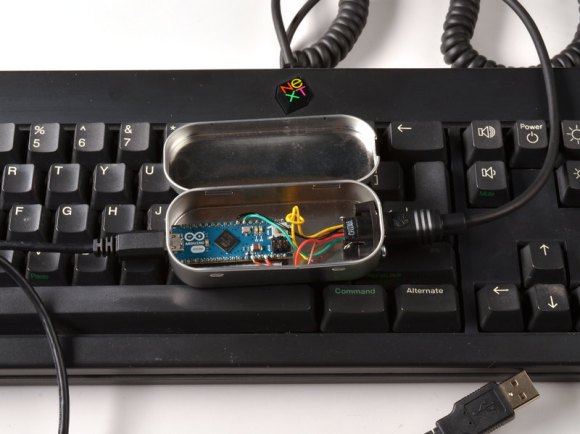
The device uses a Arduino Micro to read data from the keyboard and communicate as a HID device over USB. It connects to the keyboard using the original mini-DIN connector, and is housed in the classic Altoids tin enclosure.

Since the protocol used by NeXT isn’t standard, they had to figure it out and write some code to interpret it. The keyboard communicates bidirectionally with the computer, so they needed to send the correct frames to key data back.

Fortunately, they hit on a Japanese keyboard enthusiast’s site, which had protocol specifications. They implemented this protocol on the Micro, and used the Keyboard library to create a HID device.

The final product is an adapter for NeXT to USB, which allows for the old keyboards to be used on any computer with USB. It’s a good way to bring back life to some otherwise unusable antique hardware.

160 Mac Minis, One Rack

Mac Rack

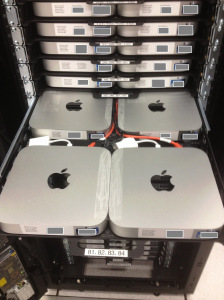
[Steve] needed an alternative to the Xserve, since Apple stopped making it. His solution was to stick 160 Mac Minis into a rack. That’s 640 real cores, or 1280 if you count HyperThreading.

First, Steve had to tackle the shelving. Nobody made a 1U shelf to hold four Minis, so [Steve] worked with a vendor to design his own. Once challenge of this was managing the exaust air of each Mini. Plastic inserts were designed to ensure that exaust wasn’t sucked into the intake of an adjancent Mini.

mac-miniAn array of 160 computers is going to throw a lot of heat. To provide sufficient airflow, [Steve] built a custom cooling door out of four car radiators fans, connected to a 40A DC motor controller. This was all integrated into the door of the rack.
Another challenge was getting power to all of the Minis. Since this deisgn was for a data center, the Minis would have to draw power from a Power Distribution Unit (PDU). This would have required a lot of PDUs, and a lot of cables. The solution: a one to four Y cable for the Minis. This allows each shelf of four to plug into a single outlet.

The final result is a professional looking rack that can replace a rack of Xserves, and has capacity to be upgraded in the future.

More Fun With Syma 107 Reverse Engineering

Syma Reverse Engineering

[Jim] used a logic analyzer to do some in depth analysis of the Syma 107G helicopter’s IR protocol. We’ve seen work to reverse engineer this protocol in the past, but [Jim] has improved upon it.

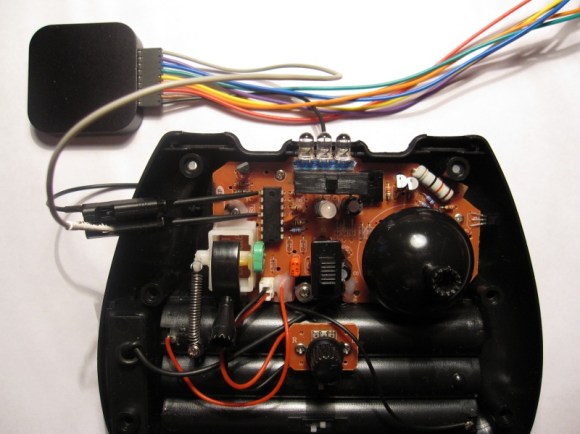
Instead of reading the IR output of the controller, [Jim] connected a Saleae Logic directly to the controller’s circuitry. This allowed him to get more accurate timing, which helped him find out some new things about the protocol. He used this to create a detailed explanation of the protocol.

One of the major findings is that the controller used a 3 byte control packet, which contradicts past reverse engineering of the device. There’s also a new explanation of how multiple channels work. This allows multiple helicopters to be flown without the controllers interfering.

The write up is quite detailed, and explains the reverse engineering process. It also provides great information for anyone wanting to hack one of these low cost helicopters. From the details [Jim] worked out, it would be fairly easy to implement the protocol on your own hardware.

LED Pocket Watch

LED Pocket Watch

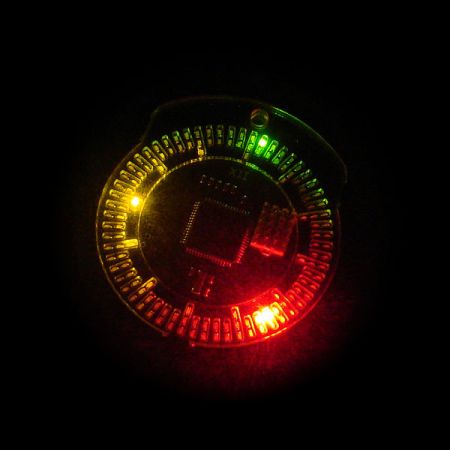
[Frank] wanted a classy way of telling the time, so he built up a LED Pocket Watch. The watch features 132 LEDs for displaying the time, two buttons to activate and change modes, a vibration motor, and a buzzer.

It’s controlled by a picoPower ATmega645P, which has enough pins to drive the array of LEDs, an internal real time clock, and low power consumption. The device is housed behind laser cut acrylic face, and sits in a 3D printed case.

To power the device, [Frank] used a rechargeable lithium coin cell battery. The charging circuitry is based on a MCP73831, which is an easy to integrate charge control IC. A USB connector is used to provide power to the board.

One of the bigger challenges of the design is driving the large array of LEDs. [Frank] uses Charlieplexing to group the LEDs and reduce the number of pins required. Another trick he used was offsetting the ISP header pins. This allows for programming the AVR without soldering a connector to the board.

[Frank]’s Instructables write-up is very detailed, and includes explanations of the schematic, PCB layout, software design, and case design. It’s a good read that details his design decisions.

After the break, watch [Frank]’s video overview of the project.

Continue reading “LED Pocket Watch”