PCB Manicure Wields Laser Cutter For Your Nails

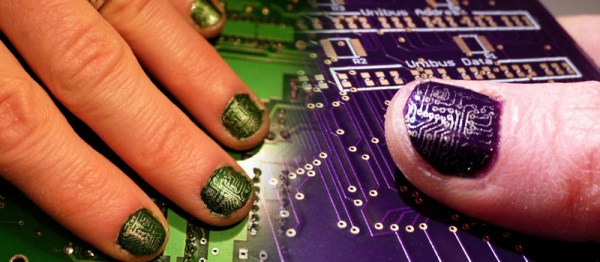
Wearable electronics is a hot topic these days. Although these fancy talons are only for show, they could lead to more in the future.

[Shelby] and [Colleen AF] showed people how to include a laser cutter in your nail care at a recent event at NYC Resistor. The technique used here starts off with a base coat of the background color before heading to the laser cutter. Now don’t worry, you don’t need to risk any of your digits. A type of reverse silk screen is made with the laser by deeply etching the artwork into a piece of flat acrylic sheet. Those voids are then filled with the secondary color for the circuit traces and the excess is removed with a squeegee. A sponge is then used to transfer the paint from the recesses in the acrylic to the nails.

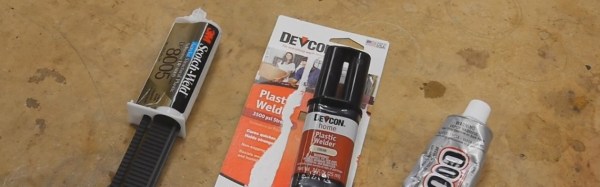
Granted, PCB finger nails might not be your cup of tea, but it does make us wonder: What if conductive ink was used? Would it be possible to build a circuit on your own fingernail? Obviously you would want to use a sticky, conductive glue rather than solder. (Please don’t try to reflow solder your fingers at home.) What kind of power supply would fit? What could you build? We also see other possible applications of the process like labeling non-flat surfaces. Let us know what you think in the comments below.

UPDATE: [David Flint] points out in the comments that this is a type of offset gravure printing.

How To Zip, Stick, And Screw Stuff Together

One of the first problems every new hacker/maker must solve is this: What’s the best way to attach part “A” to part “B”. We all have our go-to solutions. Hot glue, duck tape ( “duct tape” if you prefer) or maybe even zip ties. Super glue, epoxy, and if we’re feeling extra MacGyver-ish then it’s time for some bubble gum. For some Hackaday readers, this stuff will seem like old hat, but for a beginner it can be a source of much frustration. Even well versed hackers might pick up a few handy tips and tricks presented in this video after the break.

In part one of this series, [Ben Krasnow] shows us the proper use of just a few of the tools and techniques he uses in his shop. [Ben] starts out with a zip-tie tool which he loves in part because of a tension setting that ensures it’s tight but not overly. He moves on to advice for adhesive-vs-material and some tips on using threaded fasteners in several different circumstances. He also included a list of the parts and tools he uses so you don’t have to go hunting them down.

[Ben] is no stranger to us here at Hackaday. He does some epic science video. You can subscribe to his channel or follow his blog if you enjoy what you see.

Continue reading “How To Zip, Stick, And Screw Stuff Together”

Ball Balancing Robot Uses New TOF Sensor

By now, you’ve most likely have seen or even played with an ultrasonic distance sensor. They work by emitting a sound, and then listening for the “ping” to return. The sensor can then tell how far an object is away by calculating the time in between. With sound waves traveling at 343.2 meters per second (768 mph), it’s no small task to measure the short time it takes for the sound to be emitted, then hit something a few feet away, and return. Now, imagine trying to do that with light.

Light in comparison moves at a whopping 299,792,458 meters per second (or about 671 million miles per hour). You’re going to have to have a pretty fast finger on a stopwatch to measure the time it takes for light to bounce back from an object a few inches away.

[Paul Bristow] is doing just that with the use of a new Time of Flight (ToF) sensor called the TeraRanger One. Developed in cooperation with CERN, this sensor uses a very narrow beam of light (listed as +/- 2 degrees) to accurately measure the position of an object to a resolution of 5mm, with distances up to 14 meters away. It boasts an impressive update rate of >1000 samples a second, and is very micro-controller friendly with UART, I2C, SPI, and PWM output.

[Paul] and his fellow hackers at the Post Tenebras Lab Hackerspace in Geneva got their hands on this sensor, and in a short time had a ball balancing robot up and running. The crude program is not running a PID controller, so the results seen in the video after the break aren’t that impressive. Also, the sensor isn’t exactly cheap at about $180 USD. Despite that, it will be interesting to see what applications these sensors will be used for. If you have any ideas, leave them in the comments below.

Continue reading “Ball Balancing Robot Uses New TOF Sensor”