How would you go about determining absolute zero? Intuitively, it seems like you’d need some complicated physics setup with lasers and maybe some liquid helium. But as it turns out, all you need is some simple lab glassware and a heat gun. And a laser, of course.
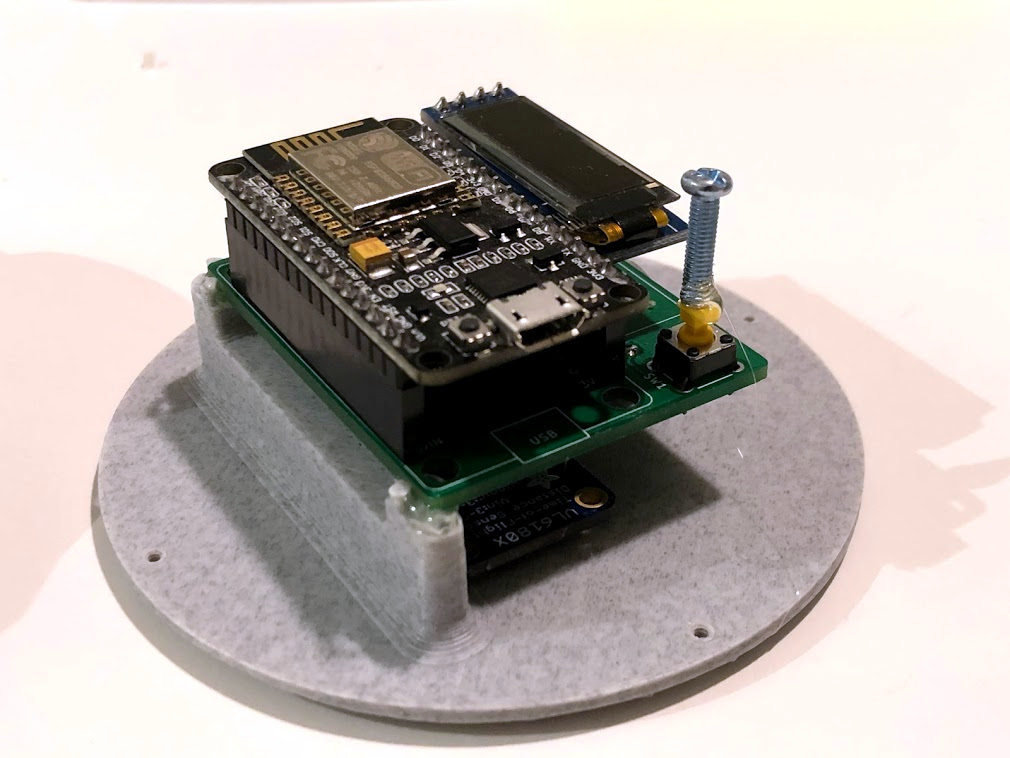
To be clear, the method that [Markus Bindhammer] describes in the video below is only an estimation of absolute zero via Charles’s Law, which describes how gases expand when heated. To gather the needed data, [Marb] used a 50-ml glass syringe mounted horizontally on a stand and fitted with a thermocouple. Across from the plunger of the syringe he placed a VL6180 laser time-of-flight sensor, to measure the displacement of the plunger as the air within it expands.
Data from the TOF sensor and the thermocouple were recorded by a microcontroller as the air inside the syringe was gently heated. Plotting the volume of the gas versus the temperature results shows a nicely linear relationship, and the linear regression can be used to calculate the temperature at which the volume of the gas would be zero. The result: -268.82°C, or only about four degrees off from the accepted value of -273.15°. Not too shabby.
[Marb] has been on a tear lately with science projects like these; check out his open-source blood glucose measurement method or his all-in-one electrochemistry lab.