Physical media has a certain amount of durability associated with it, a quality which is naturally determined by the way that they’re stored. Generally this does not involve being abandoned on the porch of a dilapidated, abandoned house where the elements and any passing critter can have their way with it.
Exactly how playable would these VHS tapes and CDs still be? Whether it was out of a sense of burning curiosity, or for a similar reason that [Brady Brandwood] has a habit of adopting former seafood critters like lobsters as adorable pets, these items got recently collected and put to the test.
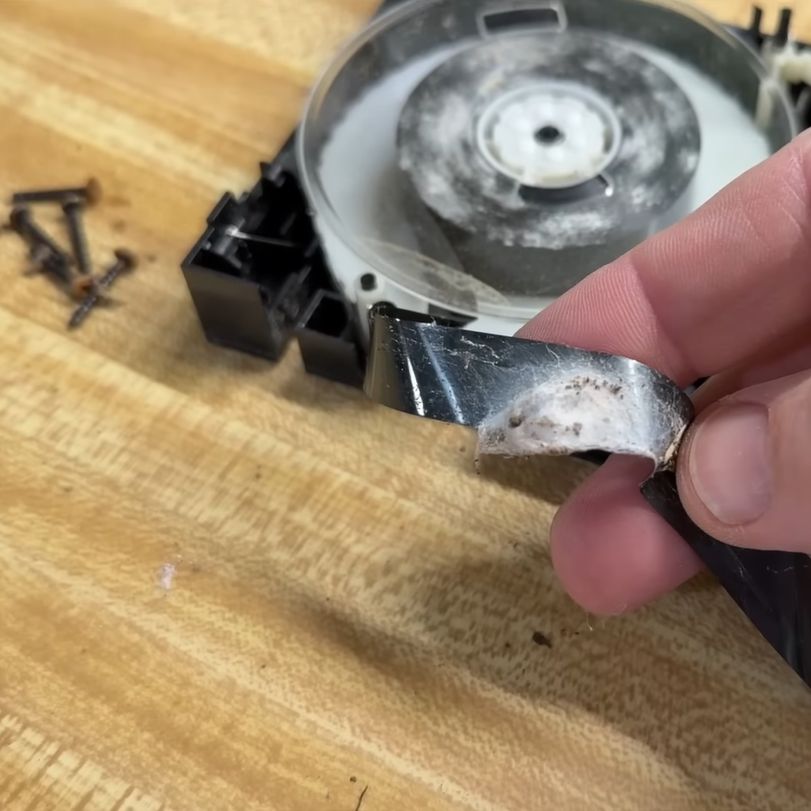
Normally VHS tapes are kept safely in a little sleeve or box in a dry, cool place, similar to CDs and DVDs. These particular items had however been left for at least a decade out in the open amidst the ransacked remains of abandoned homes. This meant that the VHS tapes were full of dirt and debris, and at least in one case with a spider nest that jammed up the thrift-store VHS/DVD combo player.
The CDs were cleaned and tried in a G5 iMac, with the obvious results there being that as long as the shiny layer with the data was intact, they worked fine. While a damaged disc tried to play somewhat, even the amazing audio CD error-correcting algorithms can not compensate for see-through gashes.
Continue reading “Testing Severely Neglected VHS Tapes And CDs”