Mini Google Street View Car Built From Lego

lego_street_view

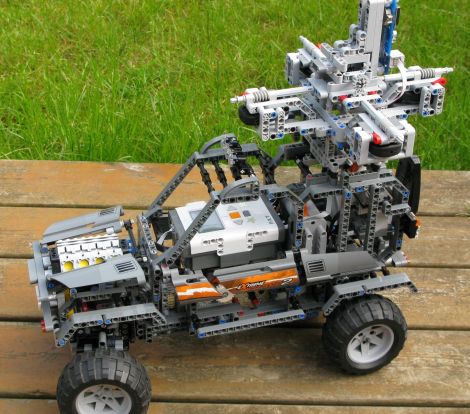
[Mark] was playing around with a small GPS sensor when a light bulb lit over his head. He imagined it would be pretty cool to replicate one of Google’s Street View cars at a fraction of the scale using Lego NXT parts. He figured it would be easy enough to rig a few cameras to a remote controlled car, recording images and GPS coordinates as it went along.

The mini Street View car is controlled by a single NXT module that receives commands from a PS2 controller via a PSPNx sensor he purchased. A trio of cameras have been attached to the car, which are meant to take pictures in all different directions when triggered by his remote. A handful of additional motors are also used for driving the car, steering, and for activating the shutter release on the cameras.

The car worked decently during testing, but [Mark] says there is still plenty of room for improvement. He is having issues reliably triggering all cameras at the moment, but we’re sure he’ll have it sorted out soon enough.

Keep reading to see a video of his mini Street View car in action.

Continue reading “Mini Google Street View Car Built From Lego”

Amazing Quad Pick And Place System Tirelessly Sorts Your Legos

delta_robots

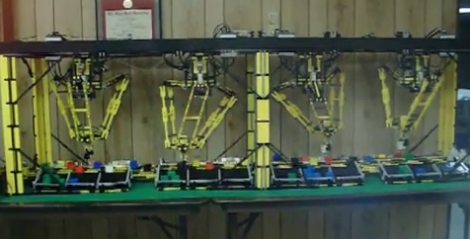
[Chris] is quite the devoted tinkerer. He recently wrote in to share what can only be described as a labor of love. His Quad Delta Robot system has been in the works for about six years now, split into periods of research, building, more research, and rebuilding until arriving at its current form.

The system is made up of four Lego NXT robots which are tasked with sorting Lego cubes by color as they come down a pair of conveyer belts. The robots were built to mimic commercially available pick and place robots which can be found on assembly lines all over the world.

Each robot operates independently, receiving signals via a light sensor which tells the robot where the next brick is located, as well as what color it is. This data is sent by the main NXT unit, which uses a lights sensor to determine brick color and position, relaying the information to the other bots via flashing LEDs. All of the robots receive the same signal, but much like NIC cards ignore frames not destined for their MAC, the bots ignore messages that are not addressed to them.

The machine is truly amazing to watch – it’s clear that all of [Chris’] research and planning has paid off. You have to check out the video embedded below to truly appreciate all of the work that went into this system. Also, be sure to swing by his site for a far more in-depth look at how the machines work, it is definitely worth the time.

Continue reading “Amazing Quad Pick And Place System Tirelessly Sorts Your Legos”

Lego Pinhole Camera

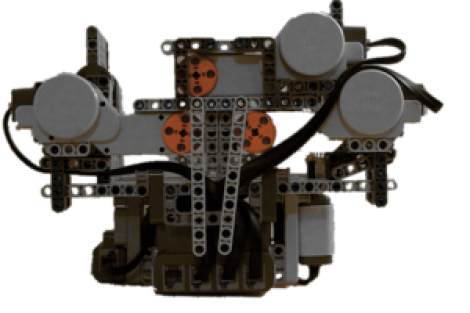
[Bshikin] built a pinhole camera out of Lego pieces (translated). It is a fully automated unit thanks to the integration of the NXT pieces. It took a bit of careful calculation to get the film spacing adjusted to match the focal length, and quite a bit of tape was necessary to keep light out of the film chamber. But in the end, it’s an amazing build that takes decent pictures. The software has settings for film size and speed, and takes care of exposing and advancing the frame at the click of a button. See for yourself after the break.

If you hunger for some more camera building goodness check out this SLR hand crafted from scratch.

Continue reading “Lego Pinhole Camera”

Pulito: The LEGO Roomba

When [Dave] installed hardwood flooring in his house, he needed a solution to help automate the monotonous task of routine sweeping. Rather than go out and buy one of the many existing automated sweep robots out there, he decided to use his passion for LEGO Robotics to design and build a NXT based Swifferbot he calls Pulito. His version implements all the important features such as object avoidance using bump sensors, an IR beacon used to automatically return to the charging station, and a photoresistor to monitor the charge of the battery. [Dave] also includes a nifty LEGO sensor multiplexor, allowing him to save on I/O ports, which is almost worth sharing by itself.

Videos after the break.

Continue reading “Pulito: The LEGO Roomba”

LEGO Ball Mill

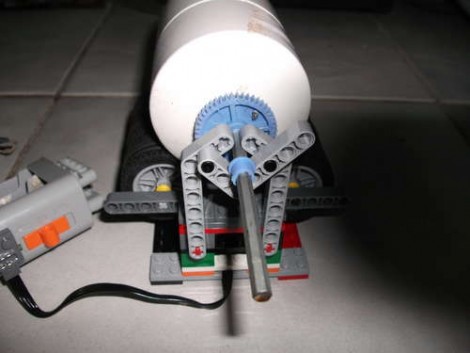
This is a ball mill used for refining materials into a fine powder. [Jpoopdog] built it in two parts, a base and the tumbler chamber. The base itself is build using LEGO wheels as rollers. The motor and controller from an NXT kit is used to drive the rotation, with programming to stop the mill every so often so that the raw material can cool down. That’s important because this can be used to make substances like aluminum powder, an explosive substance sometimes used in pyrotechnics. We don’t recommend producing your own explosives (or making your own propellant) but if that’s what you’re after [Jpoopdog] did build in a safety feature. The chamber,which is constructed from PVC, has a fail safe to prevent an explosion. A hole has been drilled in the end cap and plugged with hot glue. In the event the milling material starts to overheat the glue will melt and alleviate the built up pressure.

LEGO Barcode Scanner

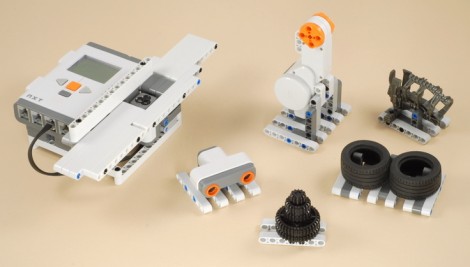
Playing store just got really, really fun because you can now build your own LEGO barcode scanner. As you can see after the break, it works well and it’s fast like a real barcode scanner. Unfortunately it doesn’t scan real barcodes. Or at least not traditional ones. As we learned in the Barcode Challenge, standard barcodes are a set of white and black bars that make up the ones and zeros of the code. This system uses the same white and gray bar system but it seems that it’s only the number of bars that identify an item, not a code created by a particular combination of light and dark. The items above are all scannable because the scanner counts the 2, 3, 4, 5 or 6 white beams on the bottom of each package. Still, it’s incredibly clever and a great toy for the young hackers to build if they have a little help.

Continue reading “LEGO Barcode Scanner”

LEGO Host For All Of Your Prototyping Projects

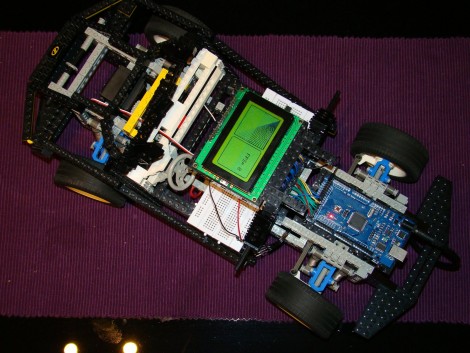
[Deadbird] decided to use a LEGO 8880 Super Car as a host for all of his electronic tinkering. Throughout his blog (translated) you’ll find the vehicle with an Arduino MEGA interfacing various prototyping bits. It starts with the motors for locomotion, closely followed by a servo for steering. From there we see the addition of a breadboard and graphic LCD screen. So far he’s worked out the use of a PS2 keyboard as a controller and, most recently he’s interfaced a Wii Nunchuck.

We’re more used to seeing NXT kits adapted for wider use, but if you’ve got a nice kit like this one it makes a great base onto which you can add your own robotic elements.